
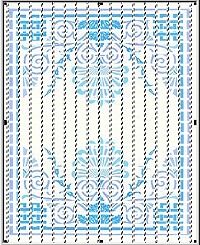
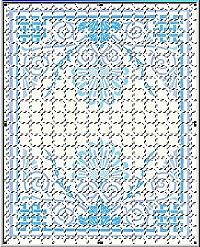
MEDITERRANEAN WALL/FLOOR TILES PI VERSION: 6/7. LEVEL: Beginners MAIN TOOLS USED: EasyPalette/TypeGallery: Edit/Trace Tool: Web/Button Designer: Transform Tools OPTIONAL DOWNLOADS: TERMS OF USE: Please Read - Thank You! |
 |
INSTRUCTIONS |
|
|
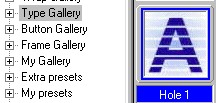
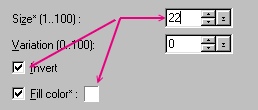
CREATING THE TILE GRID - PART ONE 1. Open the image provided (or your own) in PI. 2. Copy and Paste this image twice. Leave all the copies on top of one another. 3. Keeping the top copy only selected, open the Easy Palette/Type Gallery/Hole 1. Right Click/Modify Properties and Apply. 4. Check the Invert Box. (See opposite). Change the Fill color to white. Change the Size to one that divides your pic up into nice sized tiles - I am using 22 - make a note of the number you use if it is different - you will need it again in Stage 7. Click OK. (Your top copy has now turned into a set of horizontal white lines) 5. Click on the next copy down of the tile image by clicking somewhere between the lines. Click on Edit/Rotate and Flip to Rotate this image 90 degrees to the left. (Don't worry that you can't see all of the image that you have turned - it will work OK!) 6. Open the Easy Palette/Type Gallery/Hole 1. Right Click/Modify Properties and Apply. 7. Check the Invert Box. (See opposite). Change the Fill color to white. Change the Size to the same number you used in stage 4. Click OK. 8. Click on Edit/Rotate and Flip to Rotate the image 90 degrees back to the right, turning the image into a set of vertical white lines. CHECK! You should now have the base image, plus two lots of white lines floating above it forming a grid. 9. Hold down the Shift or Ctrl button (or go into the Layer Manager) and select both parts of your grid by clicking on them - then Right Click/Merge As Single Object. (Do NOT merge with the base image!) |
|
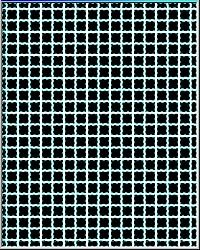
CREATING THE TILE GRID - PART TWO 10. Now open a new canvas exactly the same size as your tile image (if you are using my tile image this is 320W x 400H pixels) with a black background. 11.Drag the white grid from the tile image onto the black background. Right click/Merge All. 12. Now Click on Edit/Trace - accept the defaults - and click OK. 13. Make sure that Mode is set to Selection. Right Click/Expand/Shrink - and Expand the Selection by 1 pixel. Click OK. Your canvas should now look like the black and white one opposite. 14. Click on the tile image and Right Click/Copy. 15. With your grid image selected now click on Edit/Paste Into Selection and paste the tile image into your grid. Do NOT Merge this image. (You can now close the original image if you wish). |
|
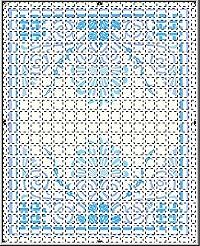
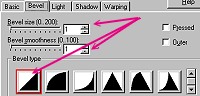
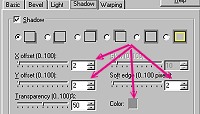
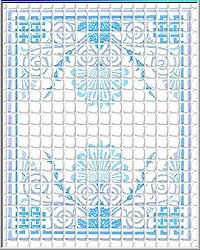
FORMING THE TILES 16. Making sure that the selection lines around your individual tiles are still active, click on Web/Button Designer/ANY Shape. 17. On the Bevel Tab - set the bevel Size and Smoothness to 1 as shown. 18. On the Shadow Tab set the x-offset, y-offset and Soft edge all to 2 as shown. 19. Click OK. 20. Right Click/Merge All. There are your Wall Tiles! |
|
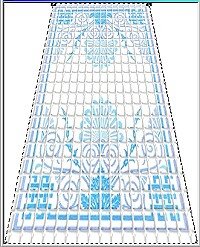
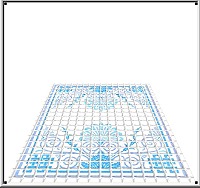
MAKING A FLOOR 21. Make a copy of your image and drag to a new canvas. (You can now Save and Close Down the original of your floor tiles picture either as a jpg or ufo and use the copy to work on with). 22. Click on the Transform Tool/perspective - narrow the top of the tiles. 23. Using the Transform Tool/Resize - shorten the image as shown. Using these two tools keep adjusting your image until it has the perspective that you want. There is your tiled floor!... Now it is up to you to make a suitable setting for it... Enjoy! |
|
|
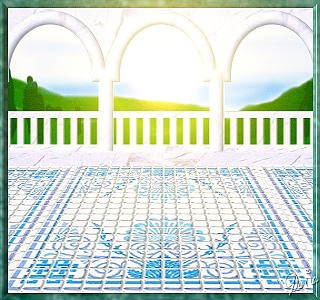
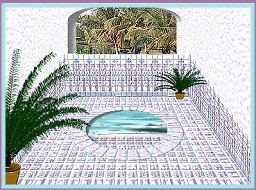
Just one suggestion as to how your new floor might be used! |
|
Using tiles made with this tutorial and animation with Almathera Puddle Filter (See my Water Animation Tutorial ) |
 |
|
|
If you need any help - or want to make suggestions to improve this tutorial - or for new ones |
|
This site © Rosie Hardman-Ixer 2001/2/3 |