
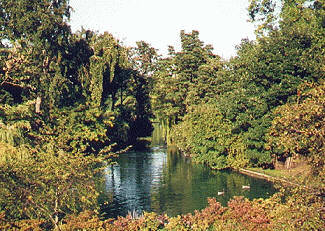
WATER ANIMATION PI VERSION: 8. LEVEL: Intermediate MAIN TOOLS USED: Selection Tools: Almathera Puddle Filter: Gif Animator 5. NECESSARY DOWNLOADS: This tutorial requires the Almathera Puddle Plug-In (Authors site here where you can download the whole Almathera Suite!). OPTIONAL DOWNLOADS: Click here for the picture (St. James' Park by Graziella Umbro) used in the tutorial. TERMS OF USE: Please Read - Thank You! |
 |
INSTRUCTIONS |
|
 
|
1. SELECTING THE AREA FOR ANIMATION: 1. Import the picture you wish you use - the easiest type is one where the water area is 'enclosed' within the picture and does not reach the sides (often, unwanted white lines appear when using the Displacement Slider when this is not the case). If necessary click on Format/Data Type to change the image data type to RGB True Color 24 bit. (For the purposes of this tutorial I have not added a frame to the picture - but if you wish to you could do this at this stage. Merge it with the picture). 2. Using the Selection/Lasso Tool on the settings shown (Snap to edges checked: Sensitivity - 1: Soft Edge - 1) carefully select the area of water that you want to animate. |
 SLIDERS: Reflection - creates a reflection from the surrounding image. Resets between each use - all other settings remain. Displacement - distorts the water - as if it it being pulled from side to side. Check each side of the image in the preview box to see if unwanted colour is evident when using this slider. Lighting Strength - add light to the top of each 'wave' set according to the ambient light in the picture. Perspective - alters the wave pattern so that the waves at the back are closer together as in landscape views of lakes, the sea etc. Scale - alters the size of the wave forms. NOTE: It normally takes me a number of goes to get the animation as I want it - usually doing all three frames again... and every picture is different - so there are no 'Settings' that I can give you that will work every time. So don't give up if the first one doesn't look too hot! |
2. ALMATHERA: 3. Click on Effect/Almathera/A Puddle to open the Almathera Plug-in.
4. Set the sliders to the settings shown. Depending on the way you have made your selection, you may have to adjust the Reflection Slider. (You can move the image around in the preview box with your mouse. The top of the selection should still be quite dark to reflect the trees at the back of the lake).
MAKE A NOTE OF THE NUMBERS YOU USED AT THIS POINT.
5. Click OK. Click on the Pick tool and then somewhere in the picture away from the selection to deselect it.
6. Click on Web/Image Optimizer to save this first frame - either as a jpg or gif. I usually save it to the Desktop as 1.gif. |
   |
3. THREE FILES FOR ANIMATION: 7. Back in PI, click on Undo TWICE to return the picture to the point where you had the selection without any Almathera water effect. 8. Re-open Almathera - re-enter the exact settings that you previously used except for the bottom number - ADD 5 to this (76). Click OK. 9. Save this frame as in 2 above - using a different file name to the first save - I just use 2.gif. 10. Repeat the whole of this section once more (Scale Slider should be at 81) - to produce image 3.gif.
You should now have three images similar to those on the left with subtle changes in the water in each. |
|
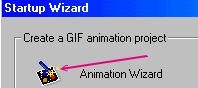
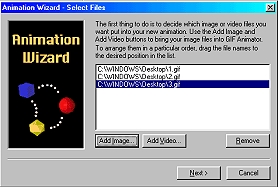
GIF ANIMATOR: 11. Open Gif Animator. 12. Click on the Animation Wizard as shown. 13. Enter the appropriate width and height for your picture (for the tutorial picture this is 325 x 321pixels). Click Next. 14. Click on Add Image. 15. Browse to the folder where you saved the three images. Holding down the Ctrl key click on the images in REVERSE order - i.e. 3,2,1. Click on Open. 16. Click on Next. 17. Click on Photo Oriented (Dither). Click on Next. 18. Change the frame rate to 3 (You don't want the water moving too fast as this is a lake - not a river!) 19. If you wish you can now click on Preview to view your animation. |


|
OPTIMISING THE ANIMATED GIF: 20. I prefer to use the Optimization Wizard at this stage - because I have more control over the process. 21. Check the Yes (Recommended) radio button. Click on Next. 22. Change the number of colours to 65. Dither value - 100. Click on Next. 23. Check Yes on both radio buttons on the next box. Click on Next. 24. Click on Finish. You are now able to Preview your animation (see opposite) and, if you are happy with it, use Save As to save the animation in a folder of your choice. You have completed your first water animation! |
 |
|
|
If you need any help - or want to make suggestions to improve this tutorial - or for new ones |
|
This site © Rosie Hardman-Ixer 2001/2/3 |