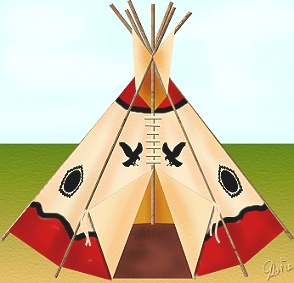
NATIVE AMERICAN TEEPEE PI VERSION: 6/7. LEVEL: Intermediate (some knowledge of the basic tools is assumed). MAIN TOOLS USED: Line & Arrow Tool, Path Tools (Bezier/Polygon Tool), Retouch Tools (Burn), Paint Tools (Paintbrush), Transform Tools (Resize, Distort). OPTIONAL DOWNLOADS: If you wish to use the Eagle Shape I have used in the tutorial, download it HERE TERMS OF USE: Please Read - Thank You! |
|
INSTRUCTIONS |
|
|
|
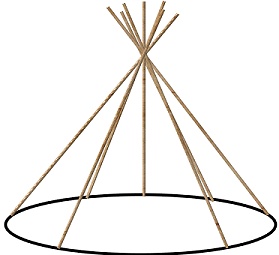
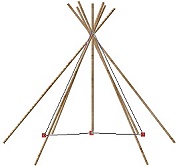
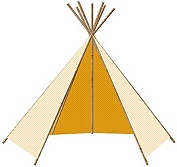
THE FRAME 1. Open a new canvas 400W x 350H pixels. 2. Using the Line & Arrow Tool, Colour - mid-brown: Mode - 3D Round: Border - 2: Depth - 30: draw lines as shown. I have chosen to fill these with a wood preset but you might prefer to leave them a simple colour. If you have problems drawing these lines free hand - draw an ellipse (using the Outline Drawing Tool) - 360W x 80H as shown. Draw the upright pole at the back (approximately 260H pixels). Then draw in the other poles gradually moving to the front of the teepee. TIP! It is easier to position the poles accurately by drawing from the ground upwards on the slanting poles. Don't try to get all the poles the same height - in reality there were often quite different lengths showing at the top of the teepee. Once you have all your lines drawn, delete the ellipse - Easy! |
|
|
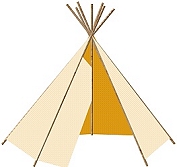
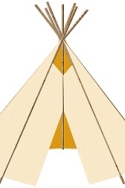
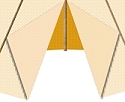
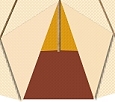
THE CANVAS COVERING 3. Using the Path Tools (Bezier/Polygon), Colour - mid-brown (I used #D5890B): Mode - 2D: draw a triangular shape as shown. (To draw using this tool - click at the beginning of the shape, then click at each point where the shape changes direction. Double click to finish.) Right Click/Arrange/Send to Back. 4. Using the same tool, Colour - pale beige/brown (I used #FCE7C2) - draw shapes to fill in the two side pieces. Try to keep just a touch of the pole showing at the edge of these pieces. In reality the poles would have been inside the canvas - but for the purposes of our teepee they are better left showing a little. 5. The next shape (which is half of the front of the teepee) is a little more difficult - because you have no guidelines - so here you will have to copy my diagram as closely as possible. 6. Now draw the second side to match. 7. Draw two opening flaps in a slightly darker colour (mine is #FCE2B1) for the entrance to the teepee and apply a narrow shadow to each one as shown. (Make sure that your shadows are showing in the correct direction against the canvas behind them! - you will need to reverse the direction of the shadow for one of them). 8. Now draw two 'smoke flaps' at the top of the teepee at the sides of the ventilation hole. 9. Using the Path Tool, Shape - Rectangle: Colour - dark brown: Mode - 2D: draw a rectangle that will cover the ground area behind the opening in the teepee. I have made this a simple brown but you might like to add a colourful rug or a different colour here. Right Click/Arrange/Send to Back. 10. Finally you need to draw a vertical line and some horizontal lines - using the Line and Arrow Tool again - to represent the fastenings at the front of the teepee (see illustration). Select all these lines (probably best done in the Layer Manager), then Right Click/Merge As Single Object. All the main parts of your teepee are now in place and we can put the finishing touches to it! |
|
|
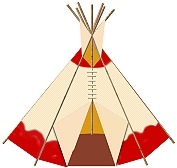
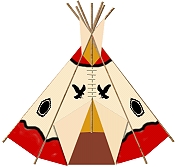
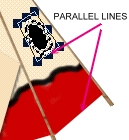
DECORATING THE TEEPEE There are many ways of decorating a teepee - from abstract shapes to pictures of animals and birds etc. I am going to put a simple painted decoration on first. Mine are simply suggestions - feel free to use any appropriate clip art or designs you have to hand. 11. Before we can using the Paint Tools on the Path shapes we created we first have to convert the pieces to image objects. It's simpler if we do all the pieces before we start painting - so Right Click on each of the teepee covering pieces (including the opening and ventilation flaps, the background piece and the floor) and then Convert Object Type/From Text/Path to Image for each piece. 12. Select the left-hand side piece and, using the Paint Tools/Paintbrush on the settings shown, paint in the top of the piece and a decorative border for the bottom in red. 13. Repeat this for the front pieces and the right-hand side piece (see pic opposite). 14. Now add any further paint decoration you wish - I have added an narrower black border for contrast. 15. You can add any appropriate pictures or shapes to the sides of the tent - if you wish to use the eagle shape I have provided open this in PI now. Reduce the size of it, using the Transform Tools/Resize and use it to decorate your teepee however you wish. NOTE: Do try to keep the perspective of the teepee when adding your decorations. Put them in place and then use the Transform Tools/Slant or Distort to give your shapes the correct perspective. For instance, try to keep the sides of the bounding box around the shape parallel with the bottom of the piece (see illustration). This was a round Path Shape (Decoration 5) before I distorted it. Once you have finished your decorations all that remains are a few finishing touches - however these can make ALL the difference to your graphic! |
|
|
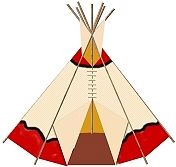
THE FINISHING TOUCHES 16. First of all select the left-hand side piece of the teepee and merge it with the decoration you added. Do the same with the two front pieces and the right-hand side piece as well - merge the pieces with their decorations. You will find that, after merging, you need to use the Ctrl + Down Arrow keys (or Right Click/Arrange/Send Backward) to move the pieces backwards. Make sure that the opening flaps and the ventilation flaps you created are in the correct places in front of the teepee! 17. Now, using the Retouch Tools/Burn, shade the sides and bases of the pieces to give depth to your picture. You can use this method to shade the inside, floor and flaps too. 18. As a final touch I added a couple of 'ties' to the front flaps using the Line and Arrow Tool. Finally, Right Click/Select All Objects - the Right Click/Merge As Single Object. Do NOT merge with the background if you intend to go on and use your teepee as a decoration for the mandella tutorial which follows.....HERE. |
 |
|
|
Free Spirit Graphics If you would then like an invitation to join, please Email Me. We'd love to have you along! |
|
|
If you need any help - or want to make suggestions to improve this tutorial - or for new ones |
|
This site © Rosie Hardman-Ixer 2001/2/3 |
