
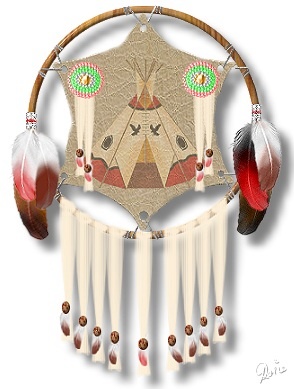
NATIVE AMERICAN MANDELLA PI VERSION: 7 - However anyone VERY familiar with PI6 should be able to adapt this tutorial. LEVEL: Advanced MAIN TOOLS USED: Path Drawing Tools, Path Edit Tools, Continue Draw, EasyPalette, Line & Arrow Tool, Outline Drawing Tool, Paint Tools (Airbrush), Retouch Tools (Colorize Pen), Transform Tools, Object Paint Eraser, Stamp Tool, Paint on Edges Effect. NECESSARY DOWNLOADS: If you wish to use the feather used in the tutorial it is available HERE. OPTIONAL DOWNLOADS: TERMS OF USE: Please Read - Thank You! |
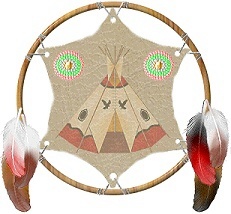
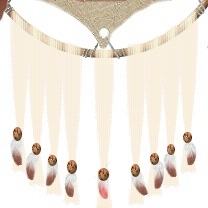
Finished Mandella shown at slightly less than full size |
INSTRUCTIONS |
|
|
|
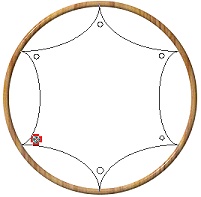
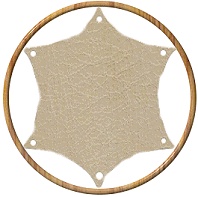
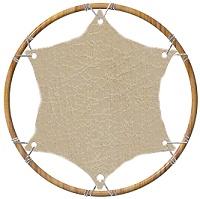
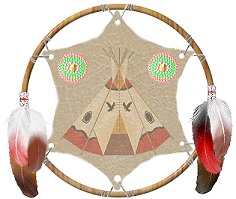
FRAME AND SKIN Please download the skin preset supplied, plus any wood presets and feathers you are going to use before starting the tutorial. 1. Open a new canvas 350W x 415H pixels. 2. Using the Outline Drawing Tool, Colour - Brown: Shape - Circle: Mode - 3D: draw a circle 250W x 250H pixels. The Border setting should be 4 and the Depth 30 (however - see next item for possible re-adjustments. If you are going to use Fr. Michael's wood presets, don't worry about these settings yet!). 3. Fill this circle with a wood preset of your choice. When using some wood presets you will need to reset the Border (to 4) and Depth (to 30) settings after applying. 4. Using the Path Tools, Custom Shape - Shape Edges 2: draw a shape inside the circle, then use the Transform Tools/Resize to stretch this shape until it fits just inside the circle. 5. Fill the shape with the skin preset you have downloaded for this tutorial (see illustration) by double clicking on it in the EasyPalette. 6. Change Mode to Continue Draw and draw a small circle close to each of the points of the skin shape. Change back into 3D Mode. 7. Keeping the Shape selected, Right Click/Convert Object Type/From Text/Path to Image. Using the Object Paint Eraser take off the sharp points from the shape and cut into the curves a little to make the shape look more like a roughly cut piece of skin rather than a perfectly symmetrical shape. 8. If necessary use the Transform Tools/Resize to stretch the skin again slightly so that it fits the circle. You might also like to click on Effect/Sharpen and add a small amount of sharpening if you have done this. 9. Using the Line & Arrow Tool, Colour - medium-grey: Border - 1: Depth - 30: - open the EasyPalette/Material Attribute Gallery and add Bump M56 (in PI6 the Sandpaper Bump in the Material Gallery will add a good texture) - draw lines at each point as illustrated. 10. Click on the right-hand line in the V and Right Click/Convert Object Type/From Text/Path to Image. Carefully use the Object Paint Eraser to erase the line to the edge of the skin - so it looks as if the cord is at the back of the skin. (You can of course draw it just from the edge of the skin - but it won't look as realistic). 11. Repeat 9 and 10 at each point of the mandella.
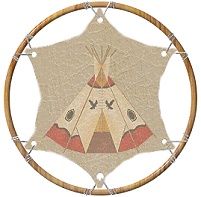
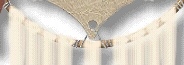
Your mandella should now look like the one opposite. |
|
|
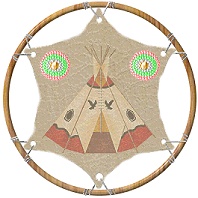
DECORATING THE SKIN - PAINTING AND BEADS 12. Open the teepee object you made in Part I of this tutorial or the object/image you are going to use. Resize it to fit your mandella and then Right Click/Properties and set the Transparency to 60% so a little of the skin texture shows through. 13. Now let's make a beaded decoration. I'm making this bigger than we actually need it because this makes it MUCH easier to work with. Using the Outline Drawing Tool, Shape - Circle: Colour - Black: Mode - 2D: Border - 1: draw a series of concentric circles as shown. Select them all then Right Click/Align/Center Both. Right Click/Merge As Single Object. 14. Using the Stamp Tool - Select the Silver Ball stamp on the settings shown. Click on Effect/Paint on Edges. Drag the beaded circles to one side and delete the black circles. 15. Using the Path Tools: Shape - Circle: Mode - 3D: draw a circle big enough to fill in the centre of the beads and fill this with any suitable silver preset. Right Click/Send to Back behind the beads. Select the circle and beads - Right Click/Align/Center Both. Right Click/Merge As Single Object. 16. Using the Retouch Tools/Colorize Pen colour the beads any colours you wish. I have used this pen because it allows the shape of the beads to shine through the colour. 17. Once you are satisfied with the bead decorations, use the Transform Tools/Resize to shrink them to size for the mandella. Click on Effect/ Sharpen and sharpen the beads just a little if resizing has made them a little blurry. Right Click/Duplicate to make a second piece. Put both pieces in place on the skin. DO NOT merge any items with the skin yet! |
|
|
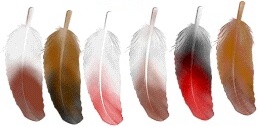
THE FEATHERS NOTE: The feather used in this part of the tutorial is, in fact, available in the EasyPalette/Path Library/3D Objects in PI7 (look for Quill) but not in PI6. I removed the pen part of the quill pen, resized the feather parts of it and recoloured them, then turned it to the correct angle for the tutorial. You can, of course, use any feathers you have already in your possession for this part of the tutorial - in which case please go straight to Instruction 21. 18. If you are using the feather ufo provided open this now and drag it to the main canvas. 19. Click on Format/Image Size - check 'Selected Object' - and set percentage to 50% and OK. 20. Make as many copies of the feather as you are going to need for the mandella - I would suggest 5 more copies - 6 feathers in all. 20. Using the Paint Tools/Airbrush (adjusting the Transparency can give nice results and more control over the amount of colour you add) - paint the feathers any colours you like. 21. Put the feathers in place on your mandella. Use the Transform Tools/Resize and Rotate & Flip to arrange your feathers as you wish. Make a copy of at least two of your feathers now (choose contrasting colours) and save to one side until later! 22. Using the Path Tools, Shape - Rectangle: Mode - 3D: make two binders for the feather ends and fill these with any suitable colour or preset. I used one of my own Engraved Silver presets and painted a coloured stripe on it using the Paintbrush. OK - that's the feathers done! |
|
|
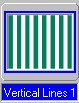
THE TASSLES 23. For ease of working here - open a new canvas - 25W x 200H pixels with a dark background (any colour). It might also help to Zoom in to 200% whilst working on this section. 24. Using the Path Tools, Shape - Vertical Lines 1: Colour - creamy-beige (mine is Hex #FDEFD7): Mode - 2D: draw a shape approximately 16W x 160H pixels. 25. Right Click and Duplicate this piece twice and overlap them in such a way that you get the appearance of strands of fibre (see pic).
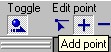
Select all three pieces and Right Click/Align/Top. Right Click/Select All Objects. Right Click/Merge As Single Object. 26. Right Click/Convert Object Type/From Text Image to Path. 27. Click on the Path Tools/ Path Edit button. 28. Click on the middle ( + sign) Edit Point button and add two Edit points at the lower sides as shown then click back onto the left Edit Point button. 29. Use these Edit points to pull the tassle inwards. 30. Use the Edit points at the base of the shape to make an uneven end to the tassle. 31. Click on the right-hand long side line and click on the Convert Line button to convert the line to a curve. Clicking on either the Top Right Square or the right-hand Edit Point will give you the adjustment handles and you will need to use these until you form a gentle curve. TIP: Sometimes the adjustment handles disappear off the side of the window. Just widen the window and you will find you are able to use them (see illustration). 32. Do the same on the left-hand side of the tassle. Return to 2D Mode. 33. Use the Transform Tool/Resize if necessary to make your tassle a little thinner then put the tassle in place on your mandella. 34. Right Click/Duplicate 4 times and put these pieces in place on the mandella as shown. 35. Select the group of four and Right Click/Merge As Single Object. Right Click/Duplicate and then use the Transform Tool/Rotate and Flip to flip the group horizontally. Put these in place on the left hand side of the mandella. 36. Now use the Object Paint Eraser to erase all excess parts of the tassles above the ring on both groups of four tassles (and the single one if necessary). 37. Now bring back the two feathers you saved earlier and use the Transform Tools/Resize to reduce the size. Now use the Transform Tools/ Rotate and Flip and Rotate Freely to make them all different sizes and angles and add one to each tassle. 37. Now add a decorative bead to each of the tassles as shown. Making these separately and slightly varying sizes will add to the reality of your picture. I am using wooden beads made from Fr. Michael's wood presets. What we are trying to do is make it look as though the tassel is either gathered and threaded through the bead or is gathered behind it. 38. Select the three pieces of the centre tassle (tassle, bead and feather) and Right Click and Duplicate this twice. Group the two copies as shown - then selecting all the pieces of the group, Right Click/Merge As Single Object. 39. Use the Transform Tools/Resize to make the group smaller - then Right Click/Duplicate. Use the Transform Tools/Rotate and Flip to flip the second group horizontally and put both groups in place on your mandella. 40. Click on each of the two beaded pieces and Right Click/Arrange/Bring to Front. 41. Finally - I have painted in some 'loops' of wool using the Paintbrush (colour -Hex #FDEFD9) to give the appearance of the wool being bound around the ring but this is optional. Make sure you click the Mode button to go into Paint As Object mode if you are going to do this. 42. Once you have everything in place Right Click/Select All Objects, then Right Click/Merge As Single Object. 43. Add a shadow to your mandella and you are done! |
|
|
NOW HANG IT UP WHERE EVERYONE CAN ADMIRE YOUR WORK! |
 |
|
|
Free Spirit Graphics If you would then like an invitation to join, please Email Me. We'd love to have you along! |
|
|
If you need any help - or want to make suggestions to improve this tutorial - or for new ones |
|


This site © Rosie Hardman-Ixer 2001/2/3 |