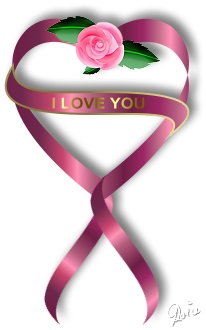
RIBBON HEART & ROSE PI VERSION: 8 (but can also be done in 6 & 7). LEVEL: Intermediate MAIN TOOLS USED: NOTE: TERMS OF USE: Please Read - Thank You! |
|
INSTRUCTIONS |
|
|
|
THE HEART
1. Open a new, white canvas, 300W x 400H pixels.
2. Using the Path Drawing Tool, Custom Shape - Heart: Color - any at this stage: Mode - 2D: draw a shape 175W x 162H pixels.
3. Now click on Color/Gradient Fill and change the fill type to a Left-to-Right fill. Then click on the Multiple Color swatch. Choose color 006 and OK.
4. OK again in the Gradient Fill box. Your heart should now look like the one opposite.
5. Click on the Edit button on the Attribute Toolbar.
6. Click on the Duplicate button on the Attribute Toolbar.
7. Move the Duplicate in line with the first shape and just below it as shown.
To be sure they are aligned correctly, Shift/Click to select both Path Shapes and the click on Align/Align Center.
8. Click out of Path Edit Mode and back into 2D (see heart, left).
9. Using the Path Drawing Tool again, Custom Shape - Wave 1: same gradient: draw a shape and then use the Transform Tools/Resize to make the shape 140W x 70H pixels.
10. Right Click/ Convert Object Type/From Text/Path to Image.
Use the Transform Tools/Rotate Freely - to rotate the shape into the position shown and put in place.
11. Right Click/Arrange/Send to Back.
12. Right Click/Duplicate this piece then use the Transform Tools/Rotate & flip - to flip the shape Vertically and put in place.
Check that the bottom of your heart and the trailing ribbons look like the pic opposite.
13. Right Click/Select All Objects.
14. Right Click/Merge As Single Object. The main part of your heart is now complete! |
|
|
THE BANNER 15. Using the Path Drawing Tool, Shape - Ellipse: same gradient, draw a shape 175W x 20H pixels across the widest part of the heart (see left). 16. Click on the Edit Tool on the Attribute Toolbar. 17. Pull the side edit point downwards and then use the Adjustment (Control) Handles to pull the side into the shape shown.
18. On the opposite side of the banner, pull the edit point upwards and then use the Adjustment (Control) Handles to pull the side into the shape shown.
19. Click the Toggle button to check your shape and if it looks OK, click out of Path Edit Mode and back into 2D Mode. 20. Right Click/Duplicate this piece and then change the Mode of the Duplicate to 3D Pipe (Don't panic here - I know it looks awful!). In the Path Panel, change the Border and Depth to 1 each. That looks a LOT better! 21. Click on the Color/Gradient Fill/Multiple Colors again - and this time choose 008 in the Palette Ramp Editor and OK twice. You should now have a nice, gold edge on your banner.
22. Use the Text Tool to add the wording of your choice - I would recommend that you use the same gold gradient for this.
OK - on to the rose! |
This site © Rosie Hardman-Ixer 2001/2/3 |


