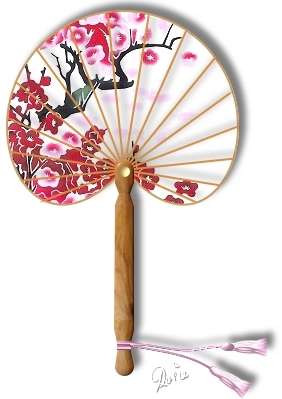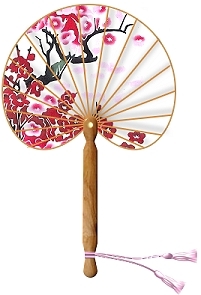
LOTUS-LEAF FAN PI VERSION: 8 (but suitable for version 7 too). LEVEL: Beginner MAIN TOOLS USED: Path Drawing Tool, Path Edit Tool, Line & Arrow Tool, EasyPalette (for presets), Retouch Tools/Burn (optional), Text Tool. DOWNLOAD: If you wish to use the picture used in the tutorial please download it by clicking Here (use Right Click/Save Picture As - to save to your hard-drive). p.s. This pic is actually a scan of part of an intricate papercut I bought in Hong Kong - it is cut from the finest tissue paper and hand painted. TERMS OF USE: Please Read - Thank You!For a lovely adaptation for PSP by 'D'zines' Click Here - Thank you for that Grace! |
|
INSTRUCTIONS |
|
|
|
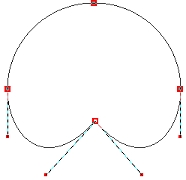
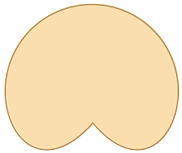
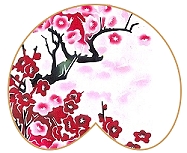
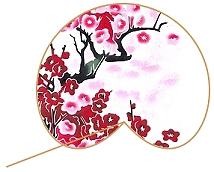
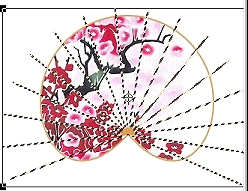
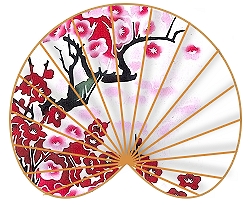
THE FAN (Before you start you will need a picture for the fan. This should be approximately 240 pixels square) 1. Open a new canvas (any colour), 325W x 400H pixels. 2. Using the Path Drawing Tool, Shape - Circle: Mode 2D: draw a circle shape 230W x 230H pixels. 3. Click on the Editing Tool and move the bottom editing point upwards as shown forming a lotus leaf shape. Click out of Path Edit Mode and back into 2D Mode. 4. Right Click/Duplicate this shape and change the Mode of the Duplicate to 3D Pipe. YIKES! What happened? Don't worry - we just have to change the Border and Depth..... In the Path Panel change BOTH of these to 1... phew! What a relief! 5. Change the colour of this border shape to a medium brown (mine is Hex #D68F43). 6. Now open up the pic you are going to use for the fan. Right Click/Copy (or Ctrl + C. 7. Select the solid shape you made for the fan and change the Mode to Selection. 8. Now Click on Edit/Paste Into Selection. Remember! - don't click until you have moved the pic into the best possible position. 9. Using the Line & Arrow Tool (Straight Line), Color - Hex #D68F43 again: Mode - 2D: Border - 1: draw a line as shown (yep - it does have to be THAT long... because the copies that we are about to make will have to stretch across the widest part of the fan). 10. Now click on the Transform Tool/Rotate Freely. Move the Rotation Point (that's the little circle with the cross through it) to the position shown at the top of the line you just drew. (It will be at the top, right-hand corner of the box). 11. Change the 'Rotate by Degree' to 15.00 degrees - then Click on Copy Rotate 15 times.
12. Select all the 'spokes' of the fan you just made (you can do this most easily in the Layer Manager) and Right Click/Merge As Single Object. 13. Select the 'spokes' once again and Right Click/Shadow. Change the X-Offset and Y-Offset to 6 and the Soft Edge to 8. Use the top-right type shadow (third from left). Tip! Another idea that works with some pics, but not others, is to send the 'spokes' to the Back of the pic and then, selecting the main picture of the fan, Right Click/Properties and change the transparency... to let the spokes show through - this way you will not need to put the shadow on the spokes.... 14. Right Click/Split Shadow. Select the shadow alone (using the Layer Manager may help here). Use the Object Paint Eraser to remove the excess amount of first the spokes & then the shadow from around the edge of the fan. Zoom in to 200% if it helps to do this. 15. Now click on the brown edge piece of your fan and Right Click/Arrange/Bring to Front. OK - that's the fan itself done - now for the stick handle! |
|
|
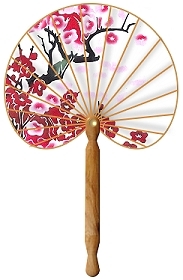
THE STICK 16. Using the Path Drawing Tool, Shape - Rounded Rectangle: Mode - 3D Round: Border - 8: Depth - 10: draw a circle shape 20W x 215H pixels. 17. Fill this with any light wood preset you have that matches the colour of the spokes. I am using a Wood Preset - Vertical 22 by Fr. Michael (hosted by the PIRC, these are available Here. Click on Cool Stuff #3 - Free Presets on the right-hand side). You will have to change the Border and Depth settings back to 8 & 10 respectively if you apply one of these presets. 18. Click on the Path Edit Tool, Click on the + under 'Edit Point' and add the extra edit nodes shown. 19. Now pull the four nodes inwards as illustrated. Click out of Path Edit Mode and back into 3D Round. 20. If you wish to, you can add a bit of extra shading to your handle with the Retouch Tools/Burn. If you do this you will need to Right Click/Convert Object Type/From Text/Path to Image before use. I would recommend that you use Level - 65 and Soft Edge - 100 and just make one pass down the right hand edge of the handle for this colour of wood. Finally, add a small, gold, circular, 3D Path shape at the top of your handle for the fixing bolt. |
|
|
THE TASSLES 21. To make the cords and tassles - check out my tutorial for the other Oriental Fan Of course you may think of lots of variations for use with this tutorial. This is a Lotus-leaf shape fan but there are many different types of these fans - with lots of different shapes, different materials for the handles etc. Use this tut as a base and let your imagination run wild! |
|
|
FINISHED FAN! |
 |
|
|
Free Spirit Graphics If you would then like an invitation to join, please Email Me. We'd love to have you along! |
|
|
If you need any help - or want to make suggestions to improve this tutorial - or for new ones |
|
This site © Rosie Hardman-Ixer 2001/2/3 |
