
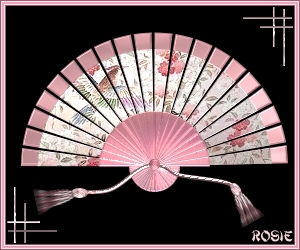
ORIENTAL FAN PI VERSION: 8 (Also suitable for PI6 & PI7). LEVEL: Beginners MAIN TOOLS USED: Path Drawing Tool, Easy Palette/Wrap - Path Wrap TERMS OF USE: Please Read - Thank You!For a lovely adaptation for PSP by 'D'zines' Click Here - Thank you for that Grace! |
 |
INSTRUCTIONS |
|
|
IMPORTANT NOTE - PLEASE READ! When drawing shapes which are later to be used in the Wrap Galleries it is essential that these shapes are drawn to size - i.e. you draw them to the size specified with the Path Drawing Tool. Drawing them approximately to size and then using the Transform Tools to resize them is NOT the same thing and the Wrap Galleries will not work properly if you do this. You will end up with a tiny little shape that does not look like the one in the tutorial. If, for any reason, you cannot draw the shape to size using the numbers at the bottom left of the PI workspace for reference (inexperience with the mouse, shaking hands etc), and HAVE to use other tools to correct the size of your path shape - then you will need to Right Click/Convert Object Type/Reset Text/Path Object before you continue. |
|
|
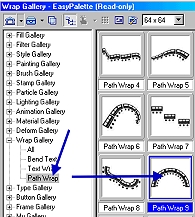
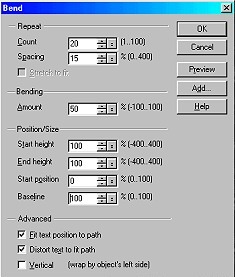
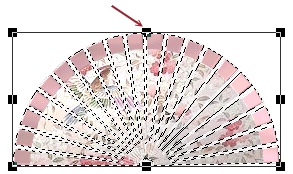
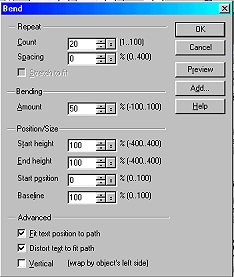
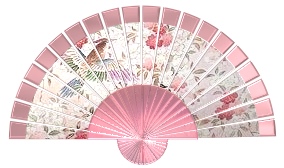
MAKING THE FIRST PIECE 1. Open a new canvas, 300 x 250 pixels. 2. Using the Path Drawing Tool, (any colour); Mode 3D; Border 2; Depth 30; draw a rectangle, 15w x 110h pixels. (If you use slightly different dimensions to this you may get a small gap at the bottom of your fan - but don't worry - you are going to cover up this area anyway!) 3. Open the Easy Palette/Wrap Gallery/Path Wrap/Path Wrap 9. Right Click - Modify Properties & Apply.4. Change the settings to those shown opposite: Count 20; Spacing 15; Amount 50; Start height 100; End height 100; Start position 0; Baseline 100. Fit text position to path - checked; Distort text to fit path - checked; Vertical - UNchecked. Click OK. 5. Your first fan piece should now look like the illustration left. 6. Right Click and Duplicate this piece. Drag the original piece to one side (but keep on the SAME canvas) until later. 7. Select the duplicated piece and fill this with your chosen preset. Ideally this should be a preset with a decorative pattern such as the one shown. Be sure to reset the Border back to 2 if this has changed whilst applying the preset. 8. Your first piece is now finished. |
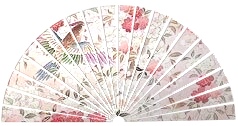
 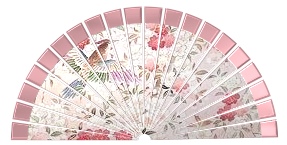 |
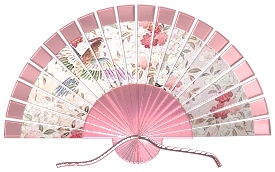
CREATING THE SECOND PIECE 9. Select the original piece and slide it behind the decorated piece so that it sits EXACTLY behind it. Using the Transform Tool/Resize (and keeping your finger on the SHIFT key), enlarge the original piece by dragging the top middle sizing handle. Your fan should now look like the picture opposite. 10. Now apply the preset of your choice to this second section. Again be sure to reset the Border back to 2 if this has changed whilst applying the preset. Your second piece is now complete. Right Click/Select All Objects and Merge As Single Object.Move combined pieces near top of canvas. |
|
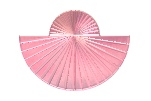
CREATING FAN STRUTS 11. Using the Path Drawing Tool, Rectangle; Mode 3D; Colour - any you wish; Border 2; Depth 30; create a rectangle 3w x 80h pixels. (Tip: For the colour it is a good idea to use a darker shade of one of the main colours in the fan and, by clicking on the Material button/Shading, change this to Metallic/Silver before proceding). 12. Open the Easy Palette/Wrap Gallery/Path Wrap/Path Wrap 9. Right Click - Modify Properties & Apply. 13. Change the settings to those shown opposite: Count 20; Spacing 0; Amount 50; Start height 100; End height 100; Start position 0; Baseline 100. Click OK. You should now have created a piece which looks like the one opposite. If you have followed my tip in 11 - you can play with the Light to get different effects until you get one that you like - as I have done here. (Click on the Light button and move your cursor over the struts). 14. Using the Transform Tool/Rotate and Flip - Flip the piece vertically. Put this in place on your fan. Your struts are now finished. 15. Right Click/Select All Objects/Merge As Single Object. |
|
THE CORDS 16. Using the Path Tools/Line & Arrow Tool/Spline - Colour - grey; Mode 3D, Width 2; Style and Arrow - plain; Border 2; Depth 30; draw 2 cords as shown and fill these with a preset of your choice. |
|
|
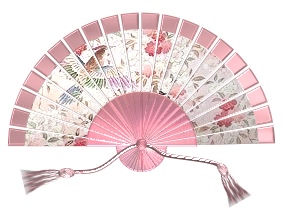
THE TASSELS 17. Use the Text Tool; Size approximately 60; Colour grey; Mode 3D Round; Border 15; Depth 30; Material/Shading-metallic Silver to type a ~ sign. Fill with the same preset as your cords. 18. Duplicate this and use the Transform Tool/Rotate and Flip to Flip this Vertically. Put in place over the first one as shown in the illustration opposite. 19. Select both pieces - Right Click and Merge As Single Object as shown. 20. Right Click and Duplicate this piece twice. Place all three pieces together as shown, Right Click and Merge as Single Object - then use the Transform Tool/Resize - to stretch the tassels as shown. 21. Use the Transform Tool/Perspective to narrow one end of the tassels as shown. 22. Right Click and Duplicate the tassels. Use the Transform Tool/Rotate and Flip to flip one set of tassels horizontally. Place at the ends of the cords and use the Transform Tool/Rotate Freely button to correct the angle of these if necessary as shown in the section below for finishing your fan. 23. Using the Path Drawing Tool (same preset), Shape - Ellipse: Color - grey: Border - 6: Depth - 30: draw two ovals and place in position as illustrated on the finished fan. Fill with the same preset as the cords. Use the Transform Tool/Rotate Freely button to correct the angle of these as shown in the section below for finishing your fan. Thanks to Maggie at MaCo Graphics for the idea for these tassels in her Oriental Rug tutorial! |
|
FINISHING YOUR FAN 24. Using the Path Tool, Shape Circle; Colour grey; Border 5; Depth 30; Material/Shading - Metallic/Silver, create a small nub and place in position in the centre of the struts. 25. Place all the cord, tassel and nub items in place as shown. Right Click/Select All Objects and Merge as Single Object. |
|
|
26. You can now add any finishing touches to your picture that you wish - a background picture or texture, a frame or your signature. |
|
|
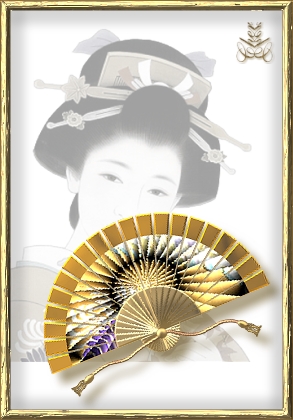
A beautiful version in a lovely setting |
 |
|
|
Free Spirit Graphics If you would then like an invitation to join, please Email Me. We'd love to have you along! |
|
|
If you need any help - or want to make suggestions to improve this tutorial - or for new ones |
|
This site © Rosie Hardman-Ixer 2001/2/3 |