SO YOU WANT TO MAKE LEVEL: You will need to know how to insert the html applet coding into your webpage via an html editor or your usual web creation program. MAIN TOOLS USED: Graphics program - selection and cropping tools. NECESSARY DOWNLOADS: This tutorial requires the Lake.class file by David Griffiths (I would love to link to David's page but it appears to be down at present). If you do not have this you can download it by Clicking Here OPTIONAL DOWNLOADS: Click here for the picture used in the tutorial (use Right Click/Save Picture As). Note: Angelfire, Geocities and Homestead users please read note at the bottom of the tutorial! TERMS OF USE: Please Read - Thank You! |
|
INSTRUCTIONS |
|
|
|
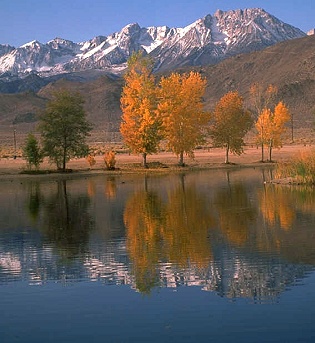
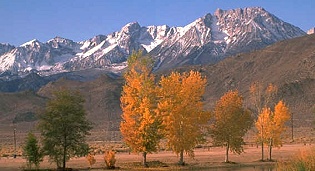
CROPPING THE IMAGE READY FOR THE APPLET 1. Before you start, make a folder - inside your main website folder - to contain the various elements of the finished applet (this will include the .class file, the webpage and the picture). Download and upzip the Lake.class file into this folder. 2. The applet will work on any picture - jpg or gif - of any size. However if you are using the picture provided with the tutorial save this (from the link above) and open it (or the pic of your choice) in your graphics program. Before you say it - yes! you can take a short-cut and save the cropped image below but I'm giving instructions here so you will know how to prepare your own images. NOTE: If you are using one of your own images try to pick one where the natural line for the water to start is approximately half way down and straight across the picture - such as the one opposite. 3. Make a note of the width and height dimensions of your picture now! 4. Use the Selection tools to select the top half of your image and crop the image (see second picture). 5. Save this image into the same folder as the Lake.class file - as applet2.jpg if you are using my picture (if you are using your own you may use any file name but you will need to change the code - see instructions below).
|
THE CODE 6. Now create a webpage for your applet - and open this in your usual html editor or program.
<param name="image" value="applet2.jpg"> </applet> or to add a table border around the applet
<applet code="Lake" width=310 height=350> <param name="image" value="applet2.jpg"> </applet> </table></tr></td> If you are using your own picture change the following items in the code: width=the width of your picture height=the height of your original, uncut image MINUS a little bit. (How much varies from image to image but usually it is between 10 and 15 pixels. You may need to try several numbers before you get the reflection to show without any grey lines at the bottom). value="thenameofyourpicture.jpg (or gif)" 8. Now save the webpage in the folder you created. 9. Now you are ready to upload your folder and its contents to your website and show off your creation! Please Note: The image, the Lake.class file and the webpage html file MUST be placed in the same folder on your website. Do NOT put the pic into another subfolder such as '--/images' | |
|
| |
|
Because of the file structure of these sites you will need to slightly alter the coding. Some helpful instructions can be found at BJ's Lake Applets | |
|
If you need any help - or want to make suggestions to improve this tutorial - or for new ones TUTORIAL LIST (By Version & Level) TUTORIAL LIST (Alphabetical) |
|
This tutorial layout © Rosie Hardman-Ixer, 2001/2002/2003