NOW LET'S ADD A FRAME LEVEL: PI Beginners but a knowledge of HTML is required to insert the applet code into your webpage. MAIN TOOLS USED: Outline Tools or any you wish to make your frame. Formatting tools for resizing frame may be needed. NOTE: In order to add an overlay you MUST be using the Lake.class file (Capital L) in the previous tutorial. It does NOT work with other lake applet class files. TERMS OF USE: Please Read - Thank You! |
|
INSTRUCTIONS(Please note you must complete the previous tutorial first!) |
|
|
|
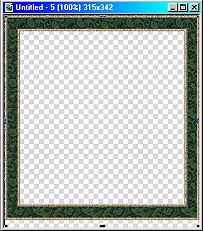
MAKING THE FRAME THE CORRECT SIZE 1. Before you start, make a note of two sets of figures. Firstly the width and height of your original, uncut picture for the applet (you should have these figures from when you made the applet). Secondly the width and height you actually used in the code (the height will be about 10 - 15 pixels shorter than the first set of figures). 2. Open up a new canvas in PI - the width and height you used in the code. 3. Make your frame for your picture to these exact dimensions (see tip below). If necessary, once you have made your frame, select it then click on Format/Image Size - make sure 'Selected Object' is checked and resize your frame so that it is exactly the right size. 4. Once you have done this Right Click/Copy your frame. 5. Now open up a new canvas with a transparent background - the size of your original, uncut picture used for the applet.
6. Paste a copy of your frame into this canvas and place it at the top of the canvas. Make sure it is placed exactly because 1 pixel out at the top or sides will spoil the effect in your final applet! NOTE: There is a small gap at the bottom beneath the frame - this is correct! It should be equal to the number of pixels you had to subtract from the height of the original image in order to eliminate those grey lines at the bottom of the rippling applet. 7. Save this frame as a transparent gif (see note below) in the same folder as your .class file, webpage and picture - in this tutorial I have called it 'appletoverlay.gif'. If you use another file name be sure to use that one in the code below (see Part 8). NOTE: When saving be sure to save as the Entire Image not just the frame. That gap at the bottom of the image MUST be included! TIP: Thanks to Cindy Berrier for this tip: To use a PI Gallery Frame, open a canvas - white background (it will not work using a transparent one) - the size used in the code for the working applet - select the frame - draw it - cut and paste it into the transparent canvas sized the same as the uncut image. |
THE CODE 8. Open the source code for the applet you made and add the following line to the applet code. <param name="overlay" value="appletoverlay.gif">
... and Save. NOTE: If you used another name for your overlay gif file, use this instead of 'appletoverlay.gif' in the code. Once you have done this, your code should look like this :
<param name="image" value="applet2.jpg"> <param name="overlay" value="appletoverlay.gif"> </applet> 9. Now you should have a framed applet! Please Note: Both images, the Lake.class file and the webpage html file MUST be placed in the same folder on your website. Do NOT put the graphics into other subfolders such as '--/images'. | |
|
| |
|
Because of the file structure of these sites you will need to slightly alter the coding. Some helpful instructions can be found at BJ's Lake Applets | |
|
If you need any help - or want to make suggestions to improve this tutorial - or for new ones TUTORIAL LIST (By Version & Level) TUTORIAL LIST (Alphabetical) |
|

This tutorial layout © Rosie Hardman-Ixer, 2001/2002/2003