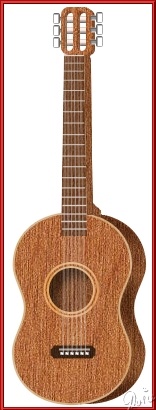
SPANISH GUITAR PI VERSION: 6/7. LEVEL: Advanced (A working knowledge of the Path & Transform Tools is assumed) MAIN TOOLS USED: Path/Path Edit Tools: Transform Tools: EasyPalette: Burn Tool: Paintbrush: Object Paint Eraser NECESSARY DOWNLOADS: Joined-Circles Shape (for PI6 Users only!) TERMS OF USE: Please Read - Thank You! |
 |
INSTRUCTIONS |
|
       
|
THE BODY OF THE GUITAR PI6 Users - please download the Joined-Circles Shape provided before starting this tutorial. 1. Open a new canvas 225W x 400H pixels. 2. Using the Path tools, Shape: Joined Circles; Mode 2D - draw the shape approximately 190W x 120H pixels. 3. Use the Transform Tools/Rotate and Flip to Rotate this shape 90 degrees left or right. 4. Use the Easy Palette/ Fill Gallery/Natural Texture/NT20 (or any vertical woodgrain preset you have of your choice) to fill this shape. 5. Right Click and Duplicate this shape twice. Move the copies to a separate canvas. 6. Going back to the original shape - Click on Format/Brightness and Contrast and click on the bottom left thumbnail three times. Click OK.
7. Drag one of the copies back onto the first canvas. 8. Click on the Path Tools and change the Mode to Continue Draw - then draw a circle in the position shown for the soundhole. (Click on Path Tools/Path Edit Mode if you need to reposition this accurately).9. Return to 2D Mode.
10. Right Click - Shadow and apply the settings shown. Click OK. 11. Right Click - Split Shadow.
12. Deselect the pieces and then reselect the shadow only and use the Object Paint Eraser Tool to erase all the shadow from around the guitar - leaving only the shadow inside the soundhole.
13. Shift/Click on the shadow and its guitar piece and Right Click /Merge As Single Object.
14. Move this piece over the darker original piece into the position shown opposite.
15. Select the dark, back piece and, using the Retouch Tools/ Burn shade the sides of the guitar.
16. Right Click, Select All Objects and Merge as Single Object. |
 
|
PURFLING (Purfling is the technically correct name for the edging around guitar bodies and soundholes). 17. Drag the remaining copy of the guitar body into the main canvas (you can now close down the 2nd canvas without saving). 18. Change the Path Mode to 3D Pipe and change the Border and Depth to 1 each. 19. Use the Easy Palette/ Fill Gallery/Natural Texture/NT22 to fill this shape. 20. Place this edging in position on the guitar. Right Click/ Select All Objects and Merge as Single Object.21. Now using the Path Tools/Outline Drawing Tool - Shape - Circle: Border -1: - draw a Circle to edge the soundhole. 22. Use the Easy Palette/ Fill Gallery/Natural Texture/NT22 to fill this shape. 23. If you wish you can draw a second, larger circle to add extra decoration to the soundhole but this is not absolutely necessary. 24. Right Click/Select all Objects/Merge as Single Object. |
   
|
THE NECK PIECES 24. Using the Path Tool - Shape-Rectangle: Mode 2D draw a tall rectangle approximately 25W x 180H pixels. 25. Click on Format/Brightness and Contrast and click on the bottom left thumbnail six times. 26. Using the Path Tool - Shape-Rectangle: Mode 2D draw a tall rectangle approximately 10W x 160H pixels. This should reach from the top of the neck to the place on the body of the guitar as illustrated. 28. Click on Format/Brightness and Contrast and click on the bottom left thumbnail three times. Click OK. 29. Your pic should now look like the one opposite. 30. Using the Path Tools - Shape - Round Shape 1 - draw the shape as shown.
31. Click on Format/Brightness and Contrast and click on the bottom left thumbnail three times. Click OK.
32. Select the front (darkest) part of the neck. Right Click/Arrange/Bring to Front. |
  |
FINISHING THE NECK
33. Keep the front of the neck selected and, using the Paintbrush Tool - Shape Size -1: Colour - light grey, paint frets across the neck - these should be spaced wider apart at the top of the neck, closer at the bottom.
34. Draw a thicker one at the top of the neck to represent the white bone 'bridge' for the strings.
35. Using the Transform Tool/Perspective - narrow the top of the neck VERY slightly.
36. Adjust any pieces of the neck that are out of place due to the narrowing of the front and then Right Click/Select All Objects - Right Click/Merge As Single Object.
Your guitar neck should now look like the illustration opposite. |
|
If you need any help - or want to make suggestions to improve this tutorial - or for new ones |
|
This site © Rosie Hardman-Ixer 2001/2/3 |