
INSTRUCTIONSPAGE 2 |
|
|
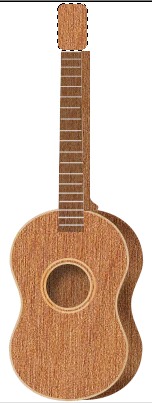
MACHINE HEAD (TUNING PEG) SECTION
36. Using the Path Tools - Shape - Rounded Rectangle: Mode 2D - draw a rectangle as shown. 37. Use the Easy Palette/ Fill Gallery/Natural Texture/NT20 to fill this shape. 38. Change the Mode to Continue Draw and draw two, narrow, rectangles as shown. If necessary change to Path Edit Mode to reposition these accurately. 39. Change back to 2D Mode and Right Click/Duplicate this piece. 40. Click on Format/Brightness and Contrast and click on the bottom left thumbnail three times. Click OK. 41. Right Click/Arrange/Send to Back and arrange the two pieces at the top of the neck as shown.
42. Using the Path Tool - Shape -Rectangle: Colour - pale ivory (I used #F5DFD6): Mode 3D: - draw a small rectangle. Duplicate this twice and put in place as shown. 43. Select all three rectangles. Right Click/Merge As Single Object. 44. Right Click/Arrange/Send to Back. 45. Using the Path Tools - Shape-Rounded Rectangle: Colour - Grey: Mode 3D: (In Materials Box - change Shading to Metallic/Silver) - draw two small shapes as shown. (Adjust lighting to your satisfaction). 46. Select the two pieces - Right Click/Merge As Single Object - the Duplicate twice and put in place. 47. Select all three Pieces - Right Click/Merge As Single Object. Duplicate this object. 48. Using the Transform Tool/Rotate and Flip - Flip the Duplicate Horizontally. 49. Right Click/Arrange/Send to Back and put in place as shown. 50 Right Click/Select All Objects/Merge As Single Object.
|
 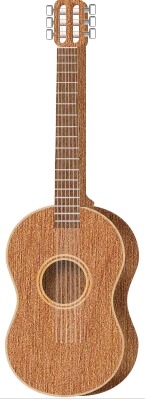 |
THE STRINGS
50. Using the Paint Tools/Paintbrush - Shape Size 1: Colour - pale grey: Lines: Straight Lines: (Click on Mode button to go into Paint as Object Mode) - draw a fine line as shown. Reselect the Pick Tool and click Yes in the box that appears. Now Duplicate the line 5 times.
51. Select all the lines (probably best done in the Layer Manager) - Right Click/Align/Top. Right Click/Space Evenly/Horizontally (Make sure that Even-Fix objects both ends is checked). OK.
52. Right Click/Merge As Single Object.
53. Move the Strings over to the guitar and, using the Transform Tool/Resize - narrow the Strings so that they are the same width as the neck.
54. Using the Transform Tool/Perspective narrow the top of the strings so that they fit within the space of the rollers and don't go over the side of the machine head section.
Note: Your strings will be so fine that you will not have to worry too much about them fitting into each individual roller - but any string which actually appears to go over the wrong part of the machine head section (e.g. over the central wooden strut) can be removed with the Object Eraser.
|
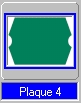 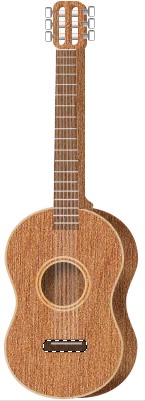  |
Now for the last piece!!! THE BRIDGE 55. Using the Path Tools - Shape - Plaque 4: Mode 2D draw a shape as shown for the bridge section. Use the Easy Palette/ Fill Gallery/Natural Texture/NT20 to fill this shape. 56. Click on Format/Brightness and Contrast and click on the bottom left thumbnail until the colour is almost black. 57. Using the Paint Tools/Paintbrush - Shape Size 1: Colour - white: Lines: Straight Lines: (Click on Mode button to go into Paint as Object Mode) - draw a line as shown.
58. Right Click/Arrange/Send Backwards - to send your bridge piece behind the strings.
59. Using the Path Tools - Shape - Circle: Mode 3D: Colour - white: draw a very small circle at the end of each string to represent the bridge pins. |
|
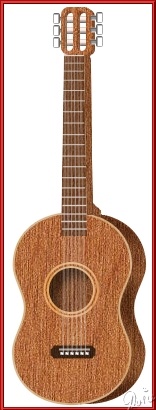
Technically your guitar is now finished! You may want to add some background or maybe a strap to your guitar - or how about trying to make a case to fit it? It's up to you now! |
 |
|
|
Free Spirit Graphics If you would then like an invitation to join, please Email Me. We'd love to have you along! |
|
|
BACK TO PAGE 1 OF THIS TUTORIAL This tutorial © Rosie Hardman-Ixer, 2001/2002/2003If you need any help - or want to make suggestions to improve this tutorial - or for new ones | |
This site © Rosie Hardman-Ixer 2001/2/3 |