FOLDED PAPER FAN PI VERSION: 7. LEVEL: Beginner MAIN TOOLS USED: Path Tools, Path Edit Tools, Transform Tools (especially the Copy Rotate Tool), EasyPalette. NOTE: Illustration shown at 75% of true size. TERMS OF USE: Please Read - Thank You! |
|
INSTRUCTIONS |
|
|
|
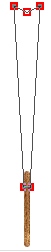
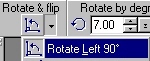
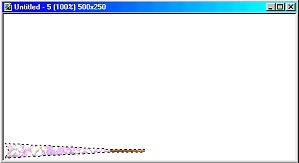
MAKING A BASIC PIECE FOR THE FAN 1. Open a new canvas 500W x 250H pixels. 2. Using the Path Tools: Shape -Rounded Rectangle: Mode 2D - draw a shape approximately 5W x 75H pixels. Fill this with a wood fill/preset. 3. Using the Path Tools: Shape - Rectangle: Mode - 3D: Border - 12: Depth - 30 - draw a shape approximately 25W x 180H pixels as shown and fill this with a colourful preset. (I have found that presets with clear bands of colour work best with this tutorial but the actual pattern is of little importance). PLEASE NOTE: Some presets change the Border and Depth settings when applied. Check that these are correct (Border - 12: Depth - 30:) after applying and adjust if necessary at this point and again after using Path Edit. Otherwise the light, delicate, folded paper look we are making may be lost. 4. Now keeping the same rectangle selected, click on the Path Edit button. 5. Move the lower two square inwards until they meet the wood. 6. Now click on Edit Point (+) and add an Edit point to the middle of the top of the rectangle and pull this point downward to form a V shape (see opposite). Click on the Path Edit button to come out of Path Edit Mode. 7. Right Click/Select All Objects. Right Click/Merge as Single Object. 8. Use the Transform Tools/Rotate and flip to rotate the object through 90% left. Place it at the bottom left hand corner of your canvas as shown. 9. Now click on the Transform Tools/Rotate Freely to show the small ring with a cross-hair through it - this is the point of rotation. Move it, with your cursor to the point shown. Now for the WOW bit! |
|
|
THE WOW BIT! 10. Now change the number in the Rotate by Degree box to 7.00 11. Click on Copy rotate - the two edges of your fan should meet - if they don't try altering the number to either 6.00 degrees or 8.00 degrees. Altering the point of rotation slightly can also make a difference but you should be able to achieve this without too much trouble. 12. Once you have the two edges meeting - click away on the Copy rotate button until your fan is complete - but don't click TOO quickly or you'll find yourself with a round fan!!! 13. Right Click/Select All Objects. Right Click/Merge as Single Object. 14. Using the Path Tools - Shape - Circle: add a small, round silver button to the middle of the struts as shown to complete the fan. 15. If you wish to add tassles to your fan you can find the instructions on my earlier fan tutorial Here 16. Once you have all your pieces in places Right Click/Select All Objects then Right Click/merge as Single Object. NOTE: Using Copy Rotate can tend to blur your pieces a little but this is usually easily rectified after merging by sharpening the finished picture. |
 (Shown much smaller than true size) |
MORE FANS Here are a variety of fans made quickly using this method. In some I have left a longer 'spoke' and not moved the bottom of the 'paper' quite so far inwards at stage 5. On one fan I have added an end piece. I also experimented with different types of presets and colourings. |
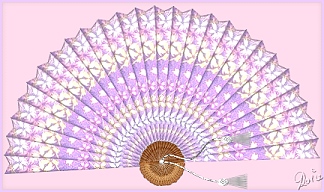
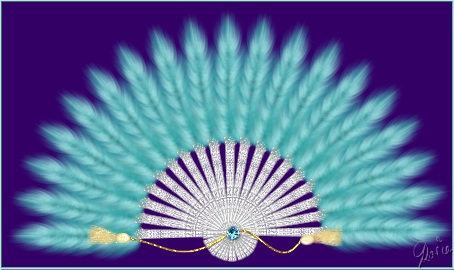 This one is made using a wider, shaped 'spoke' and a feather in place of the paper - but otherwise uses the same method as the tut above. |
|
 |
|
|
Free Spirit Graphics If you would then like an invitation to join, please Email Me. We'd love to have you along! |
|
|
If you need any help - or want to make suggestions to improve this tutorial - or for new ones |
|
This site © Rosie Hardman-Ixer 2001/2/3 |