
ROLL TOP DESK PI VERSION: 8. LEVEL: Intermediate MAIN TOOLS USED: Path Drawing Tool, Path Edit Tool, Transform Tools, Format/Brightness & Contrast, EasyPalette. TERMS OF USE: Please Read - Thank You! |
|
INSTRUCTIONS |
|
|
|
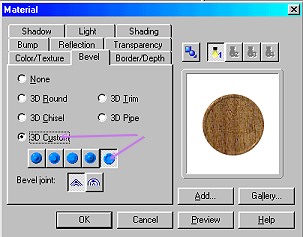
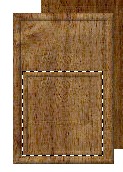
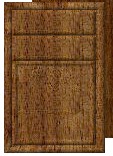
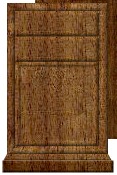
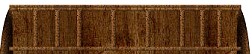
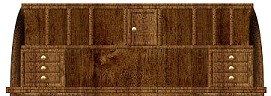
DESK - PART 1 - BACK + FRONT DRAWERS & CUPBOARDS 1. Open a new, white canvas 400W x 375H pixels. 2. Using the Path Drawing Tool, Shape - Rectangle: Color - wood preset of your choice: Mode - 3D Round: Border - 1: Depth - 1: draw a shape 300W x 250H pixels for the Back of your desk. NOTE: Try to choose a wood preset with a fairly small grain - or your desk will not look as realistic. 3. Click on Format/Brightness & Contrast and click on the bottom, centre square 3 times to dark the wood. 4. Using the Path Drawing Tool again - same shape, color and mode: Border - 8: Depth -30: draw a shape 100W x 150H pixels. 5. Click on the Material Box/Bevel tab - and apply the bevel illustrated in the first illustration above/left. 6. Now draw another rectangle 84W x 85H (Border - 6: Depth - 30:) inside the first one to represent the cupboard door (hold down the ALT key whilst you do this - this will enable you to draw on top of the first shape). 7. Change the mode to 3D Round (Border - 5: Depth - 25:); and draw a shape 84W x 25H. 8. Right Click/Duplicate this shape and put the two rectangles in place as drawers. 9. Draw another rectangle 100W x 6H pixels, Change the Border to 1 and put this in place below the cupboards/drawers and then use the Transform Tools/Perspective to widen the lower edge as shown (it can help to Zoom in to 200% to do this). 10. Draw another shape the width of the lower edge x 11H pixels and put in place. Click on Format/Brightness & Contrast and darken this piece by clicking on the bottom, centre square three times. 11. Using the Path Drawing Tool, Shape - Circle: Color - any of your preference (I am using Copper 3 from the EasyPalette/Material Attribute Gallery/Metallic): draw a small shape to represent the drawer handle. Right Click/Duplicate this and put the two handles in place. 12. Shift/Click to select all the pieces of your cupboards/drawers and then Right Click/Merge As Single Object. 13. Right Click/Duplicate this piece and put the two cupboards in place. 14. Add two slightly larger handles to the cupboards as shown. OK - that's the lower cupboards finished! |
|
|
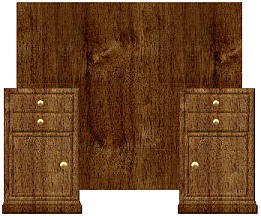
DESK - PART 2 - SIDES, TOP, WRITING SURFACE, CENTRE DRAWER & DECORATIVE PANEL
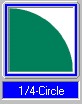
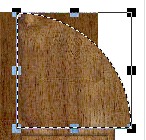
15. Using the Path Drawing Tool, Custom Shape - 1/4 Circle: Same Color: Mode - 3D Round: Border - 2: Depth - 30: draw a shape approximately 115W x 115H pixels.
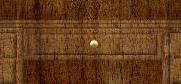
This should be the height between the top of your cupboards and the top of the Back of your desk.
16. Use the Transform Tools/Resize to narrow this piece to approximately 20W pixels and put in place as shown.
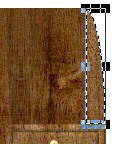
17. Right Click/Convert Object Type/From Text/Path to Image and then use the Retouch Tools/Burn to darken the left-hand side of this piece.
18. Right Click/Duplicate the piece then use the Transform Tools/Rotate & flip - to flip the piece Horizontally and put this in place on the left-hand side of the desk.
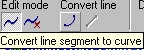
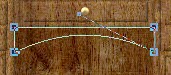
19. Now change the mode back to 3D Custom (this should give you the same bevel that you used for the cupboards). Using the Path Drawing Tools, draw two rectangles - the first (Border - 4) 310W x 8H pixels for the top of the desk and the second (Border - 4:) 348W x 8H for the writing surface of the desk. 20. Put in place on the desk as shown. 21. Now using the rectangle shape, Border - 6: Depth - 15: draw a shape 140W x 32H pixels. Put in place as the frame for the central drawer. 22. Change the mode back to 3D Round: Border - 4: Depth - 30: and draw a shape 125W x 20H pixels for the drawer front. 23. Put these pieces in place and add a drawer handle as before. 24. Using the rectangle shape, Border - 5: Depth - 10: draw a shape 140W x 25H pixels. 25. Click on the Editing button to go into Path Edit. Select the bottom line of the rectangle and click on Convert Line/Curve. 26. Use the Control handles to create a gentle upwards curve as shown. 27. Use the Toggle button to check your shape and if you are happy with it, click out of Path Edit Mode and back into 3D Round.
28. Put this piece in place on your desk. |
|
|
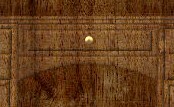
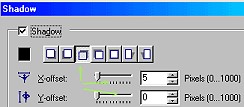
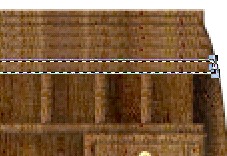
DESK - PART 3 - UPPER SHELVES/CUPBOARDS There are so many different arrangements for the inside of this type of desk that you can go ahead and change this part around as much as you like - this arrangement is just a suggestion. 29. Using the Path Drawing Tool, Shape - Rectangle: Color - same: Mode - 3D Round: Border - 3: Depth - 15: draw a shape 310W x 5H pixels for the main shelf of your desk and put in place approximately halfway between the top and the writing surface of your desk. 30. Draw a series of upright rectangles for the divisions for letters etc. and put in place. 31. Now using the same method that you used for the drawers and cupboards (3D Custom bevels for cupboards and frames and 3D Round for drawers/drawer handles etc) create small cupboards and drawers as shown. 32. I finally added a few shadows to the shelves and cupboards to give a better depth to the picture - for these I mainly used the setting shown opposite.
33. I used the Retouch Tools/Burn to create the shadow of the cupboard on the Back of the desk. Once you have all the pieces of your desk complete, Right Click/Select All Objects, then Right Click/Merge As Single Object. |
|
|
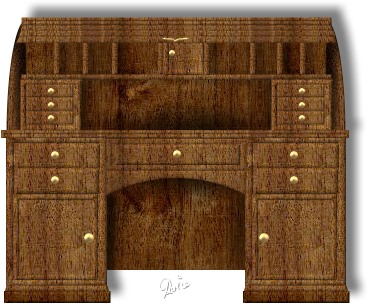
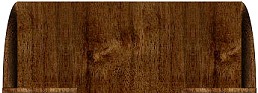
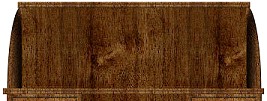
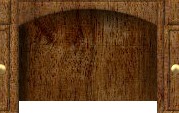
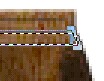
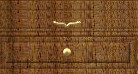
DESK - PART 4 - THE ROLL-TOP 34. Using the Path Drawing Tool, Shape - Rectangle: Mode - 3D Round: Border - 2: Depth - 15: draw a shape 310W x 5H pixels for the top slat of the roll-top. It helps to Zoom in to 200% here.... 35. Use the Transform Tools/Perspective to widen the bottom line of the rectangle so that the edges of the slat run parallel to the curve of the side of the desk. 36. Right Click/Duplicate this piece and put in place below the first slat. Use the Transform Tools to widen it to that it stretches the full width of the slat above and then also increase the height slightly. 37. Repeat Instructions 35 & 36 until you have the number of slats you wish to have on your roll-top. 38. Finally, add a small handle/knob to the bottom slat. (I typed a bracket, filled it with the same preset as the other handles (3D Round) and turned it through 90 degrees using the Transform Tools/Rotate & flip).If you are intending to go on to the animation section of the tutorial you will need to make as many slats as it takes to complete the closure of the desk top and then finally add the knob or handle to the lowest slat. Opposite is the finished version of the still picture... Those people who wish to animate the desk |
 |
|
|
Free Spirit Graphics If you would then like an invitation to join, please Email Me. We'd love to have you along! |
|
|
If you need any help - or want to make suggestions to improve this tutorial - or for new ones |
|
This site © Rosie Hardman-Ixer 2001/2/3 |