
ROLL TOP DESK PI VERSION: 8. LEVEL: Intermediate MAIN TOOLS USED: Gif Animator 5. TERMS OF USE: Please Read - Thank You! |
|
INSTRUCTIONS |
|
|
|
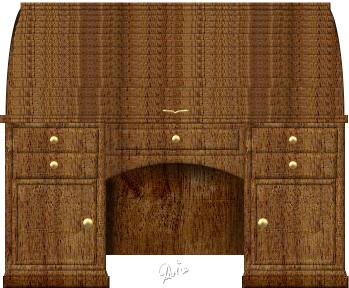
ANIMATING YOUR ROLL TOP 1. First of all complete the number of slats needed to completely close the top of the desk and then finally the handle on the bottom slat as described in the first part of the tutorial. Your result should look like the picture shown opposite. It is important to make these slats in order from top to bottom as this helps in making the animation much easier. 2. Once you have all your pieces for the desk made, Right Click/Select All Objects and drag your desk to a new canvas (this is to get rid of any excess white space around the desk) and save it as a .ufo somewhere you can find it easily (I always use the desktop).
3. Close PI and open Gif Animator 5.
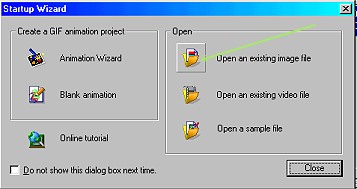
4. When the Startup Wizard opens click on 'Open an existing image file'. Browse to the ufo you just saved, select it and click on Open.
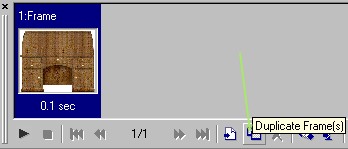
5. Click on the Duplicate Frame button at the bottom of the screen.
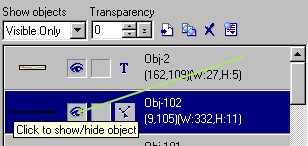
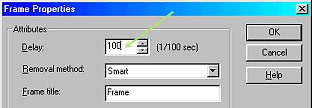
6. In the Object Manager Panel on the right-hand side of the screen, select the lowest slat in your picture (if you created your slats from top to bottom this will be the TOP slat in the list, just under the handle - see picture left), and click on the Eye Icon make this slat invisible. 7. In the left-hand Edit pane, select the handle object and use the UP ARROW button on your keyboard to move it up to the slat above (this will keep it moving upwards in a nice, straight line). 8. Repeat Instructions 5, 6 and 7 (duplicating the frame, making the next slat invisible and moving the handle to the slat above) until you have only one slat + the handle left at the top of the desk. 9. Right Click/Properties on Frame 1 at the bottom of the screen and in the Frame Properties box change the Delay to 100 and OK. Right Click/Properties on the Final frame of your animation (this might vary depending on how many slats you made) and change the Delay to 250 and OK. All other frames should have the Delay set to 2. 10. Now click on File/Optimization Wizard and in the box that comes up click on Next. 11. In the next box, change the number of colours to 35 and click on Next. 12. In the next box leave both the Yes boxes checked and click on Next. 13. In the next box click on Finish. If you wish you can click on Preview to see your animation before you save it (click on the Arrow to play). |
 |
|
|
Free Spirit Graphics If you would then like an invitation to join, please Email Me. We'd love to have you along! |
|
|
If you need any help - or want to make suggestions to improve this tutorial - or for new ones |
|
This site © Rosie Hardman-Ixer 2001/2/3 |