
WORD PLAY (Animation) PI VERSION: 8 (plus Gif Animator 5). LEVEL: Intermediate (some knowledge of tools is assumed). MAIN TOOLS USED: Path Drawing Tool, Grid & Partition, Effect/Paint on Edges, Text Tool, Gif Animator 5. Thanks to MaryLou White from the PhotoImpact Resource Center for her input on this tutorial which has made it even easier to do! TERMS OF USE: Please Read - Thank You! |
|
INSTRUCTIONS |
|
|
|
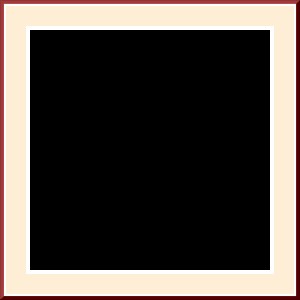
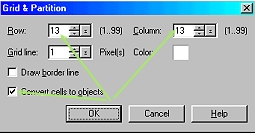
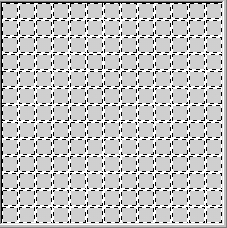
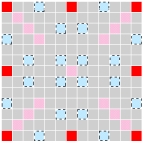
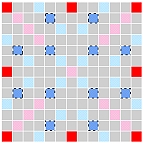
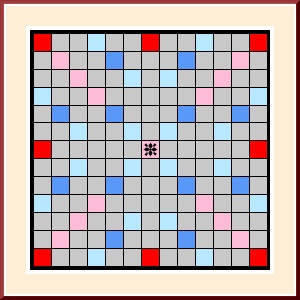
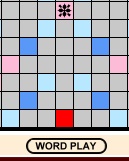
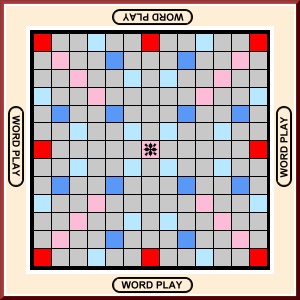
1. THE BOARD 1. Open a new, white canvas 300W x 300H pixels. 2. Using the Path Drawing Tool, Shape - Square: Color - Dark Red (I used Hex #660000): Mode - 3D Round: Border - 25: Depth - 5: draw a shape 300W x 300H pixels to fill the canvas. Deselect - by pressing the Enter button on your keyboard. 3. Changing the Color to white and the mode to 2D, draw a shape 293W x 293H pixels (keep your finger on the ALT button in order to draw on top of the previous shape). Deselect. 4. Change the color to a cream colour (I used Hex #FDEED5) and draw a third square, 287W x 287H pixels. Deselect. 5. Using white again, draw a fourth square 247W x 247H pixels. Deselect. 6. Using black draw a fifth square 239W x 239H pixels. 7. Right Click/Select All Objects. Right Click/Align/Center Both. Right Click/Merge All. Your board should now look like the first illustration on the left. 8. Open a new canvas, Color - grey (I used Hex #C8C8C8) - 233W x 233H pixels. 9. Click on Web/Grid & Partition and enter the settings shown in the 2nd illustration opposite: 10. Deselect all objects by using the Enter key on your keyboard. 11. Shift/Click to select the squares shown in the first illustration on the left. 12. Click on Edit/Fill and fill with a bright red colour. 13. Repeat Instruction 15 for the pink (I used Hex #FCBCD8) squares. 14. Repeat once more for the light blue (I used Hex #B7E8FF) squares. 15. Finally repeat with the dark blue (I used Hex #5998F7) squares. 16. Right Click/Select All Objects - then Right Click/Merge As Single Object. 17. Right Click/Copy.
18. On your main canvas, Right Click/Paste. Right Click/Align/Center Both. Right Click/Merge.
19. Using any Path Shape you wish (in black/2D), add a little motif to the center, pink square on your Board for decoration.
20. Using the Path Drawing Tool, Shape - Rounded Rectangle: Color - any of your choice (I used the same colour as the background cream - Hex #FDEED5 again): Mode - 2D: draw a shape 80W x 15H pixels. (An alternative to doing this, if you are not using a different colour for the labels, would be to draw the rounded rectangle with the Outline Drawing Tool if you wish - in which case you can omit Instructions 21 and 22). 21. Click on the Paint Tools/Paintbrush and change the settings to Size 5: Color - Black: Trans - 0: Soft Edge - 25. 22. Click on Effect/Creative/Paint on Edges. 23. Use the Text Tool to add the words of your choice to this label (I found Arial on Bold, Size 10 worked well). 24. Make sure your words are correctly placed then select these, plus the label and Right Click/Merge As Single Object. 25. Right Click Duplicate this label then use the Transform Tools/Rotate & flip to flip it 90o to the left and put in place. 26. Repeat Instruction 25 twice and put these pieces in place. NOTE: It is worth selecting the two side labels and then using Right Click/Align/Center Vertically to align them.... then the top and bottom labels, using Align/Center Horizontally... if you want a really accurate board. 27. Right Click /Merge All.
OK - there's your playing board - now for the tiles! |
|
|
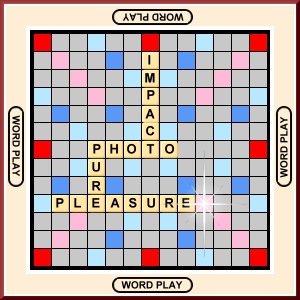
2. THE TILES 28. This next bit is best done using a new canvas - so open one up now - same size as before. Using the Path Drawing Tool, Custom Shape - Rounded Rectangle 2: Color - Hex #FAE79A: Mode - 3D Round: Border - 4: Depth - 10: draw a shape 16W x 16H pixels. 29. Right Click/Duplicate this shape and change the mode to 2D. 30. Put the two pieces together as shown, Shift/Click to select both - then Right Click/Merge As Single Object. Now you will need to work out exactly what wording you want on your board and how many tiles you will need to accomplish this. 31. Copy & Paste the tile as many times as you need and add letters to them - each time merging the letter with the tile. Don't forget - you don't need to make three letter Es if that is what is needed for your words - make one and Duplicate it. 32. Now drag these tiles to your board in the order you want them to appear in the finished animation. 33. I have also added a sparkle at the end of my words but you don't have to do this. 34. Save your work as a .ufo file, somewhere where you can locate it easily, now. OK - now onto the animation! |
|
|
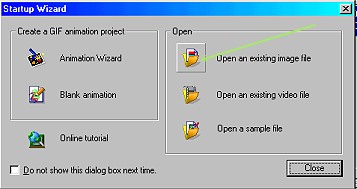
3. THE ANIMATION 34. Close PI and open Gif Animator 5. 35. When the Startup Wizard opens click on 'Open an existing image file'. Browse to the ufo you just saved, select it and click on Open. 36. In the Object Manager on the right-hand side select ALL objects except the bottom, board one and click on the eye icon to hide them. 37. Now click on the Duplicate Frame button at the bottom of the screen. 38. Select the first letter you wish to use (this should be the bottom one if you followed my instruction 32 carefully) and click on the space to reopen the eye icon. 39. Repeat Instructions 37 & 38, gradually working up the list of letters (and the sparkle if you have added this) until you have made a frame for every letter. 40. Now Right Click/Frame Properties on the 1st frame in the row at the bottom of the screen and change the Delay to 150 and OK. 41. Right Click/Frame Properties on the last frame in the row at the bottom of the screen and change the Delay to 250 and OK. NOTE: You can see your animation either by clicking on the Preview tab or by clicking on the arrow button at the bottom left of your screen (click on the little square to stop the animation running). 42. If you are happy with the animation click on the Optimize tab and Save. |
 |
|
|
Free Spirit Graphics If you would then like an invitation to join, please Email Me. We'd love to have you along! |
|
|
If you need any help - or want to make suggestions to improve this tutorial - or for new ones |
|


This site © Rosie Hardman-Ixer 2001/2/3 |