
GARDEN ARCH with WISTERIA PI VERSION: 8 (also suitable for 7). LEVEL: Intermediate (some knowledge of tools assumed). MAIN TOOLS USED: Text Tool, EasyPalette-Wrap Gallery/Path Wrap, Path Drawing Tool, Transform Tools/Resize, Trace, Object Paint Eraser, Stamp Tool. NECESSARY DOWNLOADS: If you wish to put the wisteria onto your arch you should download the Wisteria Stamp. Unzip this into the Stamps folder in PI on your hard drive. TERMS OF USE: Please Read - Thank You! |
|
INSTRUCTIONS |
|
|
|
THE ARCH
1. Open a new, white canvas - 350W x 400H pixels. 2. Using the Text Tool - Font - Arial: Color - Black: Size - 50: type a capital X. 3. Right Click/Duplicate this letter.
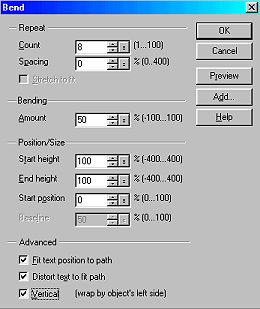
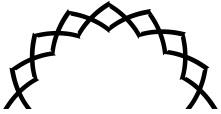
4. Using either copy - click on the Pick tool then open the EasyPalette/Wrap Gallery/Path Wrap. Click on Path Wrap 9 and apply the settings shown opposite.
This should result in the arched shape shown.
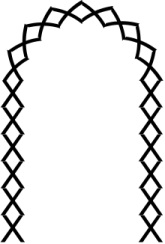
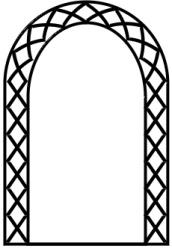
5. Using the other copy of the X, Right Click/Duplicate this 5 times and join these in a vertical row to form the left-hand side trellis as shown. 6. Select all 6 of these X's and Right Click/Align/Left - then Right Click/Merge As Single Object. 7. Right Click/Duplicate and put in place for the right-hand side of the trellis. 8. Using the Path Drawing Tool, Shape - Arch 3: Color - Black: Mode - 3D Pipe: Border - 2: Depth 1: draw a shape to fit around the outside edge of your trellis - mine measured 220W x 323H pixels. You can use the Transform Tools/Resize to adjust this if necessary.
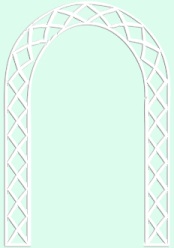
9. Now Right Click/Duplicate the arch shape. 10. Put in place over the original arch and use the Transform Tools/Resize to make the shape fit the inner sides of the trellis - mine ended up measuring 157W x 296 pixels. 11. Your picture should now look like the one opposite. Right Click/Merge All. 12. Click on Edit/Trace/Image, accept the defaults and OK. 13. Change the Mode to 3D Round, Color - White: Border - 2: Depth - 30. 14. Open a new canvas with a pastel coloured background (I am using Hex #DCFCEE) -250W x 350H pixels - and drag your arch shape to it. 15. In the Path Panel, 3D tab, use the Light Bulb on the arch to get a brighter white colour. 15. Right Click/Convert Object Type/From Text/Path to Image. 16. Use the Object Paint Eraser to erase the middle part of the base line of the shape and there's your finished trellis arch!. |
|
|
ADDING THE WISTERIA 17. If you haven't already done so, download the Wisteria Stamp and unzip this into the Stamps folder in PI on your hard drive.
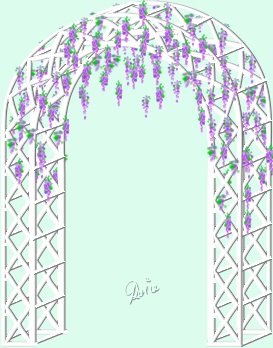
18. Select the Stamp Tool and the wisteria stamp you just downloaded. 19. Under 'Object' select 'Single Object' - then later you can move any stamps whose position you are not happy with. 20. Change the Scale to 45 and the Spacing to 200 as shown and then stamp the wisteria onto your arch. 21. Rearrange the wisteria to your liking and don't forget to select some pieces and Right Click/Arrange/Send to Back so that some of the flowers are falling at the back of the trellis.
22. This version of the arch was made by duplicating the arch shape and off-setting the two - then using the Line & Arrow Tool to draw diagonal lines joining up corresponding points on the two arches!
Enjoy your garden! |
 |
|
|
Free Spirit Graphics If you would then like an invitation to join, please Email Me. We'd love to have you along! |
|
|
If you need any help - or want to make suggestions to improve this tutorial - or for new ones |
|


This site © Rosie Hardman-Ixer 2001/2/3 |