
WISHING WELL PLANTER TUTORIAL PI VERSION: 12 (also suitable for earlier versions though the names of some tools and presets may be different). LEVEL: Intermediate MAIN TOOLS/COMMANDS USED: Path Drawing Tool, Transform Tools (Resize, Slant, Distort & Perspective), Photo/Light/Brightness & Contrast, Background Designer, Easy Palette, Continue Draw, Path Edit, Paintbrush/Painting with Texture, Object Paint Eraser, Shadow/Split Shadow, Retouch Tools (Dodge & Burn),Effect/Creative/Paint on Edges. TERMS OF USE: Please Read - Thank You! |
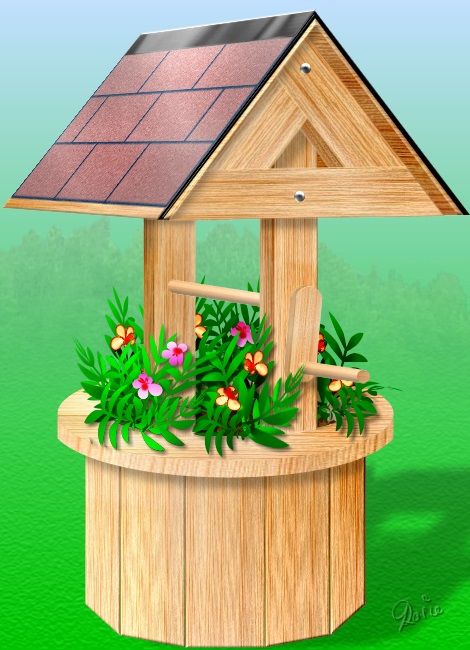
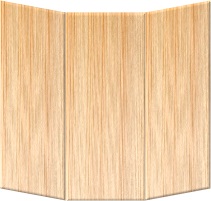
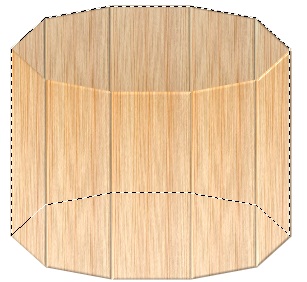
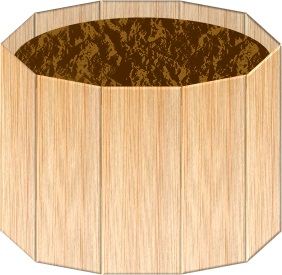
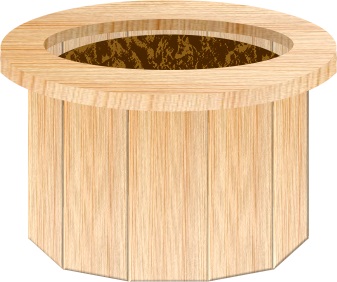
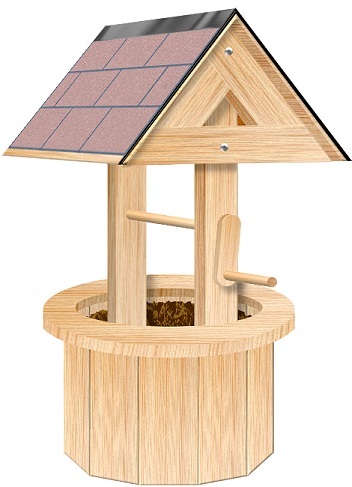
Finished planter shown at 75% full size |
|
|
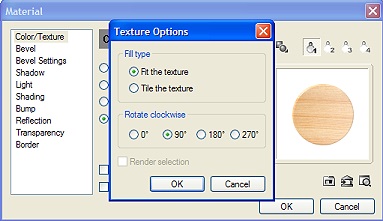
BASE OF PLANTER 1. Open a new canvas 470 x 650 pixels. I am using white at this stage but it can be any colour or gradient you wish. Using the Path Drawing Tool, Shape - Rectangle: Mode - 3D Round: Width 3: Depth 30: draw a shape 80 x 190 pixels. Now fill this with a wood preset of your choice. I am using the Larch preset from my own Wood Presets 4 Selection which you are welcome to download from my website at Rosie Hardman.com 2. If the wood preset you are using has a horizontal grain then you will need to change this to vertical. If this is the case, apply the preset then open the Material box and under Color/Texture click on the Options button. Check the 90o radio button (picture opposite) and then click OK twice. This will turn the grain. To change back for the horizontal sections of this planter, reopen the Texture Options box and return the Rotate Clockwise setting to 0o. You can also click on any path shape you have already made (as long as it hasn't been converted to an Image object) with a vertical or horizontal grain to change to that grain direction when making a new object.
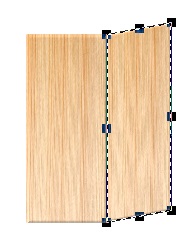
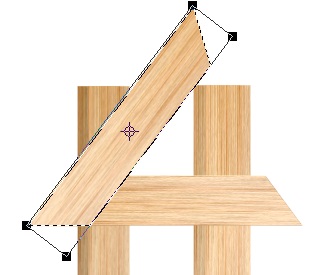
3. Right Click/Duplicate this shape. Now use the Transform Tools/Resize to narrow the duplicate shape until it is 65 pixels wide and then Slant (on the Centre, right-hand node) to create a shape 65 x 200 pixels as shown left.
4. Right Click/Duplicate this shape and then use the Transform Tools/Rotate & Flip to flip the shape Horizontally and place on the left-hand side as shown.
5. Right Click/Duplicate the right-hand slanted shape. Now use the Transform Tools/Resize to narrow the duplicate shape until it is 35 pixels wide and then Slant it as you did before, this time to create a shape 35 x 220 pixels as shown left.
6. Right Click/Duplicate this shape and then use the Transform Tools/Rotate & Flip to flip the shape Horizontally and place on the left-hand side as shown. 7. Now Right Click/Select All Objects & Right Click/Merge As Single Object. 8. Right Click/Duplicate. Right Click/Merge As Single Object.
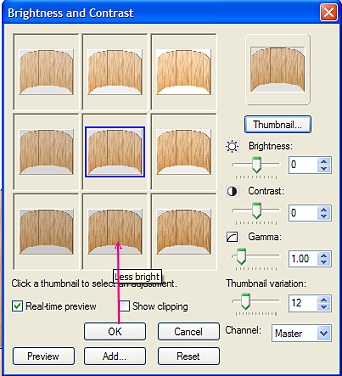
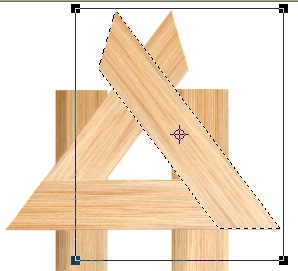
9. Using the Transform Tools/Rotate & Flip, flip the shape Vertically. 10. Click on Photo/Light/Brightness & Contrast and click the bottom, centre square twice and OK.
11. Right Click/Arrange/Send to Back. Put in place as shown left. making sure that you align the sides accurately.
12. Using the Path Drawing Tool, Shape - Ellipse: Color - Dark Brown Hex#8D5E17: Mode 2D: draw a shape 260 x 90 pixels. Right Click/Convert Object Type/From Text/Path to Image.
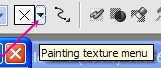
13. Keeping the shape selected, Select the Paintbrush tool. Set the Color to a very dark brown (mine is Hex#482400): Size 100: and then click on the arrow on the Painting Texture Menu button (left)/Select Texture.
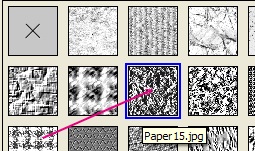
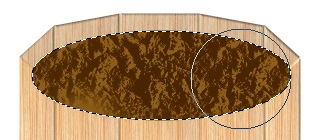
14. Click on the Edit button and select Paper 15 (left) and OK. Now paint over the ellipse shape with the Paintbrush to create the soil for the planter (see left).
15. Right Click/Arrange/Send Backward to place this between the two wooden objects. Hit Enter to deselect all objects.
16. Still using the Ellipse Shape click back on your wood preset to select it - please note that the grain for this section should be horizontal. Now change the Mode back to 3D Round: Width 1: Depth 0: and draw a shape 335 x 95 pixels. 17. Change the Mode to Continue Draw. Draw another Ellipse inside the first one, measuring approximately 250 x 50 pixels. Don't worry if it's not bang in the middle at this point! 18. Go into Path Edit and select the smaller path ONLY. Move this slightly closer to the top of the larger ellipse as shown left. 19. Select both paths then Right Click/Align/Center Horizontally. Return to 3D Round Mode. 20. To ensure that all parts of your well base are in alignment you can now select ALL the objects on your canvas and Right Click/Align/Center Horizontally.
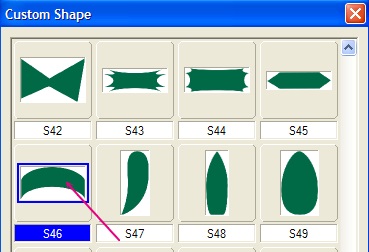
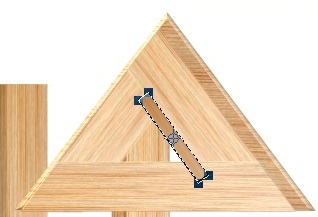
21. Using the Path Drawing Tool, Custom Shape - S46 (this shape may have a different name in previous PI versions): Color - The same wood preset but with the grain turned to vertical (see instruction 2 if necessary): Mode 3D Round: Width 1: Depth 0: draw a shape 335 x 40 pixels.
22. Put in place as shown left so that the top just fits across the ledge ellipse.
23. Go into Path Edit and use the Control points/handles on the upper line to shape it along the lower edge of the wooden ellipse as shown left.
24. Next shape the other path line so that it runs parallel to the first. Once you are happy with the editing, Exit Path Edit and return to 3D Round Mode.
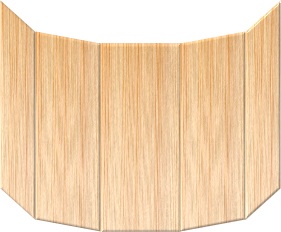
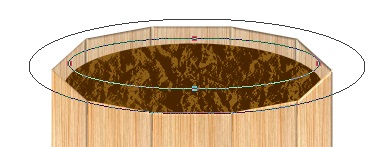
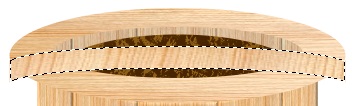
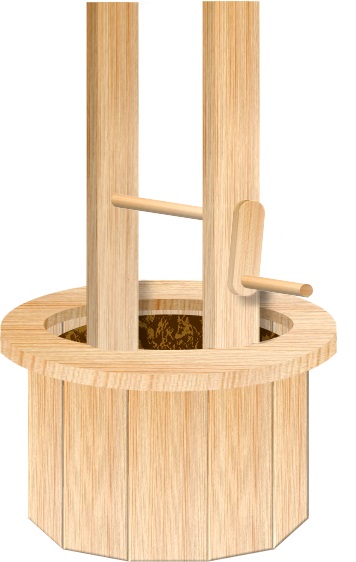
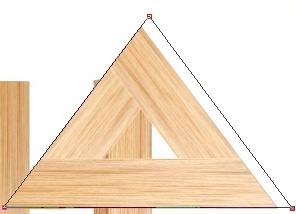
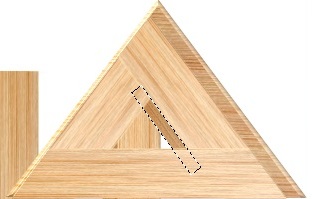
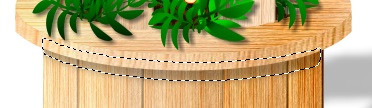
Your well base should now look like the picture opposite.
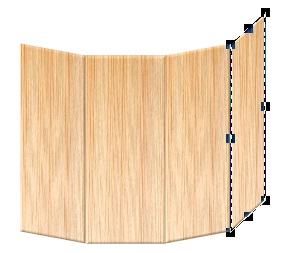
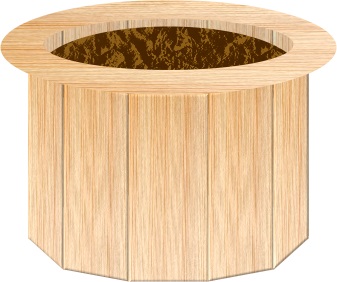
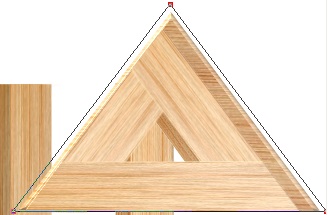
25 Select the top ellipse and Right Click/Duplicate it. In the Layer Manager, select the ORIGINAL ellipse and change the grain to a Vertical one in the Material box. 26. Use the same method as that used in Instruction 10 to darken the object but this time click the square 4 times. Put in place as shown by using the DOWN ARROW key on your keyboard, readjusting the position of your soil object if necessary. Although I know a lot of these details may not be seen when you eventually fill your planter with flowers etc, I am including them because this will make it possible for you to use the planter in alternative ways - perhaps with a bucket and rope attached etc. |
|
|
ROOF SUPPORT POSTS & WINDING HANDLE
27. Keeping the vertical grain, and using the Rectangle shape, (Mode should still be 3D Round; Width 1: Depth 0), draw a shape 45 x 350 pixels. 28. Right Click/Duplicate this shape. In the Layer Manager, select the original of these two shapes and use the same method to darken it as described in Instruction 10 - clicking on the bottom, centre square 3 times on this occasion. 29. Offset the two shapes as shown left, select them both and Right Click/Merge As Single Object. 30. Duplicate this object. Put the two pieces in place as shown, then narrow the left-hand one by around 5 pixels to allow for perspective.
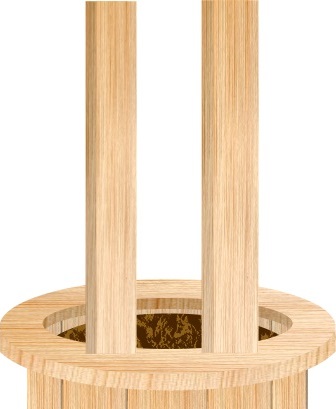
31. Using the Object Paint Eraser, carefully erase any parts of the posts that overlap the ellipse that forms the ledge of the planter (see left). When using the Eraser, remember to take your finger OFF the mouse button frequently so that if you make a mistake you can use a single UNDO and won't have to start all over again!
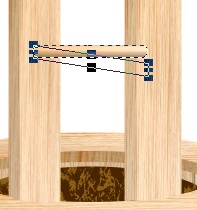
32. Using the Path Drawing Tool, Shape - the Default ROUNDED Rectangle (left): Color - same wood preset but changing to a horizontal grain again: Mode 3D Trim: Width 7: Depth 30: draw a shape 115 x 12 pixels.
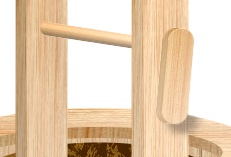
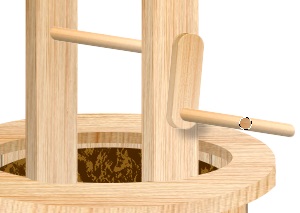
33. Right Click/Convert Object Type/From Text/Path to Image. We are doing this so that when we Slant the object, the grain will slant with it. 34. Use the Transform Tools/Slant on the centre, right-hand node to Slant the shape downwards until it measures 115 x 31 pixels. Put in place as shown. 35. Select the right-hand post and Right Click/Arrange/Bring to Front. 36. Select the left-hand post and darken it slightly as before as this post will be in the shade of the roof (I am assuming that you know how to do this from now on). I have used a single click to darken it in my drawing. 37. Returning to a vertical grain, still using the Rounded Rectangle Shape: Mode - 3D Round: Width 1, Depth 1: draw a shape 25 x 95 pixels. 38. Right Click/Duplicate. Select the back one of these objects and darken it and then offset the duplicate to the left as shown. 39. Select both objects and Right Click/Merge As Single Object. 40. Use the Transform Tools/Rotate & Flip to rotate the object 5o to the right and put in place as shown. Note: I always run the Sharpen Tool over objects such as this, as rotating them often seems to blur them a little - but it's up to you whether you do this or not. 41. Add a Dropped Shadow to this Object using Right Click/Shadow - set Transparency to 70 and OK. 42. Right Click/Split Shadow and Select the shadow ONLY. 43. Use the Object Paint Eraser to erase any shadow that does not fall on the post or the ledge of the well (see left). 44. Now select the cross-bar that you made in Instructions 32-34 and Right Click/Duplicate it. 45. Put in place on the handle as shown. 46. Using the Circle shape and 2D Mode draw a small circle 12 x 12 pixels. 47. Put this in place on the handle as shown.
48. Now select the handle and use the Object Paint Eraser to erase all the excess part of the handle (see left).
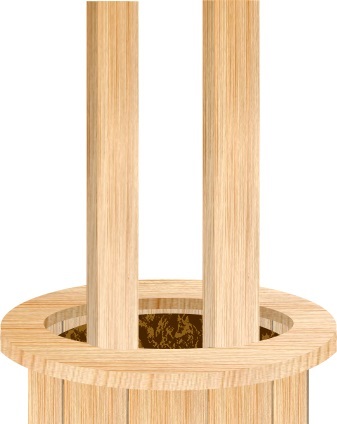
49. Select each of the posts and apply the SAME dropped shadow as you applied in Instruction 41 to them, again, splitting them and erasing any excess that is not needed. NOTE: you will need to erase any shadow that falls on the front ledge of the well - see left! |
|
|
ROOF 50. Using the Rectangle Shape, Color - same preset (with horizontal grain), Mode 3D Round: Width 1: Depth 0: draw a shape 275 x 50 pixels. 51. Now use the Transform Tools/Perspective to narrow the top line of the shape as shown (if necessary you can drag my picture into PI and form your shape over the top of mine for accuracy).
52. Right Click/Convert Object Type/From Text/Path to Image. Right Click/Duplicate this object. 53. Now click on the Transform Tools/Rotate Freely button and rotate the shape until it is in line with the side edge of the previous shape, as shown.
54. Now Duplicate this shape and use the Transform Tools/Rotate and Flip to flip the shape Horizontally. Put this in place as shown left then click on the cross-bar and Right Click/Arrange/Bring to Front.
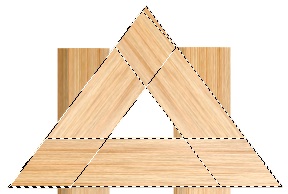
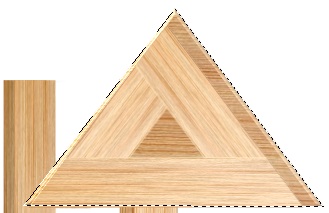
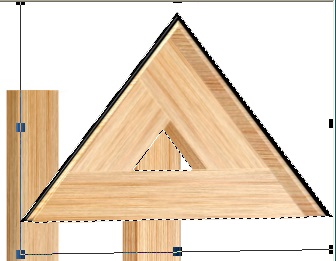
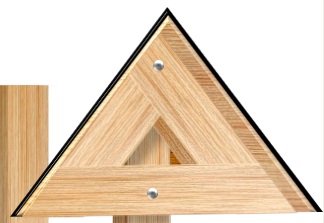
Your three pieces should now look like the ones shown left.
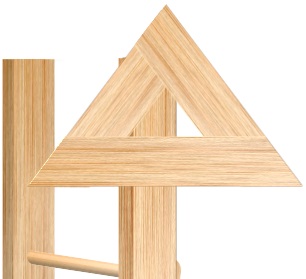
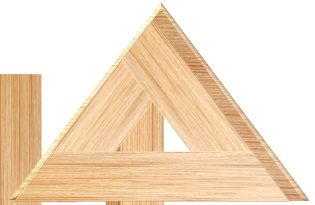
55. Now Select the two side pieces of the triangle and use the Object Paint Eraser (on straight lines) to Erase the excess parts of those pieces as shown.
56. Merge these three shapes (called the 3-part triangle from now on) and put in correct position on the well as shown.
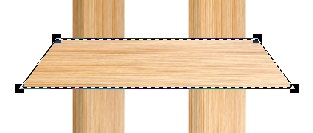
57. Now using the Triangle shape shown left, Color - Same Wood preset (horizontal grain): Mode 2D: draw a shape approximately 276 x 202 pixels and align this with the bottom of the 3-part triangle you just made. Right Click/Arrange/Send Backward behind the 3-part triangle.
58. Go into Path Edit and edit the shape so that the expanded right-hand edge runs parallel to the edge of the 3-part triangle as shown. Exit Path Edit and return to 2D Mode. 59. Right Click Duplicate this shape and change the Mode to 3D Round: Width 5: Depth 30.
60. Right Click/Arrange/Send Backward until this is behind the dark triangle and then go into Path Edit. Edit the shape so that the right and left edges are expanded slightly. When you are happy with the result, exit Path Edit and return to 3D Round Mode. The triangle should then have a light border on the left and right as shown. 61. Select the dark triangle and the light one (not the 3-part one!) and Right Click/Merge As Single Object.
62. Now use the Object Paint Eraser to remove the part of the object behind the gap in the 3-part triangle.
63. Using the Rectangle Shape, Color - same preset (with horizontal grain), Mode 2D: draw a shape 100 x 15 pixels. 64. Right Click/Convert Object Type/From Text/Path to Image. Click on the Transform Tools/Rotate Freely button and rotate the shape until it is in line with the right side edge of the gap in the 3-part triangle, as shown.
65. Right Click/Arrange/Send Backward until this shape is behind the 3-part triangle as shown.
66. Using the Triangle shape again, Color - Black: Mode 3D Round: Width 5: Depth 30: draw a shape slightly larger than all the triangles made so far. Right Click/Arrange/Send Backward to send this triangle behind the them. 67. Go into Path Edit and edit the shape to expand the side edges as shown. Exit Path Edit.
68. Right Click/Convert Object Type/From Text/Path to Image and then erase the part behind the gap in the 3-part triangle as before. 69. Select ALL sections of the roof side made so far and Right Click/Merge As Single Object.
70. Use the Transform Tools/Slant on the centre left node to Slant that side of the object down very slightly as shown. If this looks slightly blurred as a result, you can run the Sharpen Tool over it to bring back a little detail, but this if up to you.
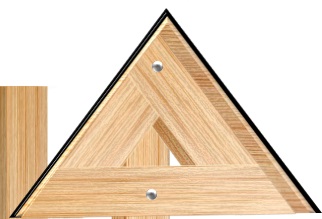
71. Using the Circle Shape, Mode 3D Round: Color - Silver 3 from the Easy Palette/Text/Path Effects/Material Attribute Gallery/Metallic: draw a small shape for a bolt-head. Duplicate this and put these in place on the roof side as shown. Select ALL sections of the roof side & Right Click/Merge As Single Object.
72. Add a Dropped Shadow to this Object using Right Click/Shadow - set Transparency to 70 and OK. 73. Right Click/Split Shadow and Select the shadow ONLY. 74. Use the Object Paint Eraser to erase any shadow that does not fall on the front post (see left).
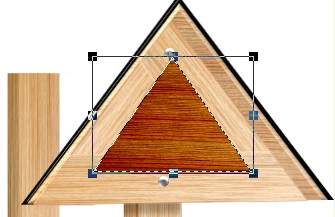
75. Now using the Triangle shape again, Color - same wood preset with horizontal grain:Mode 2D: draw a shape approximately 160 x 116 pixels and darken this quite a lot using the same methods as before but this time using the bottom right square about 4 times. Right Click/Arrange/Send to Back and put in place as shown.
76. Now we are going to make the roof itself. We're going to do this in a rather unorthodox way, so first of all I want you to open a new canvas, 275 x 205 pixels. 77. Using the Path Drawing Tool, Shape - Rectangle: Color - dark pinky-grey Hex#C39F9E: Mode 2D: draw a rectangle 100 x 70 pixels. 78. Select the Paintbrush Tool, Size 6: Color Blue #446D8C: Soft Edge 100 and then click on Effect/Creative/Paint on Edges to put a blue border around the tile (see left).
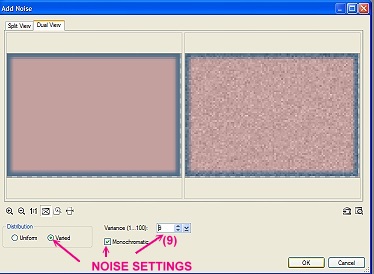
79. Now Click on Photo/Noise/Add Noise and in the box that appears click on the Options button. 80. In the Add Noise box that comes up, choose Variance 9 and check 'Varied' & 'Monochromatic' and OK (see left).
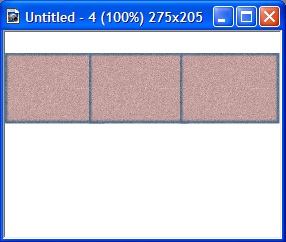
81. Make 2 duplicates of this tile and then arrange them on your canvas as shown (note that they are NOT at the TOP of the canvas!).
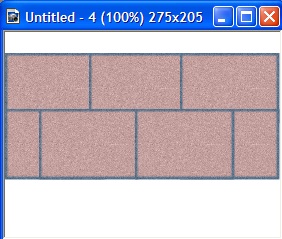
82. Make FOUR more copies of the tile and then arrange those as shown on the picture left. NOTE: Line up the two edge tiles first and then put the other two in position - don't let any tiles stray off the canvas!
83. Select your original three tiles on the top row and then Duplicate these. Use the Transform Tools/Resize to make this object 63 pixels high and put in place as shown. 84. Select ALL the tiles and Right Click/Merge As Single Object.
85. Using the Wood preset again with a horizontal grain: Mode - 3D Round: Width 3: Depth 30: draw a rectangle the width of your canvas and then place this at the bottom. Right Click/Arrange/Send to Back. Make sure that it is lined up at the sides with your tiles and then Merge the two objects as a single object.
86. Now draw another 3D Round rectangle at the top of the canvas, to fill the rest of the white area and deep enough to slightly overlap the tiles. Fill this with the Silver 3 preset from the Easy Palette/Text/Path Effects/Material Attribute Gallery/Metallic. Mine is Width 2: Depth 24: but it doesn't matter if yours is slightly different. Make sure that this is the same width as your tile object.
87. Select all parts of your roof and Right Click/Merge As Single Object - then move the roof object to your main canvas and put into the position shown left.
88. Now use the Transform Tools/Slant on the top, centre node to slant the object right until the right edge lies along the slope of the roof side (see illustration).
89. Now use the Transform Tools/Resize to narrow the roof until it just fits onto the canvas as shown.
90. Finally use the Transform Tools/Distort on the two left-hand nodes to pull the roof into the shape illustrated. Again, you are welcome to drag my illustration into PI and work on top of it, if that helps to get the perspective correct.
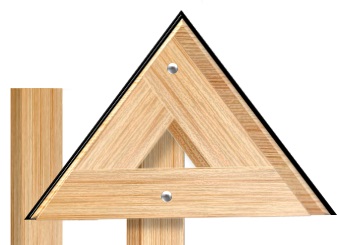
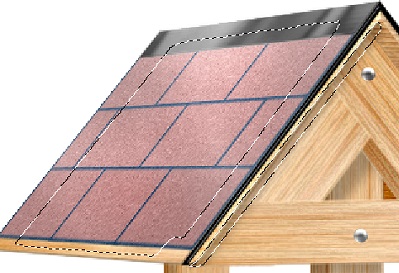
91. Finally add a dropped shadow to the roof with the same settings as you had before (70% Transparency). Right Click/Split Shadow. Select the shadow and erase all the shadow that falls BELOW the roof and also along the line of the edge of the light coloured triangle edge. This creates a shadow inside that side section of the roof very effectively!
|
|
|
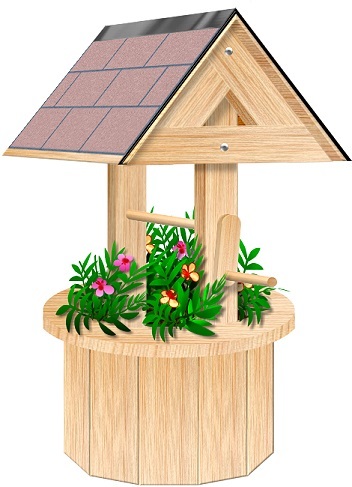
SOIL, FLOWERS & FINISHING TOUCHES As you can see from the last picture in the roof section, I have already chipped away at the top of my soil object to make it look a little more realistic but this is optional and may well be unnecesary, depending on how many plants you intend to include. Now for the flowers. You may use any flowering plant objects at your disposal but do make sure that you use ones that are suitable for a picture made with the path tools. Those from another medium, such as plants cut out of photographs may not look right if you include them. The plants in my picture were made using my quick and easy plants tutorial HERE Opposite is a picture of the plants I made using the tutorial and which I'm going to use to plant out my wishing well.
92. Add your plants to the planter. Be sure to add the SAME dropped shadow, with the SAME transparency that you used before (70%). You will also need to Right Click/Split Shadow on all of the plants, select the shadow and erase any excess that doesn't actually fall on the planter.
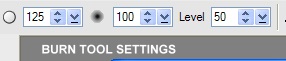
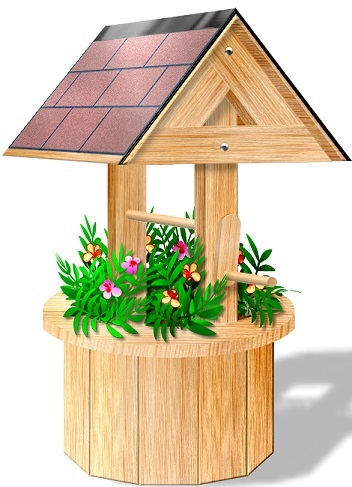
93. Now Select the front section of the base of your planter and using the Retouch Tools/Burn on the Settings shown opposite, carefully shade the right hand side - adding a little more shading as you move left i.e. I make one stroke down over the whole of the are to be shaded, move right about a third of the remaining area of the planter base to the right, add another stroke and then repeat that one more time to shade the final part of the area. 94. Do the same to the ledge and its' edging piece as shown. 95. Using the same tool I also shaded the posts and part of the handle, the triangular roof side-section and intermittent parts of the roof tiles with this tool to add a little dimension to them. 96. Using the Retouch Tools/Dodge on the SAME settings as the Burn Tool, I also highlighted the left-hand side of the base, the same side of the ledge and its' edging and even added a little highlight to the roof to simulate sunshine. 97. Using the Dodge & Burn Tools on the plants also gives them a completely different dimension. As we have the sunshine coming from the left on the this picture, lighten the plants on the left and darken the ones on the right and at the back for greatest effect. 98. In my final picture, I added a gradient to the background and then added a little texture to the ground around the planter using the Adobe Texturizer Filter. 99. I also added two more shadows - the first to the back post. This was done by Duplicating the shadow from the Triangular side section, erasing what I didn't need and putting the little remaining bit in position. 100. The second shadow was added by selecting the ledge side and adding a Dropped Shadow to it. I then Split the shadow and erased the excess as shown left. 101. The trees in the background are a photographic cut-out but have been faded to give prominence to the planter and so that the photographic medium wouldn't clash with the path-tool-drawn part of the picture. 102. Finally I merged all parts of the Planter and added a shadow along the ground.
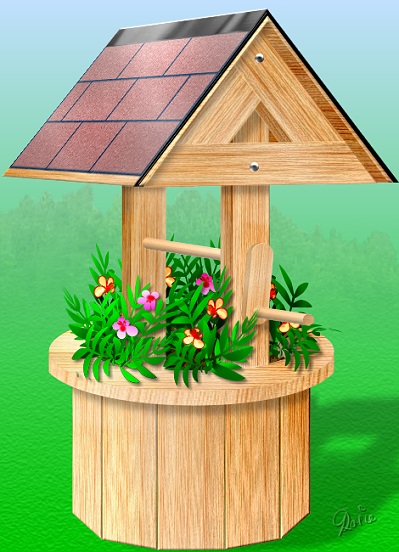
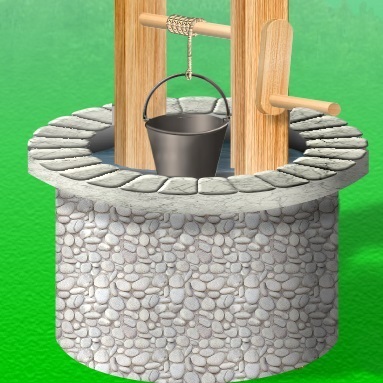
Opposite is another version of the well which I made very quickly to show you how another variation might work - not very convincing or lifelike LOL... but it gives you some idea of how this might work. It's possible to tinker with this kind of object to make all kind of variations for different uses but now it's up to you to create your own ideal wishing well! |
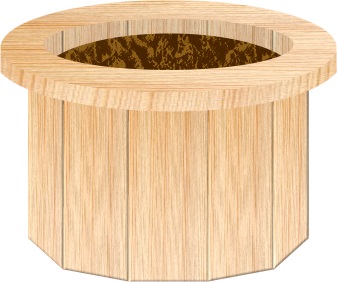
The Finished Wishing Well Planter - perfect for your garden! |
|
 |
|
|
Free Spirit Graphics If you would then like an invitation to join, please Email Me for details. We'd love to have you along! |
|
|
If you need any help - or want to make suggestions to improve this tutorial - or for new ones |
|


This site © Rosie Hardman-Ixer 2000 - 2009 |