
VENETIAN BLINDS PI VERSION: 6. LEVEL: Beginners MAIN TOOLS USED: Path Tools, Easy Palette Layer Manager & Gif Animator. TERMS OF USE: Please Read - Thank You! |
 |
INSTRUCTIONS |
|
|
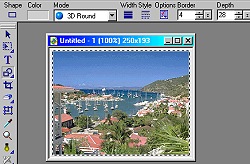
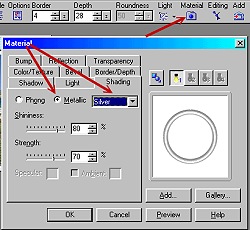
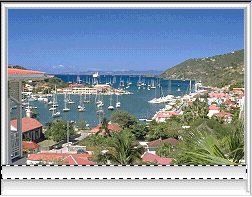
THE WINDOW 1. Import the picture you wish to use for the scene through the window. Ideally this should be approximately 250 x 200 pixels in dimensions (mine is 250 x 193 pixels). 2. Using the Outline Drawing Tool - Shape - Rectangle; Colour - Grey; Mode - 3D Round; Border 4; Depth 28; draw a 'window frame' around your picture. 3. Keeping the frame selected, click on the Material button/Shading tab - and check the Metallic radio button and Silver in the pull down box as shown. 4. Click OK. 5. Right Click and Merge All. |
|
CREATING THE FIRST SLAT 6. Using the Path Tool - Shape - Rectangle; Colour - White; Mode - 3D Round; Border 4; Depth 30; draw a slat in the position shown. This should be the width of the picture and approximately 15 pixels in Depth.
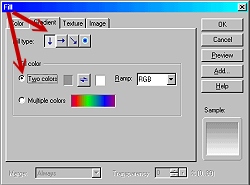
7. Keeping the slat selected, Click on Edit/Fill/Gradient. Choose a Top-to-bottom fill; Two colours - white and medium grey; and click OK.
8. Click on the light button and move the cursor over the slat until you have a slat that is light at the front and darker at the back - as shown.
9. Copy and Paste the slat and move the duplicate on top of the first slat as shown - so that it just covers the back of the first slat.
10. Use the Line and Arrow Tool, draw a line: Shape - Straight; Colour - dark grey (or colour of your choice); Mode - 2D; Width 1; Style - Plain; Arrow - None. This should reach from the centre of the first slat to the top of the second one as shown.
11. Copy and Paste this line and move into position on the other side of the blind as shown.
12. Delete the 2nd slat.
13. Select the first slat - then Right Click and Select All Objects. Right Click and GROUP (Do NOT Merge!).
14. Your pic should now look like the one opposite. |
    |
CREATING THE BLIND
15. Copy and Paste the Slat section and put the second slat in place on top of the first as shown.
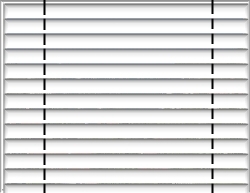
16. Repeat this procedure until the 'window' is covered. DO NOT worry at this stage if all the slats are perfectly in line - or perfectly spaced above one another!
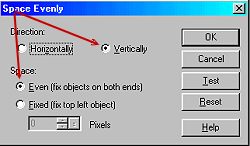
17. Select ALL the slats - Right Click/Align/Left. Whilst they are still selected Right Click/Align/Space Evenly - check the Vertically radio button and make sure Space Even (fix objects on both ends) is also checked as shown.
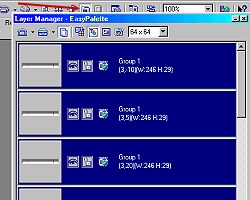
18. With all the slats still selected - open the Easy Palette, Layer Manager - Click on the Padlock to lock all items in place and then Right Click and Ungroup.
|
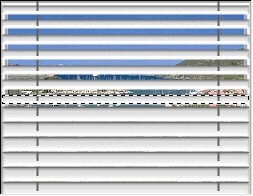  
|
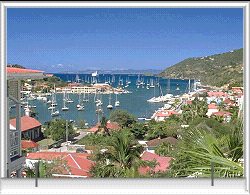
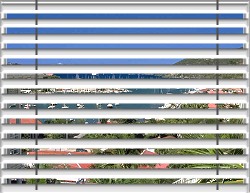
CREATING THE FRAMES 19. Before you go any further, save the entire image of closed blinds as 1.jpg. I usually do this to my desktop so I can find the finished frames easily for animation. 20. (This bit is easier if you Zoom in to about 200%!). In the Layer Manager select the first slat (it should be the third item down) and, using the Transform Tool/Resize, narrow the slat a little from the top and bottom as shown. Try to keep the sizes as even as possible. 21. When you have completed all the slats (see illustration) - save this as 2.jpg. 22. Once more, using the same method, narrow the slats to the size shown opposite. 23. Save this as 3.jpg. |
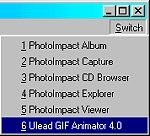 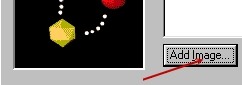     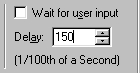 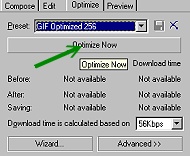 |
CREATING THE ANIMATION 24. Click on Switch/ULead Gif Animator 25. When Gif Animator opens, click on Animation Wizard. 26. Click on Add Image. Browse to your desktop - click on 1.jpg and Open. Repeat to add 2.jpg. Repeat to add 3.jpg. Click on Next. 27. Check the Photo-oriented (Dither) radio button and click on Next. 28. In the next box change the Delay Time to 50; click on Next; then Finish in the final box. 29. Right Click on frame 2.jpg and then Duplicate. 30. In the Duplicate box make 1 copy and OK. 31. On your keyboard, hold down the ALT button and then use the Down Arrow Key to move the frame 2 jpg to the bottom of the list. 32. Highlight frame 1.jpg in the list and change the delay to 150. 33. Highlight frame 3.jpg in the list and change the delay to 400. 34. (If you want to see your blinds in action you can click on the Preview tab here!) 35. Click on the Optimise tab and then on Optimise Now. 36. Click on File/Save As - give a title to your file and Save! |
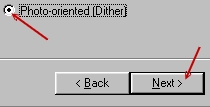
|
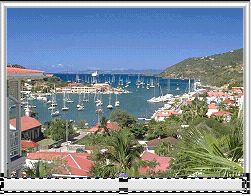
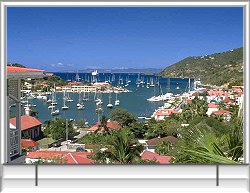
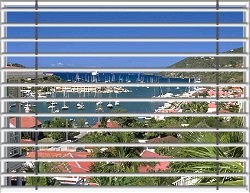
| Your finished blinds! |
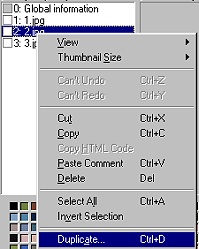
 |
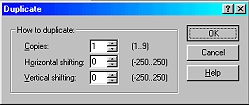
|
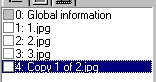
|
Free Spirit Graphics If you would then like an invitation to join, please Email Me. We'd love to have you along! |
|
|
If you need any help - or want to make suggestions to improve this tutorial - or for new ones |
|
This site © Rosie Hardman-Ixer 2001/2/3 |