
VALENTINE HEART (Animated) PI VERSION: 7. LEVEL: Animation for Beginners MAIN TOOLS USED: ZMerge Tool: Layer Manager: Path Tools: Stamp Tool: Effect/POE: Transform Tools: EasyPalette: Gif Animator TERMS OF USE: Please Read - Thank You! |
 |
INSTRUCTIONS |
|
  
|
DRAW THE HEART 1. Open a new, white canvas - 200W x 200H pixels. 2. Using the Path Tool/Custom Shape - Heart, Color deep red, Mode 3D, Border 15, Depth 30 - draw a heart approximately 80W x 140H pixels. 3. Click on Materials/Shading tab - check the metallic box (any metal) - and OK. 4. Keeping the heart selected, click on the Stamp Tool and select the pearl1.ufo stamp. 5. Using the Stamp settings shown left, click on Effect/Paint on Edges - to make an edging for your heart. 6. Deselect the heart and beads (click anywhere on the white area) and then reselect the bead edging - Right click/Arrange/Send to Back. |
|
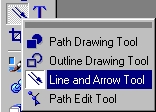
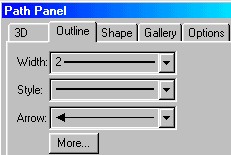
DRAW THE ARROW 7. Open a new canvas - 220W x 50H pixels. 8. Using the Path Tools/ Line & Arrow Tool - Color Grey, Mode 3D - on the settings shown opposite - draw an arrow as shown. 9. Click on Materials/Shading tab - check the metallic box (any metal) - and OK. 10. Using the Path Tool/Custom Shape - parellelogram1(yes! that is the way they spell it in the program - DUH!), Color grey, Mode 3D, Border 2, Depth 30 - draw a shape for the arrow feathers as shown. Use the Materials box to change the shading to metallic again if necessary. 11. Open the EasyPalette/Material Attribute Gallery/Bump and click on Bump M56 as shown here - or another of your choice. 12. Right Click/Convert Object Type/ From Text/Path to Image. 13. Use the Transform Tool/Resize to shorten the height of the piece. 13. Right Click/Duplicate this piece. 14. Use the Transform Tool/Rotate and Flip/Rotate Horizontally to flip this piece and put in place as shown. 15. Right Click/Select All Objects. Right Click/Merge as Single Object. |
|
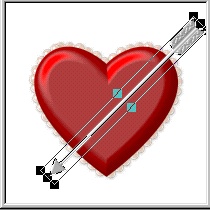
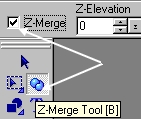
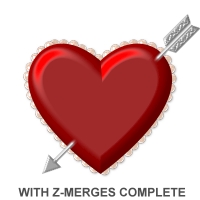
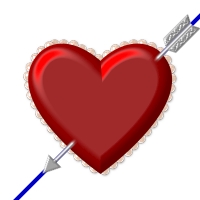
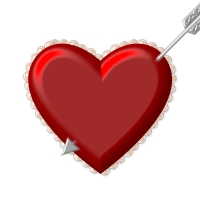
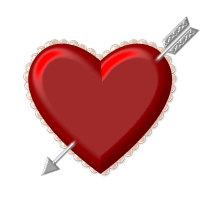
SETTING UP THE PIECES FOR THE ANIMATION 16. Move the arrow to the heart canvas and close the arrow canvas without saving. 17. Use the Transform Tool/Rotate by degree to rotate the arrow 45 degrees counterclockwise. 18. Put the arrow in position on the heart. 19. Select the heart and click on the ZMerge Tool and check the box as shown. 20. Select the arrow and click on the ZMerge Tool and check the box once more. Change the Z-Elevation to 13. Your arrow should now look as if it is piercing the heart. If it doesn't trying changing the number in the Z-Elevation box a little at a time until you get this effect. |
|
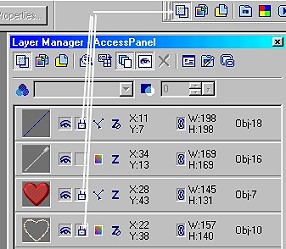
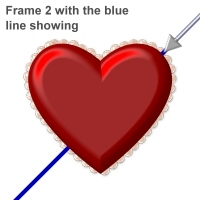
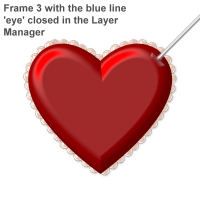
MAKING THE FRAMES FOR THE ANIMATION 21. We want to be sure that we move the arrow along a straight line for the animation - so first of all we are going to draw a line (using the Line and Arrow Tool) running from side to side of the box along the line of the arrow. Make it a nice, bold, contrasting colour so you can see it easily (see opposite). I chose blue. We're going to make it invisible when we make the frames so it doesn't matter what colour it is. You will find that, because of the Z-Merges it will be behind the heart and arrow. This is fine. 22. Click on the Layer Manager button. 23. In the Layer Manager click on the boxes shown to lock these three items in place - this will stop them moving about by accident (SO easy to do!) when you make your frames. 24. Now Click on the eye icon in the Layer Manager for the blue line and the arrow. This will make these two elements of your picture invisible on your graphic. Save your picture as Frame 1. When saving your frames - be sure to do this as a Merged picture - either gif, jpg or png format - NOT as a ufo! 25. 'Reopen' the eye icon for the blue line and arrow by clicking on the eye again.26. Move your arrow to the place shown and close the eye icon for the blue line again. Save this as Frame 2. 27. 'Reopen' the eye icon for the blue line and move your arrow along it to the place shown. Close the eye icon for the blue line again. Save this as Frame 3. 28. 'Reopen' the eye icon for the blue line and move your arrow along it until it is just coming out of the heart. Close the eye icon for the blue line again. Save this as Frame 4. 29. 'Reopen' the eye icon for the blue line and move your arrow along it until it is in place for the final frame. Close the eye icon for the blue line again. Save this as Frame 5. |
|
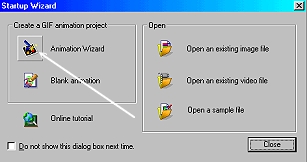
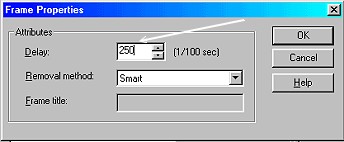
ANIMATING THE HEART 30. Open Gif Animator 5. Click on Animation Wizard 31. Type in 200 for the Width and 200 for the Height. Click Next. 32. Click on Add Image. Browse to where you saved your frames. Highlight the frame/s you wish to import and click Open. (SEE NOTE BELOW). NOTE: Either add your frames one by one or Shift/Click on them in REVERSE order from 5 to 1. This will ensure that they come into Gif Animator in the correct order. I don't know why this is the case - but it is!!! Click Next. 33. Click Next in the next box. 34. Click Finish in the final box. 35. In Gif Animator Ctrl/Click on Frames 1 and 5 only to highlight them then click on the Frame Panel Commands button (arrowed). 36. Click on Frame Properties and then change the Delay time to 250 and click OK. 37. Click on Optimise tab. 38. Click on Save and saved your finished graphic to your chosen folder. |
 |
You might like to make your version with a fancy border and background like the one at the top of the page, or add a message and sparkle to your final frame - like the one opposite. |
 |
|
|
Free Spirit Graphics If you would then like an invitation to join, please Email Me. We'd love to have you along! |
|
|
If you need any help - or want to make suggestions to improve this tutorial - or for new ones |
|
This site © Rosie Hardman-Ixer 2001/2/3 |