
TWO-TONE GOLD PICTURES PI VERSION: 6/7. LEVEL: Beginners MAIN TOOLS USED: Edit/Trace Tool: Formatting Tools: EasyPalette: Retouch Tools/Blur OPTIONAL DOWNLOADS: Download the pattern I have used for this tutorial HERE TERMS OF USE: Please Read - Thank You! |
 |
|
Alternatively, you can use your own black and white designs for this tutorial. Try to choose pictures without too much small detail for the best results. A good source of pictures are Dingbat Fonts such as those available at House of Lime or patterns for Stained Glass. The presets I am going to use are CarolOyl's Gold Leaf presets - the best gold presets I have found on the web. |
|
INSTRUCTIONS |
|
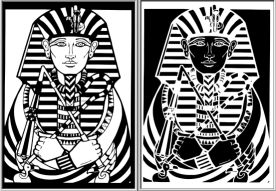 |
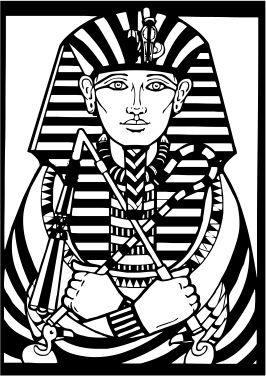
THE PATTERN 1. First of all download the pattern provided if you are going to use it or, if you are using a black and white pattern you already have on your computer - open this now. 2. If you are using a dingbat font, colour this black on a white background and use a font size large enough for your finished picture. 3. Once you have your black and white picture - Edit/ Duplicate this base image. 4. Using the Duplicated image - click on Format/Invert. You should now have two images as shown. |
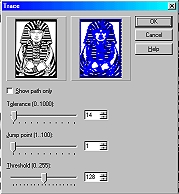 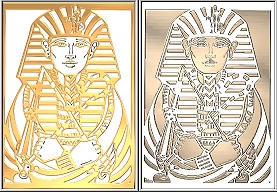  |
GOING FOR GOLD.... 5. Using the original base image, click on Edit/Trace/Image - accept the defaults (Numbers are usually 14 : 1 : 128) - and OK. 6. Now change the Mode on the attributes bar to 3D Round. 7. Using the Duplicate base image, click on Edit/Trace/Image - and change the Tolerance to 1 - and OK. 8. Now fill these two Path Objects with two contrasting gold colours. I have used Xanthous and Candescent from CarolOyl's Presets - but you may have other gold presets you prefer to use. 9. In the Path Panel, change the Border of the darker gold piece to 3 and the lighter gold piece to 2. 10. Drag the gold objects from both canvasses to a new canvas and close the black and white originals. 11. Align the two gold pieces so that they fit together as perfectly as possible with the paler gold piece behind the darker one (Right Click/Arrange/Send to Back if necessary). |
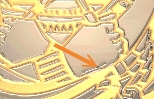 |
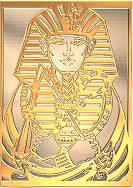
FINISHING TOUCHES 12. Often, when tracing pics you get unwanted lines such as those indicated left. It is possible to eradicate some of these by playing around with the Trace settings but often this take many tries before a satisfactory result is achieved - so we are going to do it another way. Select the appropriate gold piece - in this case the paler one and Right Click/Convert Object Type/From Text/Path to Image. Now you can use the Retouch Tools/Blur to gently smooth out imperfections in the picture. Do this carefully and you can also contour the edges of the face and neck to produce a shaded look - see final pic below. When you are satisfied with your pic, Right Click/Merge All. |
| <
|
Your gold treasure is finished and waiting to be discovered! |
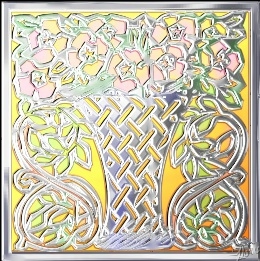 |
Art Deco Flower Basket This version of the tutorial uses silver and gold presets available in PhotoImpact. It was hand finished by converting the gold pieces to images, as above, and then colouring with the Retouch Tools/Colorize Pen using a high Transparency Setting. |
 |
|
|
Free Spirit Graphics If you would then like an invitation to join, please Email Me. We'd love to have you along! |
|
|
If you need any help - or want to make suggestions to improve this tutorial - or for new ones |
|
This site © Rosie Hardman-Ixer 2001/2/3 |