TYPE GALLERY CROSS-STITCH PI VERSION: 8 (also suitable for Version 7.0). LEVEL: Beginner MAIN TOOLS USED: Type Gallery/Hole Effect, Merges, Format Brightness & Contrast (optional). DOWNLOAD: Please download and unzip the files needed for the tutorial HERE DEDICATION: This tutorial is for Christina - a very brave and determined lady. :-) TERMS OF USE: Please Read - Thank You! |
|
INSTRUCTIONS |
|
|
|
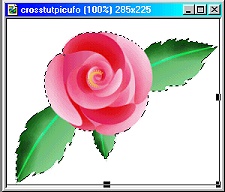
SETTING UP THE FILES This tutorial can be applied to pictures and photographs but works best on those that have large blocks of colour rather than a lot of detail. As you will see, it can be applied to free-floating objects created in PI as well as complete pictures and like most 'Effects' it will work better on some pictures and objects than others. Use the objects provided first in order to see how the technique works and then have a good time experimenting with your own pictures! 1. First of all unzip the 'tpcross.zip' file provided into a folder where you can find all the various files. 2. Move - or copy - the file called 'crossstitchbmp.bmp' to the 'Frmmask' folder inside the Ulead PhotoImpact folder on your hard drive. 3. Now - open up the 'crosstutpicufo.ufo' provided for the tutorial (pictured left)... and away we go!...... |
|
|
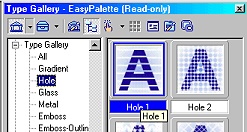
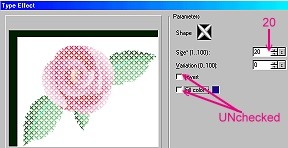
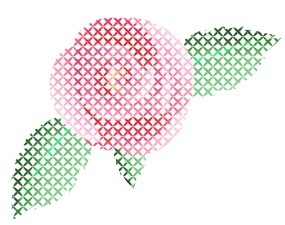
APPLYING THE EFFECT TO AN OBJECT 4. As you can see, the ufo has the rose as a free floating layer. Select it. 5. Now open the EasyPalette/Type Gallery/Hole. 6. On the Hole 1 thumbnail (though it does work with ANY of the Hole presets), Right Click/Modify Properties & Apply. 7. In the box that comes up, UNcheck the Invert and Fill boxes. 8. Now click on the Shape box at the top - Browse to the 'Frmmask' folder if this is not already showing and select the 'crossstitchbmp.bmp' that you put there. Click on Open. 9. Now change the Size to 20 by either typing it in or using the arrows or slider. NOTE: If you use the Slider to change the size you can see exactly what size your stitches are going to be and this is very handy when choosing a size to bring out the best in your picture! TIP! If you find a setting you particularly like - click on the Add button at the bottom of this box and add the setting to your Gallery in the EasyPalette - then all you will have to do to apply it to future pictures is select the picture by Right Click/All and click on the thumbnail! 10. Click OK. 11. Because this is a free floating object you can put it on any background you like. Let's add one of the backgrounds I've provided. 12. Hit the Enter key to deselect the crosses. Now click on Edit/Fill - Image tab. 13. Click on the ... button and browse to the folder that you unzipped the files to. 14. Select the 'whiteback' file and Open. 15. Click OK. OK - that's how we do it for free floating objects - now let's look at Merged pictures. |
|
|
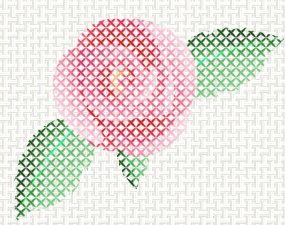
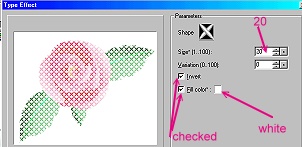
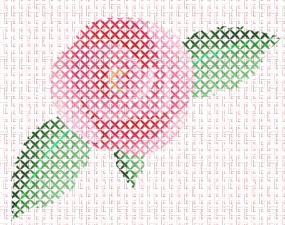
MERGED PICTURES 16. Click on Undo until the picture is back to the original free floating rose and Right Click/Merge All. 17. Right Click/All - this is important - you cannot apply the effect until you have made this selection. 18. This time, check both the Invert and Fill boxes and change the fill colour to white. 19. Browse to the shape and open it and then change the Size to 20 as before. 20. Click OK. 21. This puts a free-floating white object on top of your rose. Right Click/Merge. 22. Right Click/Copy. Right Click/Paste. This puts a new copy of the picture on top of the original. 23. Click on Edit Fill as in Instructions 12 to 15 above but this time choose the pinkback.jpg. 24. Now Right Click/Properties and change the Merge to Multiply - and OK. 25. Right Click/Merge. This should give you the picture opposite. TIP! It's worth experimenting with the different Merge methods as these can vary in effectiveness from picture to picture. OK - now let's try another variation on that - this time using a black background.... |
|
|
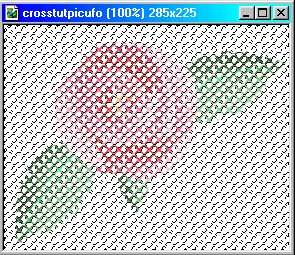
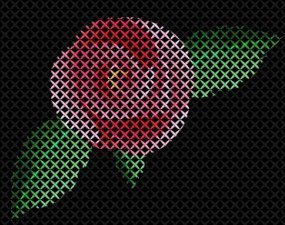
VARIATION ON A THEME.... 26. Undo again to restore the original rose ufo in a free floating layer. 27. Hit Enter to deselect the rose. 28. Now click on Edit/Fill/Color and change the background colour to black. 29. Right Click/Merge All. 30. Right Click/All - to select the whole picture. 31. Back in the Type Gallery, use the same settings as in the 'Merged Pictures' section above - but change the 'Fill color' to black. 32. Although this gives a nice 3D effect to the stitches it can also make the picture look a little dull. If this is the case, deselect the black top object by hitting the Enter key and then click on Format/Brightness and click on one of the top squares to lighten the basic picture a little. Another way to brighten the colours is to use Format/Hue & Saturation if you are familiar with it (thanks to Kathy (Ratza) from the PING Board for that tip!) |
|
|
USING A PHOTO...
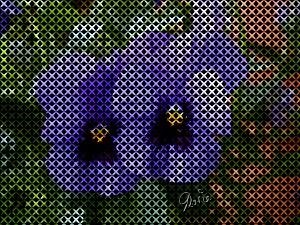
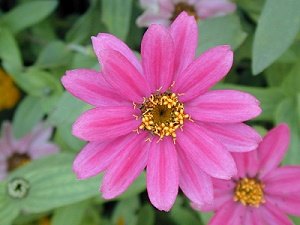
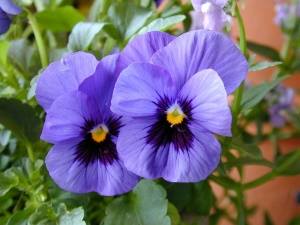
33. Open a suitable picture with clearly defined areas of colour such as the super pics
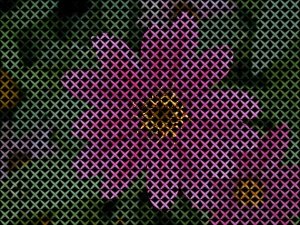
These have had a black fill applied - the first has the stitches on size 20 and the second on size 17.
Don't forget - you can always make selections from photographs and take these onto a plain background and use that part of the photograph alone for your stitching.
I showed the tutorial results to the lady I did the tutorial for and she commented that of some of these pictures could also be used as a basic guideline for a chart for stitching 'real life' cross-stitch - although some adjustments will obviously have to be made here and there.
Have fun turning your pics into cross-stitch and don't forget to let me know if you have posted your results - or email them to me - I LOVE seeing what is done with my tutorials. :-) |
 |
|
|
Free Spirit Graphics If you would then like an invitation to join, please Email Me. We'd love to have you along! |
|
|
If you need any help - or want to make suggestions to improve this tutorial - or for new ones |
|
This site © Rosie Hardman-Ixer 2001/2/3 |
