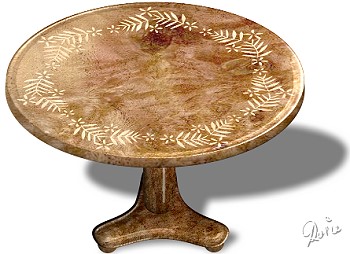
INLAID PEDESTAL TABLE PI VERSION: 8 (also suitable for 7) LEVEL: Intermediate MAIN TOOLS USED: Path Drawing Tool, Trace, Outline Drawing Tool, Transform Tools, EasyPalette/Wrap Gallery/Path Wrap, Button Designer, Format/Brightness & Contrast. DOWNLOADS: If you wish to use the same presets as I have used in the tutorial, please download my Wood Selection 2 Presets here . TERMS OF USE: Please Read - Thank You! |
|
INSTRUCTIONS |
|
|
|
TABLE TOP - PART 1 - THE INLAY 1. Open a new, white canvas, 400W x 400H pixels. 2. Using the Path Drawing Tool, Custom Shape - Leaf 2: Color - Black: Mode - 2D: draw a shape 65W x 80H pixels. 3. Right Click/Duplicate this shape then use the Transform Tools/Rotate & flip - to flip the shape Horizontally. 4. Using the Path Drawing Tool, Custom Shape - Flower 2: Color - Black: Mode - 2D: draw 4 shapes, varying in size between 35W x 35H and 40W x 40H pixels. 5. Put all these pieces in place as shown opposite, then Right Click/Merge All. 6. Click on Edit/Trace/Image - accept the default settings and OK. 7. Change the Mode from Horizontal Deform to 3D Round. 8. Open a new, white canvas, 400W x 400H pixels and drag the shape you just made to it. Close the original canvas.
9. Using the EasyPalette/Wrap Gallery/Path Wrap/Path Wrap 16 - Right Click/Modify Properties and Apply.
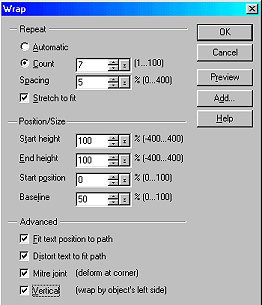
10. In the box that opens, change the Count to 7 and ensure that ALL items under 'Advanced' (including Vertical - wrap by object's left side) are checked (see settings illustration left) and OK.
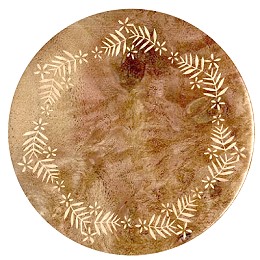
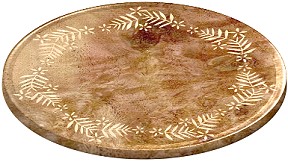
11. You now have a HUGE shape on your canvas - so click on Format/Image Size and make sure that 'Apply to/Selected Object' is checked. Change the width and height settings to 65% and OK. 12. Fill the resulting shape with a light wood preset of your choice (if you are using the presets available with this tutorial, use preset woodno4). In the Path Panel, set the Border and Depth to 2. 13. Using the Path Drawing Tool, Shape - Circle: Mode - 3D Round: Border - 2: Depth - 2: draw a shape 380W x 380H pixels. 14. Fill the circle shape with a darker wood preset of your choice (if you are using the presets available with this tutorial, use preset woodno3). 15. Right Click/Arrange/Send to Back. Make sure that your inlay design is central on the darker wood and then select both pieces of the table and Right Click/Merge As Single Object. |
|
|
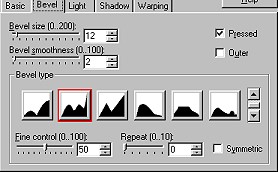
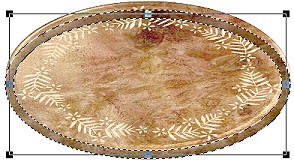
THE TABLE TOP - PART 2 16. Keeping the table top selected, click on Web/Button Designer/Any Shape. 17. In the box that opens, click on the Bevel tab. Set the Bevel size to 12, checked the 'Pressed' box and select the Bevel type illustrated. Click OK. 18. Use the Transform tools/Resize to lessen the height of your table top to 200H pixels. 19. Using the Outline Drawing Tool, Shape - Ellipse: Color - same dark wood preset: Mode - 3D Round: Border - 6 (set this under the Outline tab in the Path Panel if necessary): Depth - 3: draw a shape EXACTLY the same width and height as your table top (use the Transform Tools/Resize if necessary to achieve this). 20. Drag this shape downwards so that it's in the position shown and then Right Click/Arrange/Send to Back.
21. Select both pieces of your table top and then Right Click/Merge As Single Object. That's the top complete! |
|
|
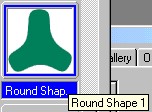
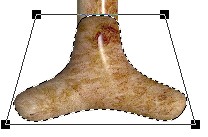
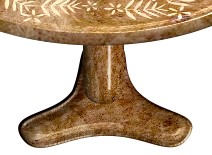
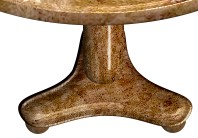
THE PEDESTAL 22. Using the Path Drawing Tool, Shape - Rounded Rectangle: Color - same dark wood preset: Mode - 3D Round: Border - 19: Depth - 30: draw a shape 40W x 110H pixels and put in position as shown. 23. Right Click/Arrange/Send to Back. 24. Now we are going to make the three legged base of the pedestal (the back leg stretched in perspective at the back). Using the Path Drawing Tool, Custom Shape - Round Shape 1: Color - same: Mode - 3D Round: Border - 27: Depth - 30: draw a shape 140W x 140H pixels. 25. Now use the Transform Tools/Resize to make the shape 180W x 110H pixels. 26. Use the Transform Tools/Perspective to narrow the top of the shape as shown. 27. Click on Web/Button Designer/Any Shape and apply the same Bevel settings that you used for the top of the table. 28. Right Click/Arrange/Send to Back. 29. Click on each piece of your pedestal in turn and then click on Format/Brightness & Contrast and click on the bottom, centre square a few times to dark each piece. 30. Your pedestal should now look like the picture opposite - with the upright piece coming down to the centre of the base - adjust this if necessary. You might also like select all three pieces of your table and Right Click/Align/Center Horizontally at this point to ensure good alignment. 31. Using the Path Drawing Tool: Shape - Circle: Color - same: Mode - 3D Round: Border - 13: Depth - 30: draw a shape 25W x 25H pixels. 32. Right Click/Duplicate. Right Click/Arrange/Send to Back for both these shapes and then put in place as ball feet under the pedestal as shown. 33. Use Format/Brightness & Contrast to darken both these shapes as in 29. 34. Finally, when you are happy with your table, Right Click/Select All Objects - then Right Click/Merge As Single Object. |
|
|
Your table awaits! |
 |
|
|
Free Spirit Graphics If you would then like an invitation to join, please Email Me. We'd love to have you along! |
|
|
If you need any help - or want to make suggestions to improve this tutorial - or for new ones |
|
This site © Rosie Hardman-Ixer 2001/2/3 |
