
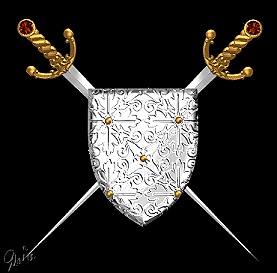
SWORDS & SHIELD PI VERSION: 7. LEVEL: Beginner MAIN TOOLS USED: Path Drawing Tool, Transform Tools, EasyPalette, Object Paint Eraser. OPTIONAL DOWNLOADS: TERMS OF USE: Please Read - Thank You! |
|
INSTRUCTIONS |
|
|
|
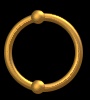
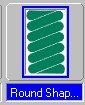
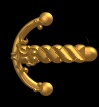
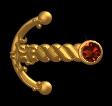
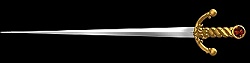
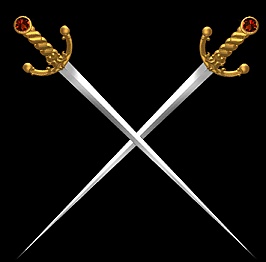
THE SWORDS 1. Open a new, canvas 450W x 400H pixels with a black background. 2. Using the Path Drawing Tool, Shape - Circle: Color - Gold: Mode 3D Pipe: Border - 4: Depth - 30: draw a shape 70W x 70H pixels. 3. Open the EasyPalette/Material Attribute Gallery/Metallic and fill this shape with the Gold 7 preset. 4. Now, using the same shape and preset but changing to 3D Round Mode and Border 7, draw two small round shapes as shown in the first illustration opposite and put them in place on the circle. 5. Now select the large circle and Right Click/ Convert Object Type/From Text/Path to Image. 6. Use the Object Paint Eraser to erase the excess part of the circle as shown. 7. Right Click/Select All Objects then Right Click/Merge as Single Object. 8. Using the Path Drawing Tool, Shape - Rounded Rectangle: Color - (Same preset): Mode - 3D Round: Border - 8: Depth - 30: draw a shape 85W x 15H pixels. 9. Right Click/Arrange/Send to Back and put in place. NOTE: Although we are going to cover this piece it IS necessary because the next shape we use has gaps in it which would show the background through if we didn't put this piece behind it. 10. Using the Path Drawing Tool, Custom Shape - Round Shape 4 (see left): Color - (Same preset): Mode 3D Round: Border - 8: Depth - 30: draw a shape 20W x 35H pixels. 11. Use the Transform Tools/Rotate and flip - to rotate the shape 90 degrees to the right and then stretch it to make a grip for the hilt as illustrated. 12. Select the the first, curved piece you made and then Right Click/Arrange/Bring to Front. 13. Using the Path Drawing Tool, Custom Shape - Decoration 6 (see left): Color - (Same preset): Mode 3D Round: Border - 8: Depth - 30: draw a shape 30W x 45H pixels. 14. Using the Transform Tools/Rotate by Degree - rotate this shape 50 degrees to the left. 15. Right Click/Duplicate this shape and use the Transform Tools/Rotate and flip, to flip the piece Vertically. Put both pieces in place on the sword hilt. 16. Now either bring into PI a gemstone which you have in your collection - or open the rubystone.ufo provided for download with this tutorial. If you are using your own gemstone use the Transform Tools to resize it approximately 25W x 25H pixels and then use the Outline Drawing Tool, Shape - Circle: Color - Same preset as above: Mode - 3D Round: Border - 2: to draw a circular edge for the jewel. If you are using the download - this has been done for you! :-) 17. Using the Path Drawing Tools: Shape - Triangle: Color - grey: Mode - 3D Chisel: Border - 10: Depth - 30: draw a shape 20W x 25H pixels and then use the Transform Tools/Rotate and flip - to flip the piece 90 degrees to the left. 18. Now use the Transform Tools/Resize to stretch the piece into a long blade 350W x 20H pixels. 19. Open the EasyPalette/Material Attribute Gallery/Metallic and fill this shape with the Silver 2 preset. 20. Right Click/Arrange/Send to Back and put in place behind the handle. 21. Right Click/Select All Objects - then Right Click/Merge as Single Object. 22. Use the Transform Tools/Rotate by Degree - to rotate the sword 45 degrees to the left - then Right Click/Duplicate the sword. 23. Keeping the duplicate selected, use the Transform Tools/Rotate and Flip to flip it Horizontally. 24. Select both swords and then Right Click/Align/Center Both. |
|
|
THE SHIELD 25. Using the Path Drawing Tools, Custom Shape - Arch 2: Color - grey: Mode - 3D Round: Border - 15: Depth - 30: draw a shape 175W x 200H pixels and then use the Transform Tools/Rotate and flip - to flip the piece Vertically. 26. Place the shield shape in the middle of the cross sword blades. 27. Fill the shield shape with any ornate silver preset of your choice. I have used one of my own Engraved Silver Presets (Toledo) - downloadable at the top of this tutorial. You could also leave the shield plain and/or decorate it with studs or a central boss - either of silver or gold as I have done. |
 |
|
|
Free Spirit Graphics If you would then like an invitation to join, please Email Me. We'd love to have you along! |
|
|
If you need any help - or want to make suggestions to improve this tutorial - or for new ones |
|


This site © Rosie Hardman-Ixer 2001/2/3 |