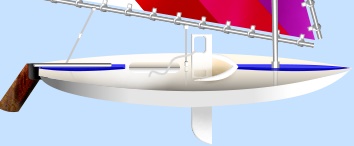
SUNFISH SAILING BOAT PI VERSION: 7/8/XL. LEVEL: Intermediate (working knowledge of the tools is assumed). MAIN TOOLS USED: Path Drawing Tool, Path Edit, Line & Arrow Tool, Continue Draw, Object Paint Eraser, Paintbrush, Retouch Tools (Dodge & Burn), Transform Tools, EasyPalette. OPTIONAL DOWNLOADS: TERMS OF USE: Please Read - Thank You! |
|
INSTRUCTIONS |
|
|
PLEASE READ! - TURNING THE SHADING IN 3D TRIM In the first section we are going to make a number of pieces in 3D Trim mode. On some of these I am going to ask you to 'Turn the 3D Trim shading through 90o'. To do this you will need to use the following steps on each of the pieces: To turn 3D Trim shading through 90o:a. Create the shape to the dimensions stated and do any path edit work where appropriate. b. Click on the Transform Tools/Rotate & flip and flip the shape 90o to the left. c. Right Click/Convert Object Type/Reset Text/Path Object. d. Flip the shape back 90o to the right. NOTE: Border settings will change after turning the shading. Leave them at the new setting unless specifically instructed otherwise. You will find that the 3D Trim shading now goes from left to right. |
|
|
|
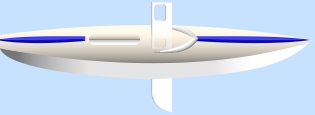
THE HULL 1. Open new canvas 370W x 400H pixels with a pale coloured background (I am using a pale blue, Hex#C6E2FF). 2. Using the Path Drawing Tool: Custom Shape - Arch 2: Colour - (any you like, I am using a creamy colour - Hex#FFF7E8): Mode - 3D Trim: draw a shape 35W x 45H pixels and then use the Transform Tools/Resize to make the shape 35W x 315H pixels. 3. Now use the Transform Tools/Rotate & flip to flip the shape 90o to the right and Right Click/Convert Object Type/Reset Text/Path Object. 4. Flip it back left - you will see that the shading has changed from a top to bottom shading to a left-to right one! 5. Now flip it back right and the shading is the way we want it. (Goodness knows why we have to go through all this to turn the shading but until Ulead make it easier, we're stuck with it LOL!!!). Your first shape should now look like the one opposite. 6. Go into Path Edit and move the two left-hand nodes closer together and then use the control handles to create a slightly more pronounced curve in the hull as shown. Note that the top line should be slightly flatter than the bottom one. 7. Exit Path Edit and go into Continue Draw mode. 8. Using the Rounded Rectangle, draw a shape approximately 50W x 10H pixels as shown. If you need to, go into Path Edit to position this perfectly. 9. Deselect the hull shape and change the Color setting on the Attribute Toolbar to white. 10. Now, using the Ellipse, draw a shape 315W x 35H pixels. Right Click/Arrange/Send to Back and put in place as shown. 11. Go into Path Edit and create the shape shown. Make sure that the right and left nodes meet the points at the ends of the Hull perfectly (use the Toggle button in Path Edit to check this). 12. Exit Path Edit mode and return to 3D Trim. 13. Now turn the trim shading as shown in the red instructions at the top of this tutorial.
14. In the Path Panel, change the Depth setting to - (Minus) 30. Your picture should now look like the one opposite.
15. Using the Rounded Rectangle, Border - : Depth - _ (Minus) 20: draw a small shape 58W x 9H. Right Click/Arrange/Send to Back. 16. Put in place as shown. 17. Change the Color setting back to the cream by clicking on the first piece you made and draw another small shape, Border - 4: Depth - 12: 58W x 6H pixels.
18. Right Click/Arrange/Send Backward to send this behind the hull top. You won't be able to see much division between this and the hull top at the moment - that's fine.
Your boat should now look like the one opposite.
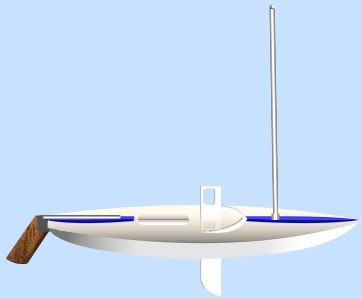
19. Now for some decorative stripes for the hull (these are optional!). Using the Custom Shape Arch 2 again, Mode - 3D Round, Border - 27: Depth - 3: draw a shape approximately 9W x 9H pixels. 20. Use the Transform Tools/Rotate & flip to flip it 90o to the right. 21. Use the Transform Tools/Resize to make the shape 118W x 9H pixels. 22. Go into Path Edit and drag the bottom, left-hand node up slightly. Exit Path Edit to return to 3D Round and put the piece in place 23. Duplicate the blue stripe and use the Transform Tools/Rotate & flip to flip the shape Horizontally. Lessen the width so that it fits between the two points shown left. 24. (It helps to Zoom in to 200 or 300% here!) Using the Custom Shape - Arch 2 again, Mode - 3D Round: Border - 3: Depth - 15: draw a small shape and then use the Transform Tools/Resize to stretch it until it is 33W x 45H pixels. 25. Go into Path Edit and Add a node to the bottom line of the shape. 26. Pull this node upwards until it almost meets the top of the arch and then use the control handles to create the shape shown. 27. Exit Path Edit mode and return to 3D Round - then use the Transform Tools/Rotate & flip to flip the shape 90o to the right. Put in place as shown. 28. Now we're going to make the 'Dagger-board' (a removable keel which slots through the boat hull). 29. Go into Path Edit and move the bottom left-hand line upwards to the point shown. 30. Now select the bottom line of the shape and convert this to a curve - then use the control handles to create the shape shown. 31. Exit Path Edit and go into Continue Draw mode. 32. Using the Rounded Rectangle shape, draw a small rectangle as shown. Return to 3D Round mode. 33. Adjust the lighting to get the Board nice and white. 34. Put the board in position on the boat and then Right Click/Arrange/Send to Back. 35. Right Click/Convert Object Type/From Text/Path to Image. 36. Right Click/Duplicate this piece. 37. Align this piece exactly over the top of the one at the back of the boat and then use the Object Paint Eraser to remove the excess board as shown. 38. Duplicate the small, remaining piece of the front daggerboard and then use the Transform Tools/Rotate & flip to flip the Duplicate Vertically. 39. Lessen the height of this piece and then Right Click/Properties. Set the Transparency to 60% and OK. This creates the reflection of the dagger-board on the boat hull. 40. Using the Rectangle shape, Color - a medium brown wood preset of your choice: Mode - 3D Round: Border - 5: Depth - 30: draw a shape 25W x 48H pixels for the rudder. 41. Use the light bulb in the Path Panel to put the light on the left-hand outside edge of the shape. 42. Now use the Transform Tools/Slant to slant the shape as shown. 43. Go into Path Edit and move the bottom, left-hand node upwards a little. Convert the bottom line to a curve and then create the shape shown. Exit Path Edit. 44. Right Click/Arrange/Send to Back and put in place as shown. 45. Using the Rounded Rectangle shape, draw a small, dark grey shape 10W x 16H pixels and put in place between the boat and the rudder. 46. We need something to steer the boat with - so make a handle for the rudder by drawing a silver rectangle, Color - Hex#C8C8C8: Mode - 3D Round: Border - 2: Depth - 30: 80Wx 4H pixels. In the Material Gallery/Shading tab, check 'Metallic' and OK.
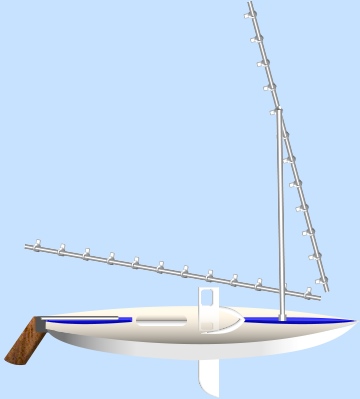
47. Using the same silver but 3D Trim mode, draw a rectangle 210W x 5H pixels for the mast. 48. Right Click/Convert Object Type/From Text/Path to Image. 49. Use the Transform Tools/Rotate & flip to flip the shape right or left through 90o degrees and put the mast in place. 50. Now draw a small rectangle to form the fixing block at the bottom of the mast. I did mine in 3D Trim and then turned the shading again... but you can do this in 3D Round if you wish. 51. A very small ellipse in 3D Round, Sent to the Back, finishes off the top of the mast. Now onto the booms, sail and rigging! |
|
|
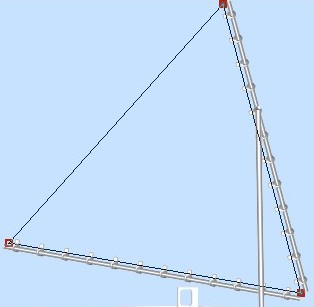
BOOMS, SAIL AND RIGGING 52. Using the Rectangle shape, Color - grey Hex#D6D6D6: Mode - 3D Trim: Border - 3: Depth - 30: draw a shape 300W x 4H pixels for the lower boom. (Again, in the Material box/Shading make sure that Metallic is checked. 53. Right Click/Convert Object Type/From Text/Path to Image. 54. (It helps to Zoom in to 200 or 300% here too!). With the Outline Drawing Tool, draw a small ellipse, Border - 1: as shown for the sail ring. Right Click/Convert Object Type/From Text/Path to Image. 55. Now use the Object Paint Eraser to erase the right-hand part of the ellipse so that the remainder looks as if it is going around the boom. 56. Now draw a very small rectangle for the fasten for the sail ring. Select the partially erased ellipse and this rectangle and Right Click/Merge as Single Object. 57. Right Click/Duplication this merged object 11 times. 58. Put one of the duplicates in place accurately at the other end of the boom. 59. Now arrange the other duplicates roughly between the two end ones. Right Click/Align/Centre Vertically. 60. Now Right Click/Align/Space Evenly - Horizontally.
61. Select all parts of the boom and sail rings and Right Click/Merge As Single Object. Right Click/Arrange/Send to Back. This is the lower boom. 62. Right Click/Duplicate the boom and rings and then use the Transform Tools/Rotate by degree to rotate the duplicate 115o to the left. Right Click/Arrange Send to Back. This is the upper boom. 63. Select the lower boom and use the Transform Tools/Rotate by degree to rotate the duplicate 10o to the right. 64. Put the two booms in place as illustrated.
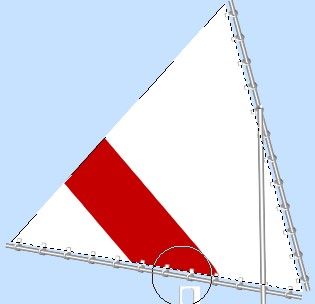
65. Now for the sail. First of all using the Rectangle shape, Color - white: Mode - 2D: draw a shape 300W x 290H pixels. 66. Right Click/Arrange/Send to Back. 67. Go into Path Edit mode and delete any ONE node from the rectangle. 68. Now move the three remaining nodes into place as shown opposite. Make sure that the outside lines of the sail fit just behind those little rectangles on the sail-rings.
69. Right Click/Convert Object Type/From Text/Path to Image. 70. Keep the sail selected and select the Paint Tools/Paintbrush. You can use any colours you like for this bit but use the settings shown above/left apart from the colour.
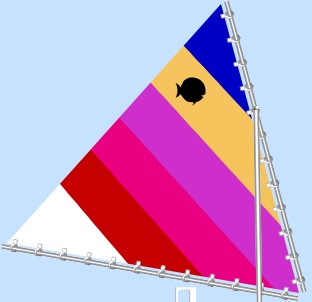
Trans - 0 Soft Edge - 1 Preset - None Lines - Straight Lines Paint the first line across the sail as shown.
71. Continue to paint stripes down across the sail being sure to keep the lines parallel. 72. Open the little Sunfish Logo ufo supplied in PI and reduce the size of this to fit on the sail. Put in place.
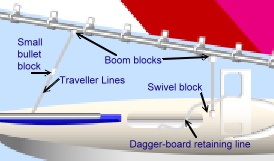
73. Opposite you can see the finishing pieces you need to add to your Sunfish.
Two boom blocks (small rectangles in pale grey, 3D Round) Small bullet block (same as boom blocks but turned in line with traveller line) Swivel block (same again) Daggerboard retaining line (Line & Arrow/Freehand)
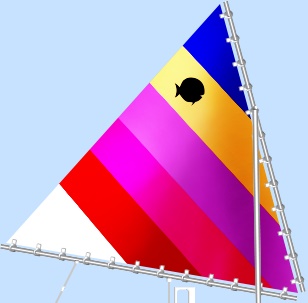
74. Finally - let's add a little light and shade to the object. 75. Select the sail and using the settings shown opposite, use the Retouch Tools/Burn to add some shade to the right-hand side of the sail and the Retouch Tools/Dodge to add some sunlight to the left-hand side.
Your sail should now look similar to the one opposite.
76. Finally I selected the top of the hull and added a little more light and shade with the Burn and Dodge Tools. I then created some more reflections (using the same method that we used for the top of the dagger-board) for the mast and traveller lines and use the Paint Tools/Airbrush to shade the part of the dagger-board beneath the boat. |
|
|
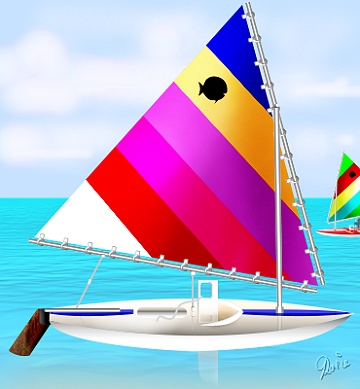
... and there she is - ready to sail out onto the ocean! |
 |
|
|
Free Spirit Graphics If you would then like an invitation to join, please Email Me. We'd love to have you along! |
|
|
If you need any help - or want to make suggestions to improve this tutorial - or for new ones |
|
This site © Rosie Hardman-Ixer 2001/2/3/4 |
