
THE SUNCATCHER PI VERSION: 8 (suitable also for 7). LEVEL: Intermediate MAIN TOOLS USED: Line & Arrow Tool/Freehand, Outline Drawing Tool, Stamp Tool, EasyPalette/Lighting Gallery NECESSARY DOWNLOADS: Picture, glass sample and stamp for chain - Zip File. TERMS OF USE: Please Read - Thank You! |
 |
INSTRUCTIONS |
|
|
|
1. CREATE THE LEADING
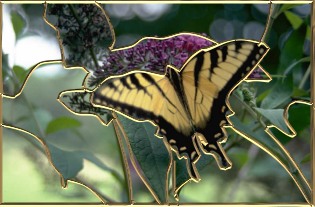
1. Download and unzip the file supplied above and then open the butterfly.jpg in PhotoImpact.
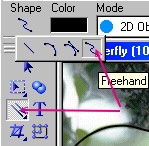
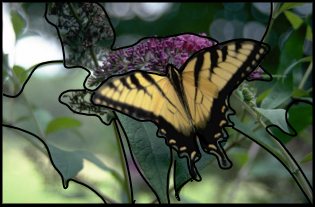
2. Using the Line & Arrow Tool/Freehand: Color - Black: Mode - 2D: Outline Width - 2 (set this in the Path Panel/Outline): Accuracy - 10: (set this in the Path Panel/Shape/Freehand Drawing) - carefully outline the major areas of colour in the picture with black lines (hold down the mouse button whilst drawing each line and release at the end of the line) .
3. Although this method of making stained glass does not rely on absolutely accuracy - the closer your outline is to the areas you are trying to define, the better the finished picture. I have made the leading simple in my example but you may make it as complicated as you wish. (Pic 1).
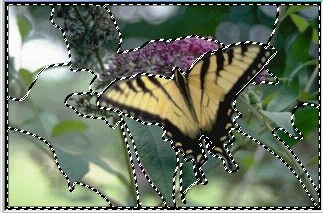
4. Now, using the Outline Drawing Tool on Rectangle draw a black 2D frame around the picture to match. 5. Right Click/Select All Objects - then Right Click/Merge As Single Object. 6. On the Menu Bar click on Edit/Trace/Image - accepting the defaults and click on OK.
7. On the Attributes Toolbar, change the Mode from Horizontal Deform to 3D Round. 8. Using the Layer Manager again you can now delete the original black outline. Your pic should now look like the picture opposite.
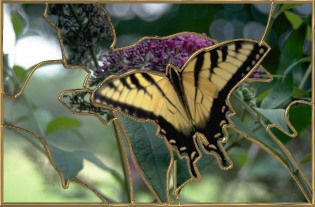
9. Select the leading and fill this using the Easy Palette/Material Attribute Gallery/Metallic/Copper 4 (see illustration opposite).
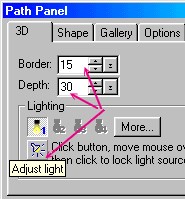
10. In the Path Panel adjust the border and depth and then click on the Light Bulb button under Lighting and move your cursor over the leading until you have it lit to your satisfaction. (see final picture in this section). |
|
|
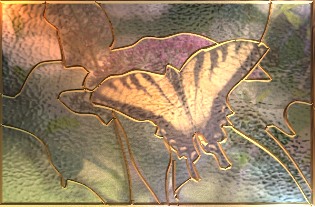
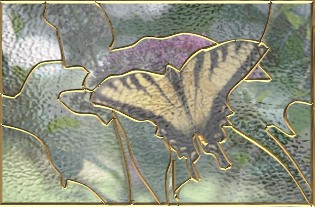
2. ADD THE GLASS 11. Open the stained glass sample provided in the zip file. 12. Right Click/Duplicate this and drag the copy across on top of your butterfly picture and leading. 13. Right Click/Properties and set the Transparency to between 55% - 65% (depending on how much you want the original picture to show through). Click OK . 14. Right Click/Arrange/Send to Back. Your pic should now look like the illustration. 15. Right Click/Merge All. |

|
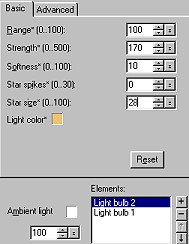
3. ADD A LITTLE SUNSHINE!
16. Open the Easy Palette and click on the Lighting Gallery/Lightbulb/Lightbulb 1.
17. Right Click/Modify Properties and Apply.
18. This is where you can play around with the light until you get an effect you like. I moved the light to a top/central position on the picture (you can do this by moving your cursor over the light in the preview pane until it becomes a four-headed arrow) - then I changed the settings to those shown left. 19. NOTE: Do make sure that you slide the Ambient Light back up to 100% if you want to keep the original brightness of your picture.
You can also add extra lights by clicking the + button below 'Elements' as I have - you will have to alter the settings for each light if you do.
20. When you are satisfied click OK. You can finish here or move on to making the hanger. |

|
4. THE HANGER 21. Open a new, white canvas, 325W x 350H pixels. Right Click/Copy your suncatcher picture and Right Click/Paste it into the new window. Move it to the bottom of the window. 22. Using the Path Tools/Outline Drawing Tool, Shape - Circle: Mode - 3D - Round: draw a 3D Circle 20W x 20H pixels and fill it with the same Copper 4 preset used for the leading. 23. Right Click/Duplicate this. 24. Place these rings at the edges of the suncatcher as shown. 25. Select both rings then Right Click/Arrange/Send to Back. 26. Draw another 3D circle, 35W x 35H pixels at the top centre of your picture. 27. Using the chain stamp supplied, Trans 0, Scale 100, Spacing 100 - Lines/Straight Line - stamp a line of chain from the top of each ring attached to the suncatcher to the centre of the top ring as shown. 28. Merge all elements of the picture. |
 |
|
|
Free Spirit Graphics If you would then like an invitation to join, please Email Me. We'd love to have you along! |
|
|
If you need any help - or want to make suggestions to improve this tutorial - or for new ones |
|


This site © Rosie Hardman-Ixer 2001/2/3 |