
RENNIE MACKINTOSH-INSPIRED, STAINED GLASS BOX PI VERSION: 12 (also suitable for most earlier versions though some preset and shape names may be different). LEVEL: Beginner MAIN TOOLS USED: Outline Drawing Tool, Line & Arrow Tool, Path Drawing Tool, Path Edit Tool, Trace, EasyPalette presets, Transform Tools/Perspective & Resize, Object Paint Eraser DOWNLOAD (Optional): If you haven't got an glass samples or you want to use the ones I am using in the tutorial please click Click HERE. TERMS OF USE: Please Read - Thank You! |
|
|
|
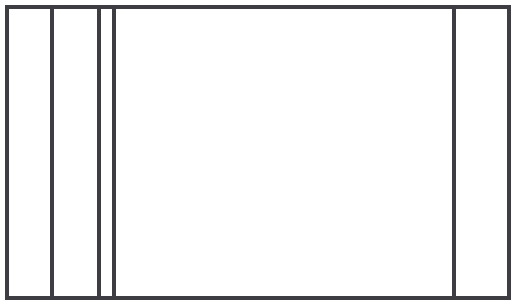
BLACK & WHITE LEADING PATTERNS 1. Open a new, white canvas, 605 x 390 pixels. 2. Using the Outline Drawing Tool, Color - Black: Shape - Rectangle: Mode - 2D: Width of Line - 2: draw a rectangle 500 x 290 pixels (a couple of pixels difference is not going to make a bit of difference to this tutorial so DON'T worry if it's slightly out!). Right Click/Merge All. 3. Using the Line & Arrow Tool draw in the lines shown - same Width thickness. Right Click/Merge All. 4. Click on Edit/Duplicate/Base Image with Objects. 5. SAVE THE DUPLICATE as Box Side Leading.jpg. You can either close that canvas for the time being or keep it open in your workspace (either way I recommend you Save a copy, just in case!).
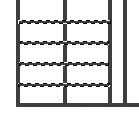
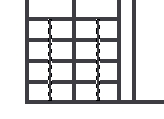
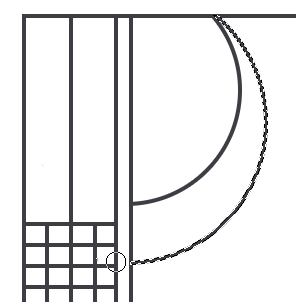
6. Using the ORIGINAL black and white, using the Line & Arrow Tool, draw in the 4 lines as shown and then Right Click/Align/Space Evening - Vertically - make sure that they are the right distance from the frame outline. 7. Right Click/Merge All. 8. Now draw in the final two straight lines as shown. You should now have a small grid of squares. Right Click/Merge All.
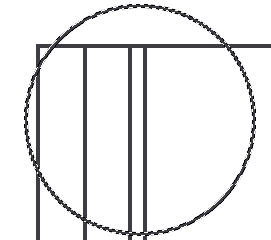
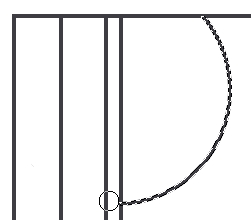
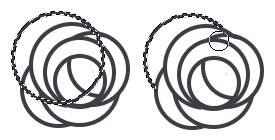
9. Change Back to the Outline Tool. Using Shape - Circle: draw a circle approx 277 pixels in diameter and put in position as shown. Right Click/Convert Object/From Text/Path to Image.
10. Now erase the part of the circle shown. DO NOT MERGE THIS SECTION WITH THE BACKGROUND YET!
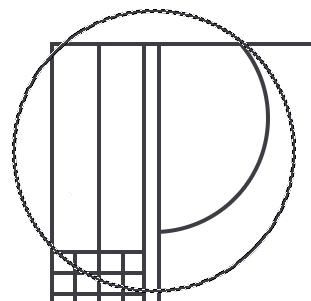
11. Now draw a 2nd circle 280 pixels in diameter and put in position as shown.
12. Erase the portion of the Circle that is not needed.
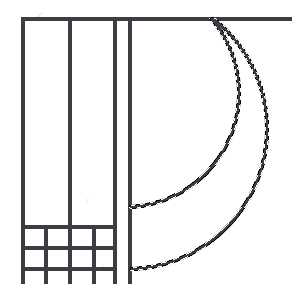
13. Select the two crescents you have just created and Right Click/Merge As Single Object (AGAIN DO NOT MERGE WITH THE BACKGROUND YET!). 14. Hit Enter to Deselect the crescents for the time being.
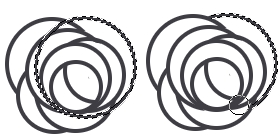
15. Now we're going to create the rose. Do this either on a new canvas, or in the most open part of the space on the canvas you are using now. We will move it into the correct place when the whole rose is finished. Draw a small circle approximately 50 pixels in diameter. 16. Now draw another Circle over the top of this and erase any of this that is not needed as shown left. Merge with the other two pieces of the rose but not the background! 17. Using this same method we are now going to add the petals.
Left are the petals in the order that made them - but feel free to vary these yourself if you wish to! The first one didn't even need any erasing as it just overlapped the first circle at the bottom!
18. When you have all the petals made and all parts of the rose Merged, move the rose into position as shown left. Hit Enter to Deselect the rose.
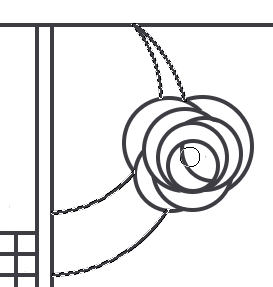
19. Now select the two crescents you made earlier and erase all parts that fall behind the rose. 20. You can now Right Click/Merge All. .
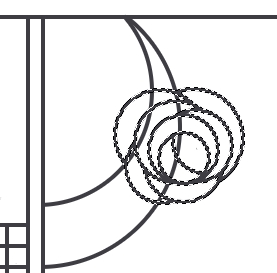
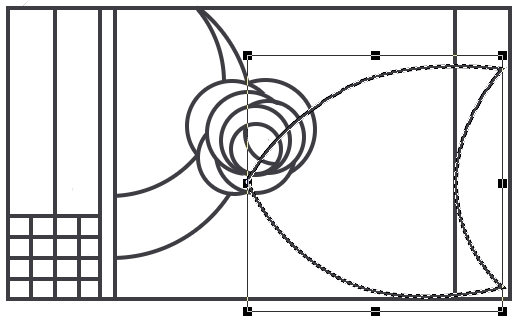
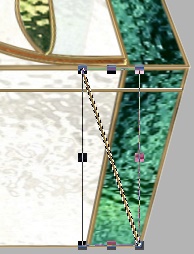
21. Now Select Shape 3 in the Outline Drawing Tool Custom Shapes and draw a shape 255 x 256 pixels and put in place as shown left.
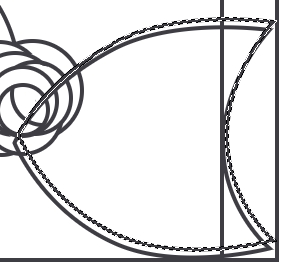
22. Right Click/Duplicate the Shape as shown and put in place. 23. Select both these last two shapes and Right Click/Merge As Single Object. 24. Erase all parts of the shapes not needed to form the stem of the rose. 25. Right Click/Merge All. .
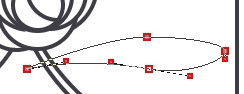
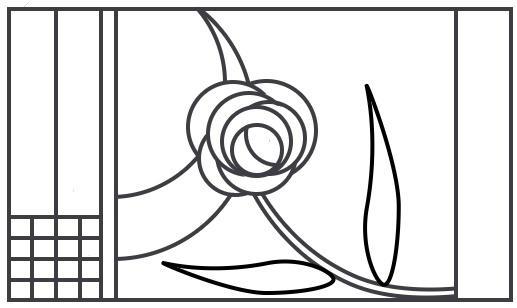
26. Sadly we don't have a convenient shape for this next bit, so we have to resort to editing - but it's so simple that it won't take more than a few seconds! Using the Outline Drawing Tool again, this time using the Ellipse shape, draw a shape apprximately 152 x 28 pixels - then go into Path Edit. 27. Create the shape shown and then use the Transform Tools/Rotate to rotate the leaf to a pleasing angle. 28. Create a second leaf, slightly smaller, the same way and put the two leaves in position on your picture. Right Click/Merge All. 29. Save this as Box Top Leading pattern. That completes the leading for the top & side of the box! |
|
|
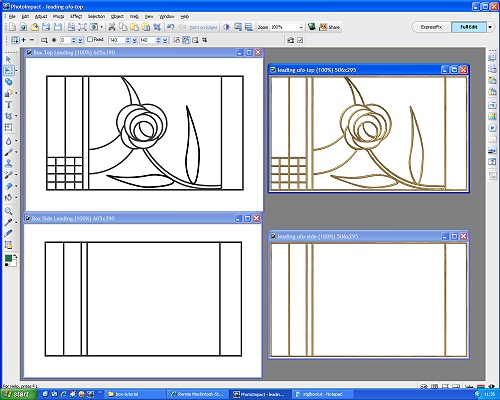
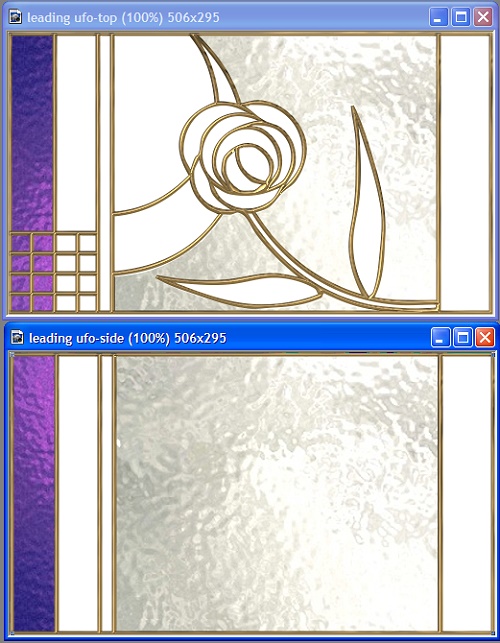
FILLING THE BOX WITH GLASS 30. First of all, open your Box Side Leading pattern that you made earlier, if this is not still open in your workspace. 31. Using the black & white, Box TOP Leading pattern, Click on Edit/Trace/Image. Accept the Defaults and OK. 32. Change the Mode to 3D round and apply a Metallic Preset from the EasyPalette. I chose Metallic Attribute Gallery/Metallic/Copper 3 for mine. 32. Drag the 3D leading to a separate canvas. 33. Now follow the same procedure as detailed in instructions 30 - 32 for the Box SIDE Leading. This should leave you with 4 canvasses open on your desktop (see left). NOTE: If you are familiar with stained glass work and you prefer to fill the design with other glass samples you have made/downloaded, please feel free to do this now. If you are not, then please download the glass samples provided at the top of this tutorial, unzip them to your desktop or somewhere you can easily find them and then follow the instructions below for filling the leading.
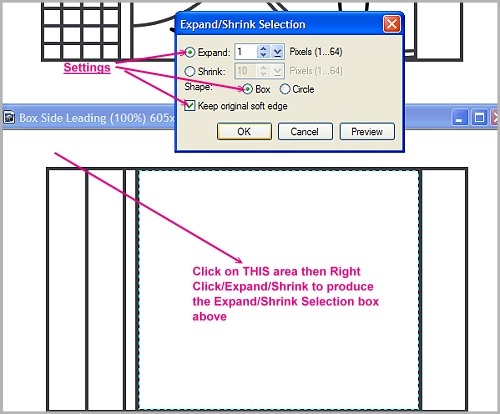
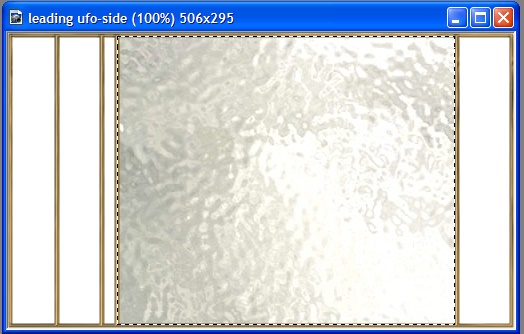
34. First of all bring the white.jpg glass sample into the PI workspace. Click on Copy. You may now close this glass sample. 35. Now using the black and white Box SIDE leading pattern and the Selection Tools/Magic Wand Tool click on the large area of the pattern. 36. Right Click/Expand/Shrink and in the box that pops up Check Expand and set the number to 1 (see left). OK. 37. Now click on Edit/Paste/Into Selection and the glass sample will appear in your selected area. DO NOT CLICK WITH YOUR MOUSE until you have moved it into the position you prefer - then click.
38. Drag this piece of glass to the leading canvas and put in position and then Right Click/Arrange/Send to Back (or Ctrl+Alt+Down Arrow). Make sure that there are NO GAPS between the leading and the glass! (see pic left)
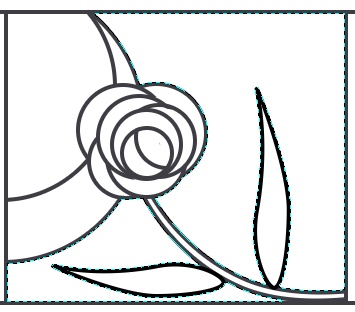
39. Now using the Box TOP black and white pattern, click on the parts of the top that are to be coloured white (see left), clicking on the + sign in order to select multiple areas; then repeat the above procedure, first Expanding the Selection, Pasting the glass into it and then putting this into the appropriate place in the Box TOP leading canvas.
40. Now bring the Deep-Purple glass sample into PI and Copy. 41. Click on the far left rectangle in your pattern and fill this with Deep Purple, using the same method described above - but before you move it to the leading, click on Copy again as we can use the Duplicate to fill the left hand side of the TOP of the box! Don't worry that it's a bit too big and crosses over those little squares - that doesn't matter at ALL at this stage! Your two leadings should now look something like the picture left. Just to give a little variety, I have flipped the purple leading on the side leading, using the Transform Tools/Rotate & Flip - but you don't have to if you don't want to.
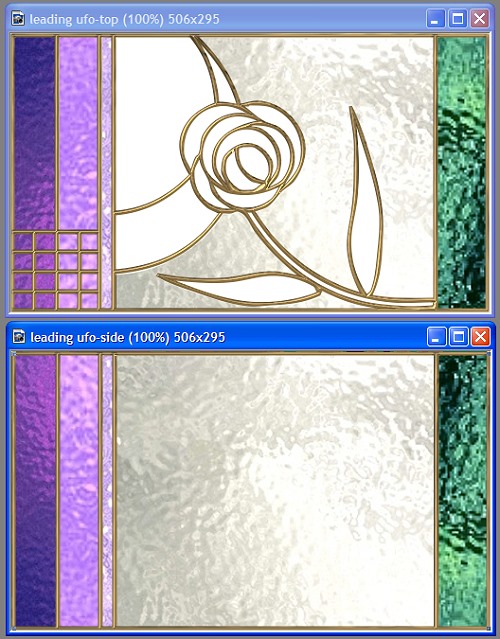
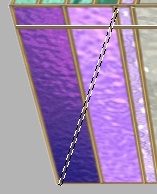
42. Next I filled the two rectangles with the mid-purple and the lavender and finally the right hand rectangle with green as shown. Again - I copied these to the leading for the top of the box in each case. Your leadings should now look like the illustration left. 43. Save your Box SIDE leading UFO and close this canvas and the black and white side pattern for the time being.
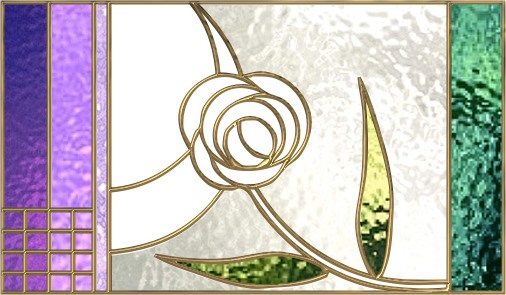
44. As you have still got the green glass sample copied, we'll next do the leaves of the rose. 45. Once you have these in place click on Photo/Color/Color Balance and add a little more yellow to the leaves by clicking on the top right square two or three times. 46. Move the leaves to your leading and Send to Back.
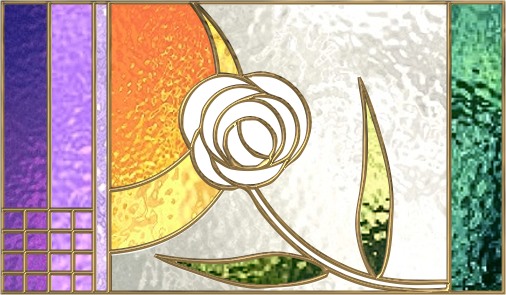
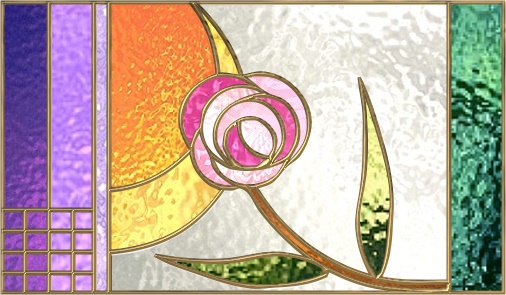
47. Now use the yellow and orange samples to fill the two shapes shown.
48. Using the three shades of pink samples, fill the sections of the rose as illustrated left.
49. Using the brown glass sample, fill the stem of the rose.
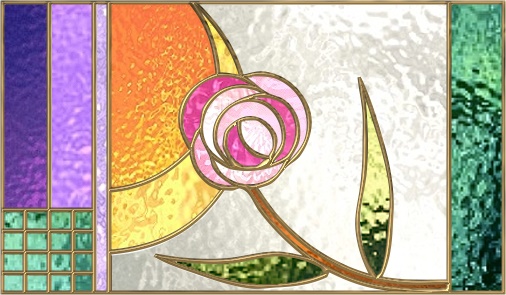
50. Finally we need to fill those little squares. Open the green sample again and Copy. 51. Select all the little squares and Expand as usual then fill with the green. Drag this to the leading but instead of Sending to Back, just use Send Backwards (or Alt+Down Arrow). SAVE this leading as a UFO. That completes the top & sides of the box! |
|
|
PUTTING THE BOX IN PERSPECTIVE/FINISHING TOUCHES 52. Open both the box side and the box top leading ufos in PI. 53. For each of the two canvasses, click on Edit/Duplicate/Base Image with Objects Merged and close the ufo canvasses. 54. Open a new grey canvas (I used Hex#B4B4B4) , 600 x 700 pixels. 55. Copy and Paste each of the two box canvasses and drag the copies to the big canvas. You can now close the two leading canvasses without saving. 56. Now use the Transform Tools/Resize, to make the TOP 190 pixels High and the SIDE 180 pixels High. 57. Now use the Transform Tools/Perspective to narrow the bottom edge of the side and narrow the far edge of the top of box. Your picture should now look like the one opposite.
58. Using the Line & Arrow Tool and the same preset you used for the leading, draw a line across the box side to indicate the lid.
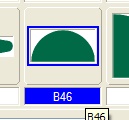
59. Using the Path Drawing Tool, Custom Shape B46 (left), draw a small shape for the catch for the lid and flip this Vertically using the Transform Tools/Rotate & Flip. Put in position as shown left.
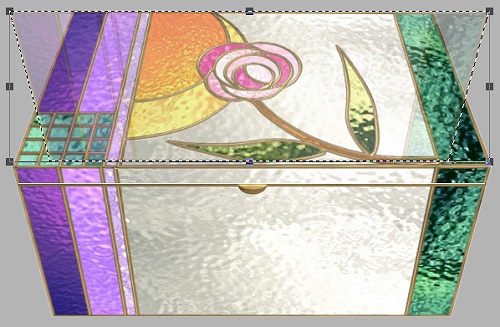
Now all that remains are to make the box a bit 'see through'! 60. Select the SIDE section of the Box and Right Click/Duplicate. 61. Using the Duplicate, Right Click/Properties and set the Transparency to 85%. OK. 62. Now move this section UP to the position shown on the picture left.
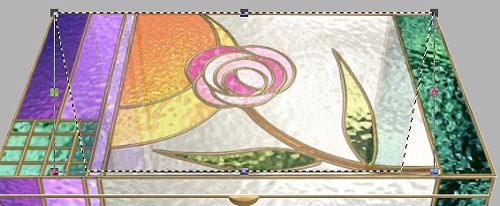
63. Now use the Transform Tools/Resize to move the sides inwards until the corners meet (see left).
64. Finally - using the Line & Arrow Tool and using the same preset you used for the leading, draw a straight line as shown, to represent the bottom of the box side. 65. Right Click and set the transparency to 75% and OK.
66. Now Duplicate this line and use the Transform Tools/Rotate & Flip, to flip the shape Horizontally. Move THIS line to left hand side.
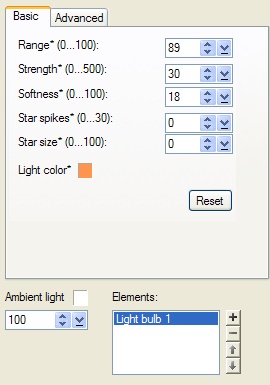
67. Finally - this is optional though - you can add a glow from a light using the Light Bulb feature in the EasyPalette. I selected Light Bulb one then used Right Click/Modify Properties & Apply.
68. Use the settings shown left and position the glow in the centre of the orange/yellow sections. Click OK.
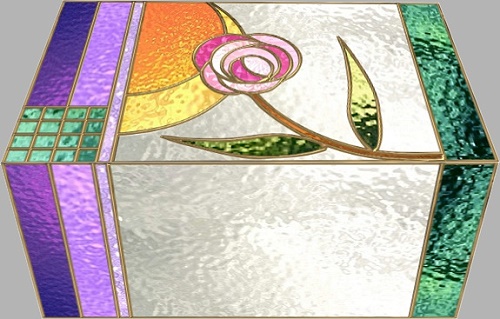
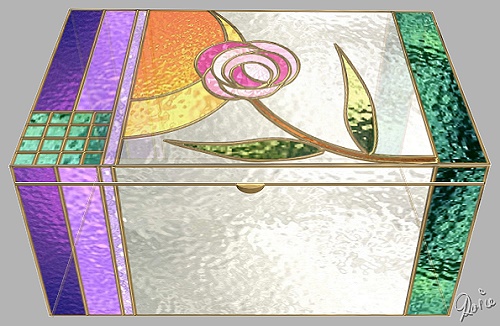
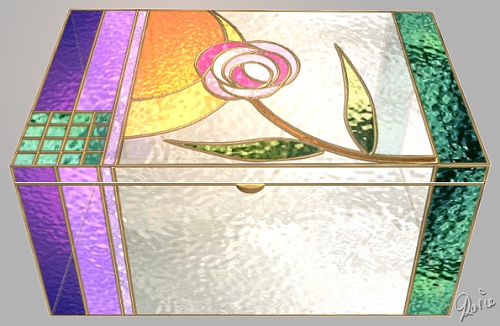
And there is your beautiful, glowing, finished box! |
 |
|
|
Free Spirit Graphics If you would then like an invitation to join, please Email Me. We'd love to have you along! |
|
|
If you need any help - or want to make suggestions to improve this tutorial - or for new ones |
|


This site © Rosie Hardman-Ixer |