
A SIMPLE SNOW SCENE PI VERSION: 6/7. LEVEL: Beginners MAIN TOOLS USED: Path Tools: Paintbrush Tool: Transform Tools: EasyPalette/Type Gallery: Path Tools/Freehand Drawing Tool (Optional) NOTE: This Tutorial should be easy to do in PI6 using the Spline Tool instead of the Freehand Drawing Tool in Stages 23-25). TERMS OF USE: Please Read - Thank You! |
 |
INSTRUCTIONS |
|
|
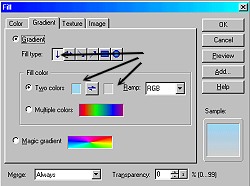
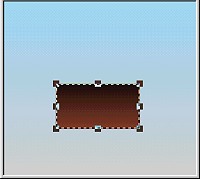
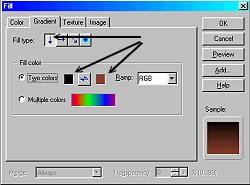
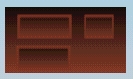
THE HOUSE - PART ONE 1. Open a new canvas 275W x 250H pixels. 2. Click on Edit/Fill/Gradient and fill the canvas with the colours shown and a top-bottom fill. 3. Using the Path Tool, Shape-Rectangle: Mode 2D: draw a rectangle approx. 120W x 65H pixels. 4. Using the Path Tool - same settings draw a rectangle approx. 55W x 25H pixels for a window. 5. Click on the Paint Tools/Paintbrush, Shape7: Color-Light-ish Brown: Trans-0: Soft Edge-50. Click on Effect - Paint on Edges. 6. Right Click/Duplicate this piece twice. 7. Use the Transform Tool to narrow the width of one of the duplications to approx 30 pixels wide. 8. Put the three window pieces in place as shown. 9. Draw another rectangle - 20W x 22H pixels - same fill - and put in place as shown for door. |
|
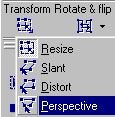
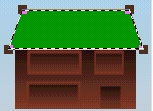
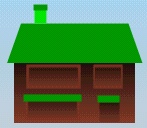
THE HOUSE - PART TWO 10. Using the Path Tool - draw a rectangle 135W x 40H pixels (roof).( I have coloured this and the following rectangles in shades of green to show the size, shape and placement of them - but you do NOT have to change the colour of them). Now use the Transform Tool (Perspective) to shape the top of the roof by moving the squares towards the centre. 11. Draw another rectangle - 12W x 17H pixels (chimney). This should retain the same brown/black fill as you have used for the house. 12. Now another tiny one to sit on top of the chimney. 13. And another one to sit above the door. 14. And finally another to go above the downstairs window! Phew! That's the lot for the house! 15. Put all these in place as shown and take a breather - winter is just around the corner! |
|
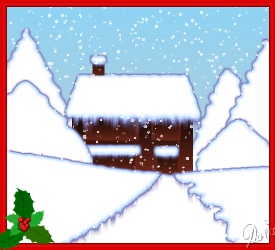
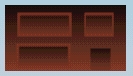
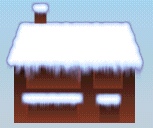
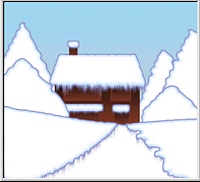
LET IT SNOW!!! 16. First of all select the roof section. Open the Easy Palette/Type Gallery/Snow - and click on Snow 2...oooheeeeeee winter arrives! 17. Click on the section above the window and do the same - except use Snow 1 this time... 18. Now the bits above the door and on top of the chimney - again using Snow 1... 19. Right Click/Select all Objects/Merge As Single Object. Your pic should now look as chilly as the one opposite....brrrrrrrr... and it's getting colder..... |
|
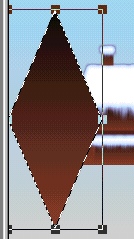
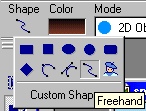
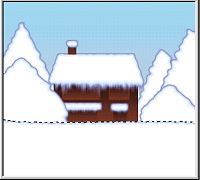
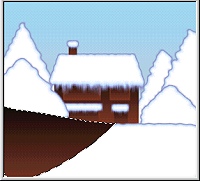
SCENERY OK - now it's looking like winter around here - let's create some scenery!... (Thanks to Deb DeHaven for pointing out that the following technique will also work on PSP tubes of trees that you have imported for use in PI!) 20. There are a number of shapes in the Shape Library that make good trees (you may even have some actual fir tree shapes you have imported that you can use) - but for the purposes of this tutorial I am going to use the diamond shape because we all have that. Using the Path Tool - draw a tall diamond about 95W x 220H - Mode-2D: and then apply Snow 2 to it. 21. Repeat this with another - slightly different sized diamond - and this time apply the Snow 2 TWICE to it. You will see that you get a different shape outline. By drawing different sizes of diamonds and alternating between Snow 1 and Snow 2 - and different numbers of applications of each - you can build up a few trees of different sizes and edges. 22. Send some of the trees behind the house by selecting them and then using Right Click/Arrange/Send to Back. Left is my snow scene with 5 of these trees added. 23. Now - using the Path Tools: Freehand Drawing Tool (PI6 users could use the Path Tools/Spline Tool for this and the next two parts) - draw a shape that cover the whole of the front of your scene - Apply Snow 1 to this. (See opposite) - or you could be lazy and just use a rectangle! 24. Now draw the shape shown opposite to form a path to the front door - and Apply Snow 1. 25. Using the same method draw a shape for the right-hand side of the picture and apply Snow 1. |
|
| FINISHING YOUR PICTURE Now click on the Easy Palette/Particle Gallery/Snow - and click on one of the snow presets - you can pick any of them depending on how much of a blizzard you want!!! You might like to add a festive frame or some touches of your own - Santa Claus, a snowman? It's up to you now! |
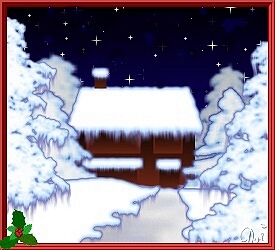
| WINTER NIGHT This version of the picture uses imported tree shapes for a better effect, a starry night sky and a little shading to give perspective. |
 |
|
|
Free Spirit Graphics If you would then like an invitation to join, please Email Me. We'd love to have you along! |
|
|
If you need any help - or want to make suggestions to improve this tutorial - or for new ones |
|
This site © Rosie Hardman-Ixer 2001/2/3 |