
|
|
|
THE SKYWRITER PI VERSION: 6/7. LEVEL: Beginner MAIN TOOLS USED: Path Tools, Path Edit, Transform Tools, Paint Tools, Paint on Edges Effect, Burn Tool. TERMS OF USE: Please Read - Thank You! |
|
INSTRUCTIONS |
|
|
|
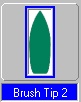
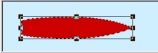
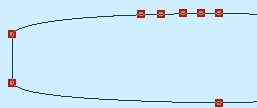
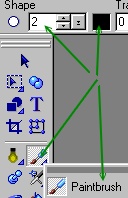
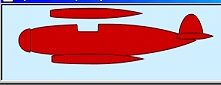
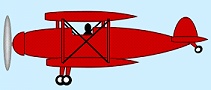
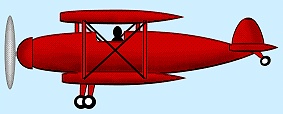
THE PLANE 1. Open up a new canvas, 525W x 125H pixels, with a pale blue background. 2. Using the Path Drawing Tool, Custom Shape - Brush Tip 2: Colour - Red: Mode - 2D: draw a shape. 3. Use the Transform Tools/Rotate and flip, to rotate this shape through 90 degrees to the left. 4. Now use the Transform Tools/Resize to make this shape 225W x 45H pixels. 5. Right Click/Duplicate this piece and then use the Transform Tools/Resize to make the shape 125W x 15H pixels. 6. Right Click/Duplicate this piece TWICE and resize ONE of these pieces so that it is 50W x 10H pixels. 7. Select the largest shape once again and click on the Path Edit button.
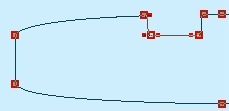
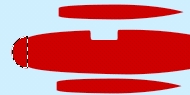
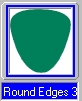
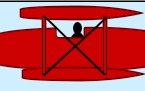
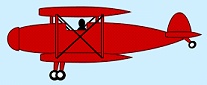
8. Click on Edit Point/Add point and add points as shown then pull them into the positions in the illustration to form a cockpit. 9. Using the Path Drawing Tool, Custom Shape - Half-Circle: Colour - Red: Mode - 2D: draw a shape 32W x 16H pixels and then use the Transform Tools/Rotate and flip - to rotate the shape 90 degrees left. Put in place as shown. 10. Using the Path Drawing Tool, Custom Shape - Round Edges 3: Colour - Red: Mode - 2D: draw a shape 34W x 34H pixels. Use the Transform Tools/Rotate and flip - to flip the shape vertically and put in place as shown. 11. Change to the Paint Tools/Paintbrush, Size - 2: Colour - Black: and then, selecting each piece of your plane in turn, click on Effect/Paint on Edges to edge them all in black. Put all the pieces into place as shown (you will need to Right Click/Arrange/Bring to Front - for the horizontal bit of the tail section). 11. Using the Path Drawing Tool, Shape - Rectangle: Colour - Red: Mode - 2D: draw a tall, thin shape 5W x 60H pixels. Use the Paintbrush and Paint on Edges Effect again to edge this in black. Right Click/Duplicate this shape and set the two pieces aside for the moment. 12. Using the Path Drawing Tool, Custom Shape - Round Edges 3 again: Colour - Black: Mode - 2D: draw a tiny shape 14W x 14H pixels. Use the Transform Tools/Rotate and flip - to flip the shape vertically. Change to a Ellipse Shape and draw a small shape as shown. Shift/Click to select both black pieces and then Right Click/Merge As Single Object. 13. Put the black shape in position in the cockpit and then Right Click/Arrange/Send to Back (resize if necessary to make it look right). 14. Now bring the two tall, thin rectangles over to the plane and put in place as shown. 15. Use the Line and Arrow Tool (Straight Line), Colour - Black: in the Path Panel/Outline change the Width to 1: draw two struts in an X as shown. 16. Shift/Click to select the two upright pieces and the X pieces and then Right Click/Merge as Single Object. 17. Right Click/Duplicate this object and then Right Click/Send to Back. Put in place as shown. 18. Using the Path Drawing Tool, Custom Shape - Shape 2: Colour - Red: Mode - 2D: draw a shape 29W x 9H pixels and then use the Transform Tools/Rotate and flip, first to flip the shape vertically and then to rotate the shape 90 degrees left. Use the Paintbrush/Paint on Edges again to edge in black. 19. Using a circle shape draw a black circle and then a smaller white one and put in place with the red shape you just made as shown. 20. Shift/Click to select all three pieces and then Right Click/Merge As Single Object. Right Click/Duplicate this piece TWICE. 21. Put two of the pieces in place as shown for the undercarriage/wheels (You will need to use Right Click/Arrange/Send Backward to put them behind the main fusellage of the plane). Slightly reduce the size of the third wheel and put in place at the tail of the plane as illustrated. 22. Using the Rectangle shape add a small, dark grey rectangle to the nose of the plane. Then, using the Ellipse shape, add a long thin Ellipse for the propellor. Fill this with a gradient shading from dark grey to white with a central fill as shown. Your plane is technically finished - but you could always select each piece and use the Burn Tool to shade the various parts of the plane if you wish (illustrated left). |
|
|
|
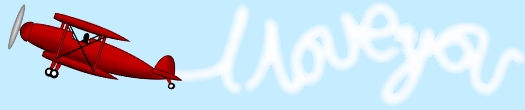
THE MESSAGE 24. For the message I have used the Line and Arrow Tool/Freehand (but you might choose to take an easier route and use a font....). First of all write in your message using the Freehand Tool on Width 5. 25. Right Click/Convert Object Type/From Text/Path to Image. Now increase the Soft Edge to about 7. 26. For the Second Version I have made a simple banner out of Path Shapes and added a message with the Text Tool. I'm sure you can think of lots of other ideas! |
|
|
|
Here's my final one - a little animation made with the biplane! I drew the full loop of the trail with the Line and Arrow/Freehand Tool before I started making the frames. Then I put the plane at the END of the loop and saved the frame... then I pulled the plane BACKWARDS along the loop (turning it with the Transform Tools/Rotate Freely) and chopped a bit off the loop with the Object Paint Eraser. I carried on working backwards along the loop... taking off a bit of the loop at a time and saving frames as I went... right back to the point where the plane is first entering the picture! VOILA! Then all I had to do was add the frames to the animation in the reverse order to the way I made them - and there you have one plane - with the loop forming behind it as it goes! |
 |
|
|
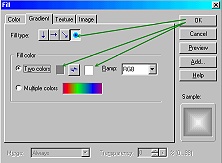
Free Spirit Graphics If you would then like an invitation to join, please Email Me. We'd love to have you along! |
|
|
If you need any help - or want to make suggestions to improve this tutorial - or for new ones |
|


This site © Rosie Hardman-Ixer 2001/2/3 |