
STAINED GLASS HEART FRAME PI VERSION: 6. LEVEL: Beginners MAIN TOOLS USED: Edit/Trace: EasyPalette: Magic Wand Tool: Colorize Pen NECESSARY DOWNLOADS: TERMS OF USE: Please Read - Thank You! |
 (Shown smaller than actual size) |
INSTRUCTIONS |
|
 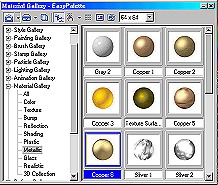 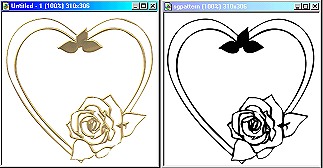 |
Making the Leading 1. Open a new blank, white canvas -310W x 306H pixels. (We will be using this in a couple of minutes). 2. Open the sgpattern.ufo file provided. 3. With the pattern file active click on Edit/Trace/Image. 4. With settings at Tolerance 14; Jump Point 1; Threshold 128 - Click on OK. 5. Change the Mode to 3D Round; Border 3; Depth 30 - your pic should now look like the first pic on the left (though it may be a different colour). 6. Open the Easy Palette/Material Gallery/Metallic - and double click on Copper 6. 7. Using the Pick tool, drag the new gold heart to the blank canvas, alongside the black and white one. |
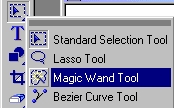 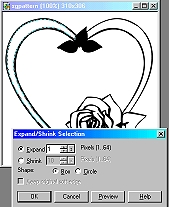   |
ADDING THE GLASS TO THE HEART. Please note - at this point you can choose any of the glass samples I have provided for colouring in the frame or, if you already possess some, use some of your favourite glass samples from the web or that you have made yourself. The samples I choose are merely suggestions! 9. Open the iceglass.jpg sample. Click on Copy. 10. Using the Magic Wand tool, Click on the left hand area of the heart on the black and white pattern copy of the picture, being sure to include the small area at the point of the heart. (In Mode click on the + button to be able to select BOTH areas at once. Also make sure that 'Search Connected Pixels' and 'Line' are checked! ). 11.Right Click/Expand-Shrink - choose Expand and enter the figure 1; Click OK. 12. Change to the Pick tool. Click on Edit/Paste Into Selection. Do NOT click the mouse button until you have moved the glass into the best position - then Click! 13. Drag the blue glass you just created over to the gold heart and place in position over the correct area (do not worry about slightly jagged edges - these will be hidden soon!) . 14. Repeat steps 9 - 13, this time selecting the right hand side of the heart. 15. Close the iceglass jpg. Your gold heart should now look like the pic on the left. |
|
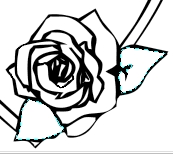
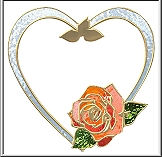
ADDING THE GLASS TO THE ROSE. 16. Using the same method in 9 - 13 above, open the pink glass sample and fill the three areas shown left and move the glass to the gold rose. 17. Again using the same method in 9-13 above, open the orangeglass sample and fill the remaining areas of the rose and move the glass to the gold rose. 18. Finally, using the same method in 9-13 above, open the greenglass sample and fill the leaf areas and move the glass to the gold rose. 19. Check that you have left no gaps unfilled with glass - and then close the black and white pattern. 20. Click on any point on the gold frame - the leaves at the top are probably the best - then Right Click/Arrange/Bring to Front. 21. Right Click/Select All Objects and then Merge As Single Object. |
|
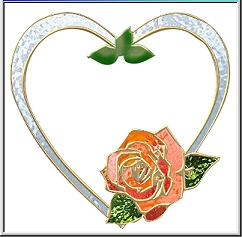
FINISHING YOUR FRAME 22. You can just leave your frame as it is - but I finished mine by clicking on the Colorize Pen - Shape 20; Colour - dark green; Trans 75; Soft Edge 50 and coloured in the leaves at the top. 23. I then took the Paintbrush Tool - Shape 20; colour Dark Green; Trans 50; Soft Edge 100 and added a bit of shading to the leaves as well. 24. There are dozens of ways you could choose to add things to your frame - so here I will leave it to your skill and imagination! I've added a pic of my husband and our last dog, Sam - a simple square frame and my signature. |
 |
|
|
Free Spirit Graphics If you would then like an invitation to join, please Email Me. We'd love to have you along! |
|
|
This tutorial © Rosie Hardman-Ixer, 2001/2002/2003 If you need any help - or want to make suggestions to improve this tutorial - or for new ones |
|
This site © Rosie Hardman-Ixer 2001/2/3 |