
MAKING SNOWFLAKES & SNOWFLAKE BACKGROUNDS PI VERSION: 6. LEVEL:Beginners (but plug-in filter installation necessary) MAIN TOOLS USED: Rulers: Guidelines: Line & Arrow Tool: Filters NECESSARY DOWNLOADS: TERMS OF USE: Please Read - Thank You! |
 Click here to see the snowflake background tiled (Opens in a new window) |
INSTRUCTIONS |
|
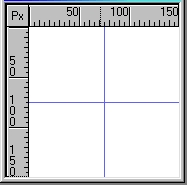 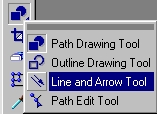 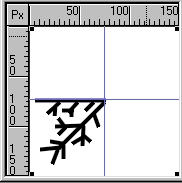 |
MAKING YOUR SNOWFLAKE - 1 1. Open a new canvas 150 x 150 pixels - white background. 2. Click on View/Ruler to turn on the ruler if you do not already have this. 3. Click on View/Guidelines. Drag a guideline from both rulers to the centre of your square (75) to find the centre point (Illustration 1). 4. Using the Line and Arrow Tool (Straight Line), Colour-Black: Mode - 2D Object: Width - 2: Style and Arrow - Plain: draw a pattern something like the one shown. You can change this to make a variety of different snowflakes - the limit is your imagination! HOWEVER keep within the general shape shown i.e. a horizontal line and lines branching downwards from it and a diagonal line with lines branching from it. |
 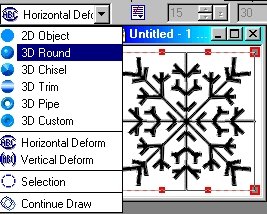 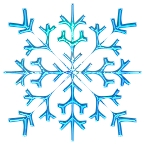 |
MAKING YOUR SNOWFLAKE - 2 5. Now comes the real fun!!! First of all - Right Click and Merge All. Click on View and turn off the Rulers and Guides. 6. Click on Effect/Simple/Pizza Slice Mirror - and there's your snowflake!!! 7. Click on Edit/Trace/Image - and Click OK using the Default settings. This will give you a snowflake-shaped selection. 8. Change the Mode back to 3D round and you now have a snowflake shaped Path Object. Drag this to a new canvas. 9. Fill this shape with a preset of your choice and play with the Border and Depth until you like the look of your snowflake. If you wish you can leave the tutorial here (maybe save the snowflake to your Easy Palette?) - or continue with the tutorial to make a background using your new snowflake! |
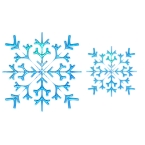 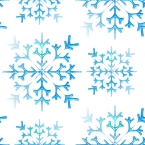 |
MAKING A BACKGROUND TILE 10. Right Click and Duplicate your snowflake object. 11. Using the Transform Tool/Resize - resize the two copies and place as shown. Right Click/Merge All. 12. Click on Effect/Simple/Quick Tile - then on Apply - and there's your background! (If you wish to see what your background will look like as a webpage background, click on File/Preview in Browser/As Tiled Background) Save your background. |
 |
|
|
Free Spirit Graphics If you would then like an invitation to join, please Email Me. We'd love to have you along! |
|
|
If you need any help - or want to make suggestions to improve this tutorial - or for new ones |
|
This site © Rosie Hardman-Ixer 2001/2/3 |