
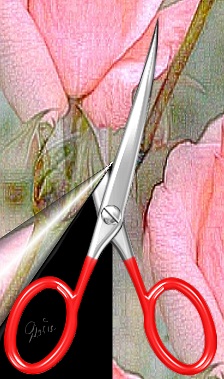
A PAIR OF SCISSORS PI VERSION: 6/7. LEVEL: Beginner MAIN TOOLS USED: Path Drawing Tool, Outline Drawing Tool, Transform Tools (Resize, Rotate Freely, Rotate and flip), Paint Tools/Paintbrush, EasyPalette/Material Gallery. TERMS OF USE: Please Read - Thank You! |
|
INSTRUCTIONS |
|
|
|
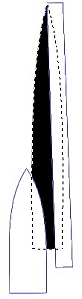
BASIC SCISSORS SHAPE 1. Open up a new white canvas 350W x 410H pixels. 2. Using the Path Drawing Tool, you now need to draw the following shapes in the colours and sizes stated below: NOTE: I have coloured the edges in blue to show you how they fit together - but you leave them plain black or white. a) Using Path Custom Shape - Arch 2: Colour - Black: Mode - 2D: draw a shape and then use the Transform Tools/Resize to make it 50W x 330H pixels. b) Using the same shape: Colour - White: Mode - 2D: draw another shape and resize this to 63W x 170H pixels. c) Using a Rectangle shape: Colour - White: Mode - 2D: draw a shape 35W x 355H pixels. 3. You will need to use the Transform Tools/Rotate Freely to rotate the last shape slightly to the left. When you have done this, fit the shapes together as shown in the first illustration to the left. 4. Using the Outline Drawing Tool: Shape - Ellipse: Colour - Black: Mode - 2D: Border - 6: draw a shape approximately 70W x 100H pixels. Again you will need to use the Transform Tools/Rotate Freely to rotate this ellipse slightly to the left. 5. Put this in place as shown left and then Right Click/Merge All. |
|
|
TRACE AND COLOUR MAIN PIECES 6. Click on Edit/Trace and then change the Mode from Horizontal Deform to 3D. 7. In the Path Panel - change the Border to 7 then open the EasyPalette/Material Gallery/Metallic and fill the shape with a suitable silver metallic preset such as M17 (PI7) or Silver 2 (PI8). 8. Open up a new black canvas 350W x 410H pixels. Move the 3D shape to it. If necessary, go into Path Edit and smooth any curves that have kinks in them (especially on the insides of the handle ellipses) then save the the black shape if you wish to use it again in the future. Close down the original canvas. 9. Select the 3D piece and use the Transform Tools/Rotate by Degree to rotate the shape 15 degrees to the left. 10. Right Click/Duplicate this piece and then use the Transform Tools/Rotate and flip - to flip the shape horizontally. 11. Put in place as shown. 12. Using the Path Drawing Tool, Shape - Circle: Mode - 3D Round: Border - 8: Depth - 24: draw a shape 20W x 20H pixels. 13. Right Click/Convert Object Type/From Text/Path to Image. 14. Using the Paint Tools/Paintbrush - Size 4, Colour - Black: Lines/Straight Lines - draw a dark line across the circle (make sure that you have a Soft Edge of about 10 set for this. 15. Change the Paint colour to White and draw another line close to the first one as shown. If you like your scissors in plain silver, your scissors are done! However.......you could experiment by 'painting' the handles as I have done in the illustration.... to do this.... 16. Select the main scissor shape, then Right Click/Duplicate and fill the duplicated shape with a red plastic preset from the EasyPalette/Material Attribute Gallery/Plastic/Red 2. Open the Material Box, Border/Depth tab and check the 'Smooth Spine' box and OK - this gives this piece and more rounded look. 17. Use the Object Paint Eraser to take off the upper part, just leaving the handle red (SEE NOTE BELOW). NOTE: The lines at the top of these red sections would form a straight-line if the scissors were CLOSED but ours are open - so the lines would be at an ANGLE - see my pic at the top of the tutorial and left. 18. Right Click/Duplicate this piece, then use the Transform Tools/Rotate and flip - to flip the piece horizontally. Put the red handles in position over the original ones and then Right Click/Select All Objects. Right Click/Merge As Single Object. Your scissors are done! |
 |
|
|
Free Spirit Graphics If you would then like an invitation to join, please Email Me. We'd love to have you along! |
|
|
If you need any help - or want to make suggestions to improve this tutorial - or for new ones |
|


This site © Rosie Hardman-Ixer 2001/2/3 |