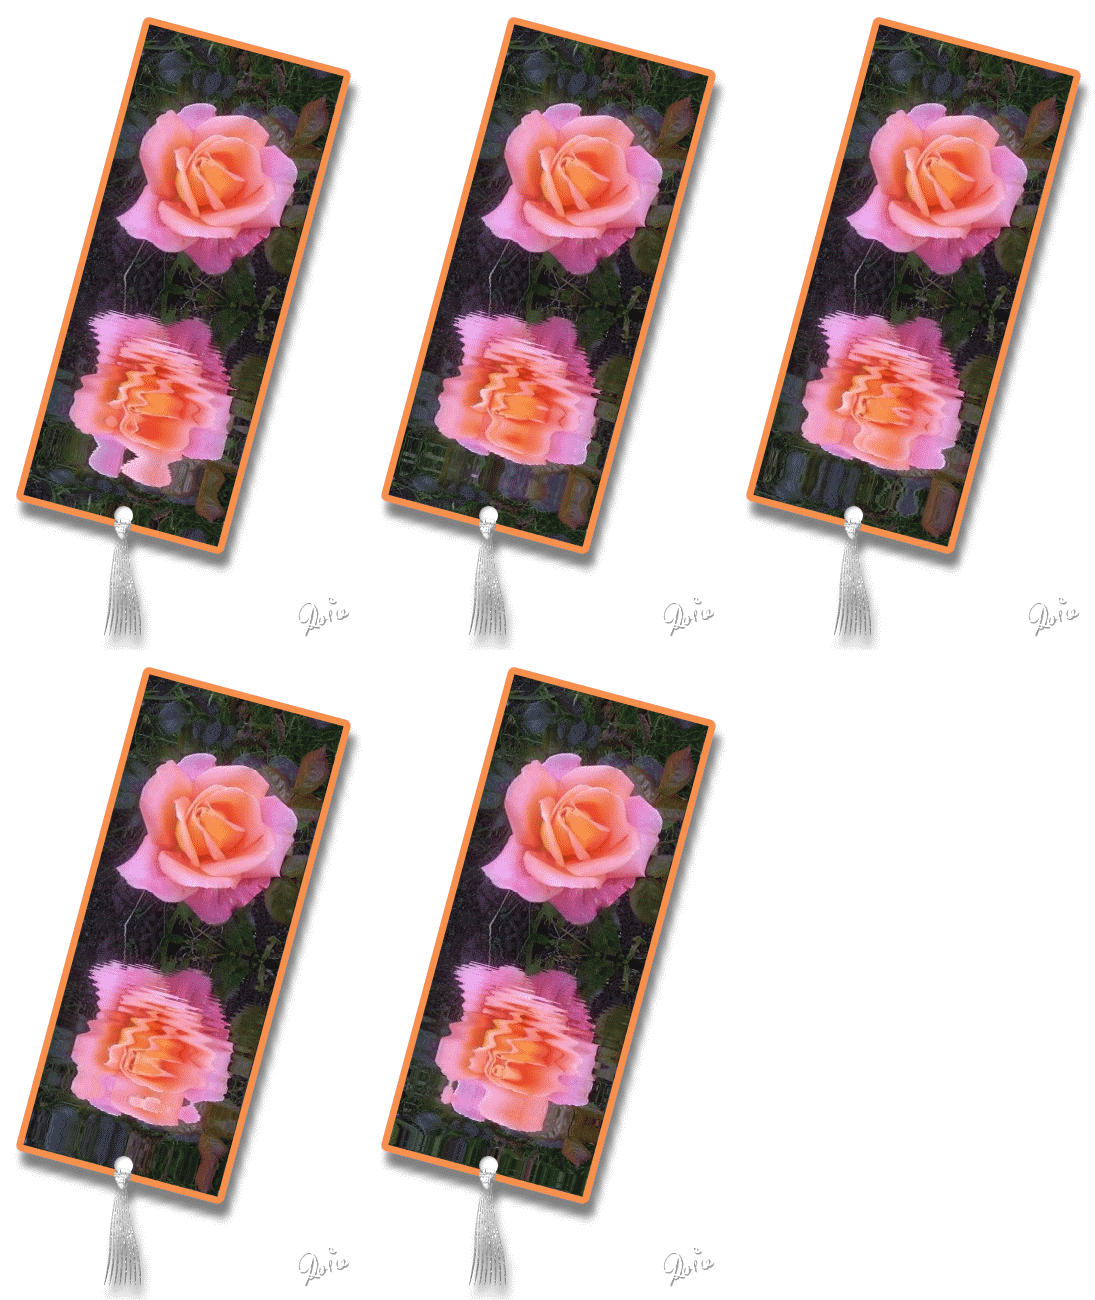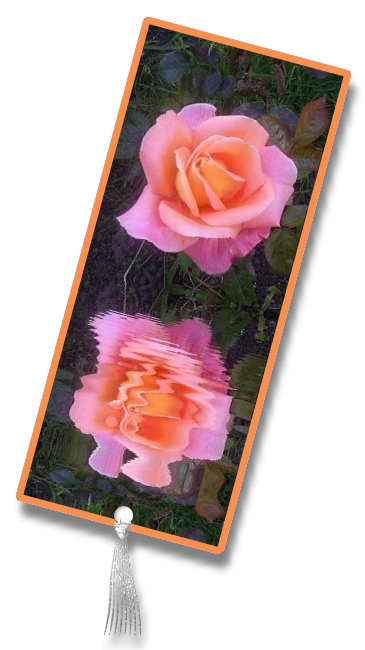
REFLET ANIMATION BOOKMARK PI VERSION: The tutorial is written and illustrated in PI 12 but is suitable for V 10 and, using a slightly different method which is detailed in the tutorial, PI 8/XL also. LEVEL: Reflet and Animation for Beginners MAIN TOOLS USED: Reflet (stand alone application), PhotoImpact 10 or later, Gif Animator 5: Tools in PhotoImpact - EasyPalette, Path Tools/Border, Path Drawing Tool, Transform Tools, Shadow NECESSARY DOWNLOADS: Reflet Water Animation program - Click HERE. Distributed by kind permission of the author of the program, Selon, at the PhotoFiltre home site - HERE. Please Note that this is the English Version of the program. A French Version of the program is available on the PhotoFiltre site. Download a choice of 4 roses pictures to use in the tutorial HERE. These are my own photographs and there is no problem with your using them in ANY project as long as a credit is included. TERMS OF USE: Please Read - Thank You! |
|
INSTRUCTIONS |
|
|
|
PREPARING THE FRAMES IN REFLET First of all - I should explain that REFLET (and that is spelt correctly - it was originally a French Program), is a stand-alone product. You do NOT access it through PI Effects or open in the PI workspace. You need to have Reflet on your computer, somewhere that you can access the exe file easily. I have it in it's own folder, inside the PI folder on my desktop. All you need to do is unzip the Reflet zip provided in the link at the top of this tutorial (which is for the ENGLISH version) into your folder and you are ready to go! 1. If you are using one of my rose pics, unzip the file and choose your picture now. Put a copy of this into a folder that you can find easily, or on the Desktop - I use the Desktop. If you wish to use one of your OWN pictures, you need one that is approximately 200 x 250 pixels in size. 2. Click on the Reflet exe file (the one that looks like a clapperboard) and we're ready to go!
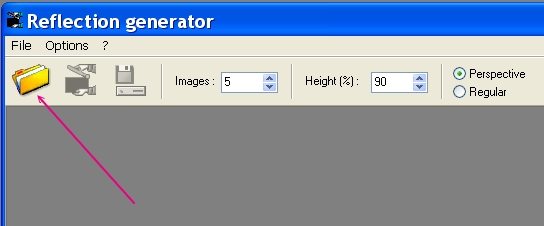
3. Click on the yellow folder, browse to your roses picture and open it in Reflet.
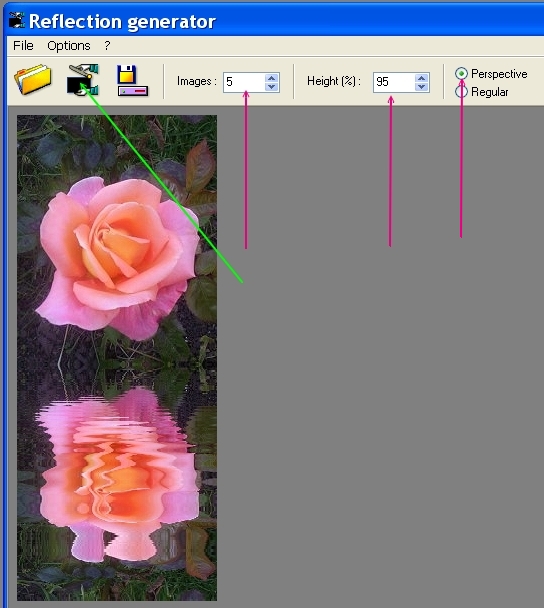
4. Using the settings shown in the illustration left (pink arrows) - note that the Height setting has been changed from the Default 90% to 95% - create your animation. Test it by clicking on the little clapperboard icon (green arrow).
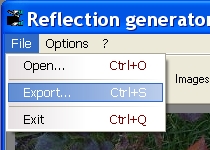
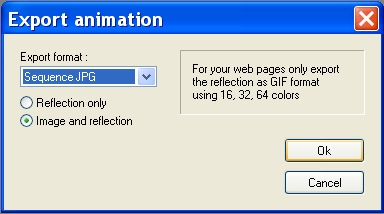
5. Click on File/Export and in the Export Animation window that appears, select Sequence JPG using the pull-down arrow and check the Image and reflection button. Click OK This will save 5 frames for you in the same folder as the source image. NOTE: If you just wished to save the Reflet animation as it is you can choose to save it as a Gif Animation instead of a jpg sequence. |
|
|
PREPARING THE UFO IN PHOTOIMPACT 6. Close the Reflet program and open ALL the 'frames' made in Reflet in the PhotoImpact workspace. BE SURE TO HAVE THESE IN THE NUMERICALLY CORRECT ORDER!
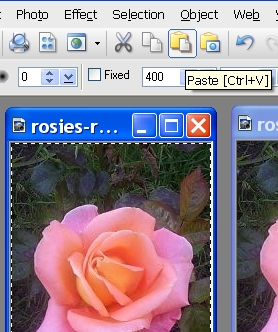
7. One at a time, click on each frame and Copy & Paste a copy of that picture on top of its original.
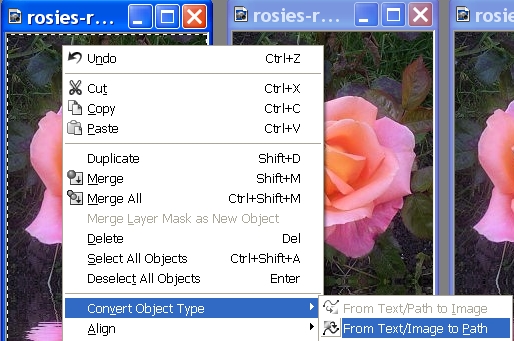
8. Again, one frame at a time, select the copy and Right Click/Convert Object Type/From Text/Image to Path for all the frames.
9. Now Select the first of the frames and then the Path Drawing Tool. Please note: 10. Check the box next to BORDER, select the colour that you wish to use for the 'outline' for the picture and set the number to 7 - as per the illustration opposite.
11. Repeat this procedure for the copies in ALL the frames. This will put a coloured border around all 5 copies of the pictures that you made, though you will not be able to see it at the moment, because the border will be off the canvas. 12. Now for each frame, select the copy with the coloured border and Right Click/Convert Object Type/From Text/Path to Image. 13. Now Open a new canvas 365W x 650H pixels with a white background. 14. Starting with the image numbered 04 at the end and working back - drag each copy off its original and onto the new canvas. Close all the original frame windows after you have done this - leaving you with a large canvas with 5 floating frames.
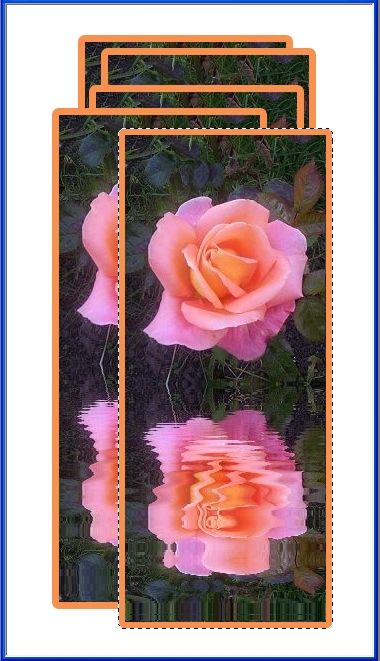
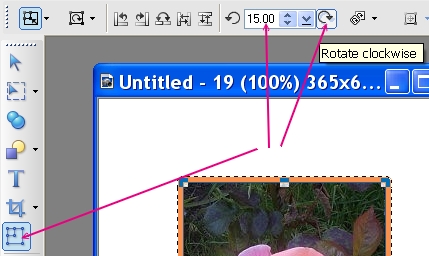
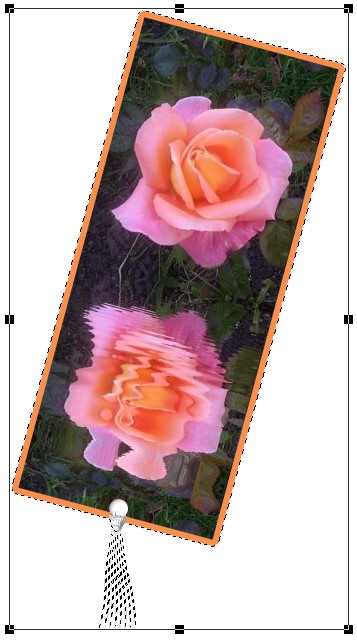
15. Right Click/Select all objects and then Right Click/Align/Center Both. 16. Using the Transform Tool, on the settings shown opposite, turn the set of frames through 15 degrees to the right.
17. Using the Path Drawing Tool (DESELECT THE BORDER by unchecking the box!), Color - White: Mode - 3D Round: Shape - Circle: draw a shape, 18W x 18H pixels.
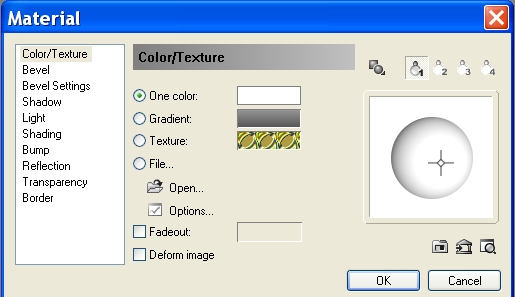
18. Open the Material box/Light by clicking on the little icon that looks like a camera on the toolbar (see opposite) and using your mouse set the light to the position shown.
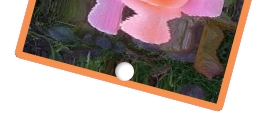
19. Put in place on the ufo as shown. Note how the positioning of the light creates an optical illusion of a hole, cut through the bookmark with a shadow!
20. Using the Path Drawing Tool, Custom Shape - B27, Mode - 3D Round: draw a shape 18W x 20H pixels.
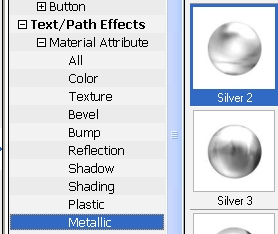
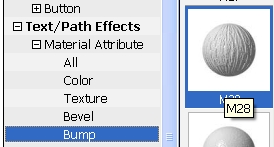
21. Open the EasyPalette/Text Path Effects/Material Attribute and apply the Silver 2 preset to the shape.
22. Using Text Path Effects/Bump, apply the M28 preset to the shape. 23. Put in place on the ufo as the knot of the tassle - where it threads through the hole.
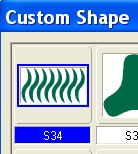
24. Using the Path Drawing Tool, Custom Shape - S34, Color - SAME silver preset: Mode - 3D Round: draw a shape 45W x 100H pixels.
25. Now use the Transform Tools/Perspective to narrow the top of the shape so that it forms a tassle. Put in place just below the silver 'knot' piece as shown in the picture opposite.
26. Now select the 1 white 'hole' piece + the 2 pieces of the tassle (NOTHING ELSE!) and Right Click/Merge as single object. 27. Select the tassle object + the top frame of the set as seen opposite - and Right Click/Duplicate. Drag the duplicate to a new canvas and Right Click/Merge as single object.
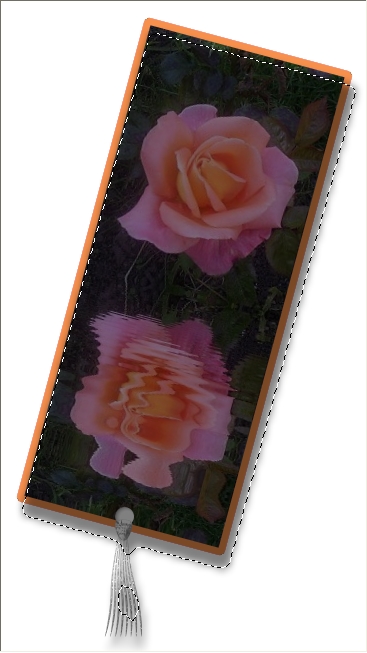
28. Using Right Click/Shadow, apply a default, dropped shadow to the right. 29. Right Click/Split Shadow. 30. Drag the SHADOW ONLY onto the original ufo canvas as seen illustrated left and Right Click/Arrange/Send to Back.
31. Adjust the position of the shadow so that it looks like the picture opposite and then Right Click/Merge the shadow ONLY with the background. |
|
|
ANIMATION
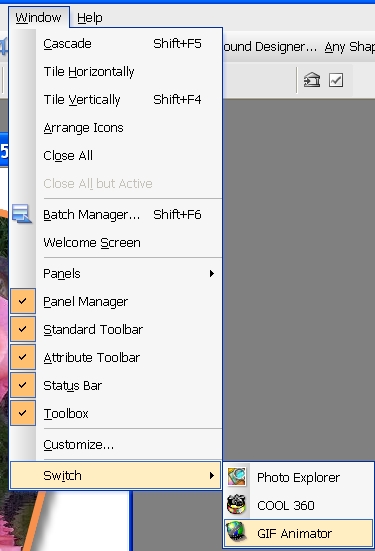
32. Now save your ufo to your desktop or folder - somewhere you can find it easily - as bookmark.ufo. 33. Click on Window/Switch/Gif Animator to open Gif Animator 5.
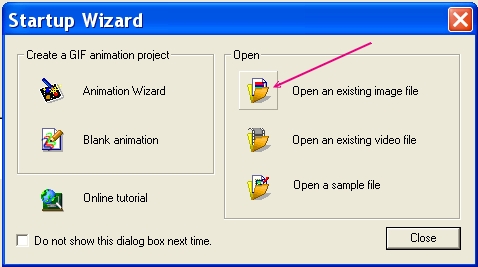
34. In the Startup Wizard that opens, click on 'Open an existing image file', browse to your bookmark ufo and Open.
35. Use the Duplicate button at the bottom of the screen to duplicate the first frame FOUR TIMES (i.e. 5 frames in all).
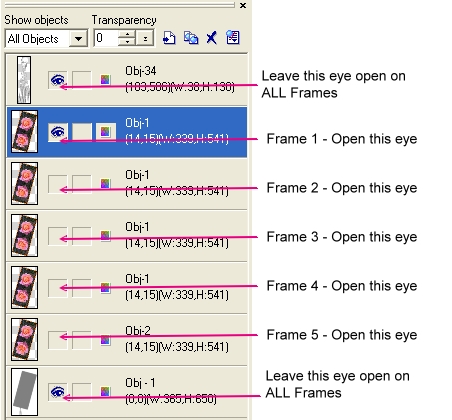
36. Now selection Frame 1 and in the Object Manager on the right close all the eyes for the flower frames except the top one as illustrated left. 37. Select Frame 2 and keep only the eye for the 2nd flower picture down open. 38. Select Frame 3 and keep only the eye for the 3rd flower picture down open. 39. Select Frame 4 and keep only the eye for the 4th flower picture down open. 40. Select Frame 5 and keep only the eye for the bottom flower picture down open.
41. If you wish to view your animation - you can now click on the Play button at the bottom left of the screen (see left). You can also view the animation by clicking the Preview tab. 42. This is quite a big animation - so if you wish to make it smaller in size, click on Edit/Resize and use the window that comes up to adjust the size of your animation, either by percentage or by pixel size. However, for the purposes of this tutorial I am leaving the animation at it's original size. 43. Now click on the Optimise tab. Set the number of colours as low as you can without spoiling the look of the animation - this will vary from picture to picture but for my animation this was 140 colours. Then SAVE - and you're done!
|
 |
|
|
Free Spirit Graphics If you would then like an invitation to join, please Email Me. We'd love to have you along! |
|
|
If you need any help - or want to make suggestions to improve this tutorial - or for new ones |
|
This site © Rosie Hardman-Ixer 2001/2/3/4/5/6/7 |
