
BOWL WITH WINDOW REFLECTION PI VERSION: 10 (also suitable for PI 8/8.5/XL). LEVEL: Beginner MAIN TOOLS USED: Path Drawing Tool, Material box, EasyPalette, Object Paint Eraser, Transform Tools (rotate and flip), Retouch Tools (Burn). TERMS OF USE: Please Read - Thank You! |
|
INSTRUCTIONS |
|
|
TOOL ICONS FOR BEGINNERS
|
|
|
|
REFLECTION GRAPHIC 1. Open a new canvas, 350W x 350H pixels, with a grey background (Hex#C8C8C8). 2. Using the Path Drawing Tool, Shape - Rectangle: Color - White: Mode - 2D: and draw a shape 57W x 145H pixels and put in position as shown opposite. 3. Now, using the same colour as the background, draw two rectangle shapes for the divisions between the panes. 4. Right Click/Merge All - then Save this graphic as a jpg to your hard-drive somewhere that you can easily find it. Or, if you're feeling lazy - you can always pinch my graphic opposite LOL! At least you now know how to make your own if you want to try a different shaped window etc. ;-) |
|
|
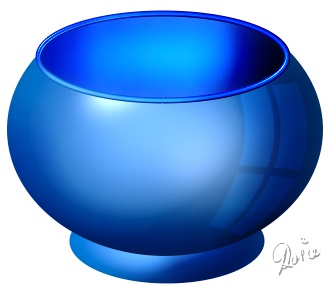
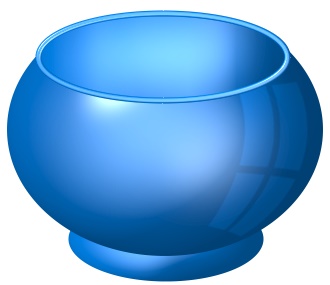
THE BOWL
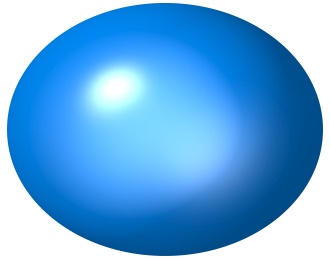
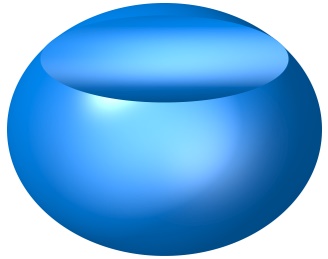
5. Using the Path Drawing Tool - Shape - Ellipse: draw a shape, 315W x 250H pixels, Mode - 3D Round, Width - 126: Depth - 30. 6. Open the EasyPalette, Material Attribute Gallery/Plastic and fill the shape with the Blue 5 preset (double click on the thumbnail or click and drag the preset to the shape).
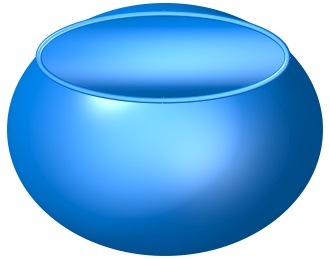
7. Now draw another ellipse - this time 250W x 87H pixels. Change the Mode to 3D Trim: Width - 44: Depth - 30. Put in place as shown.
8. Right Click Duplicate this ellipse and change the Mode to 3D Pipe. In the Path Panel/3D tab, change the Width to 3. Put in place as shown left.
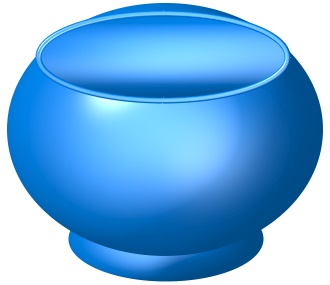
9. Now draw another ellipse - 195W x 85H pixels. Change the mode to 3D Round. Right Click/Arrange/Send to Back. Put in place as shown for the base. 10. In the Path Panel/3D tab - Lighting, click on light number 3 and use your cursor to move the light to the position shown on the left.
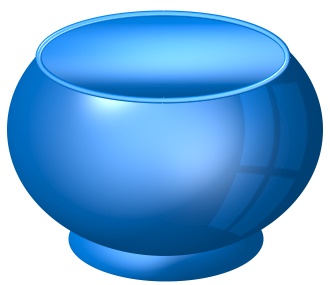
11. Now select the main part of the bowl again. Click on the Material button on the Attribute Toolbar - Reflection tab. Check the box next to Reflection map: then click on the File button. Browse to the graphic file you made in Part 1, select it and click Open. 12. Set the Density to 100% and click OK. 13. Right Click/Convert Object Type from Text/Path to Image. 14. Using the Object Paint Eraser, erase the excess from the top of the ellipse.
15. Select the small 3D Trim ellipse at the top (the inner bowl). 16. Using the Transform Tools/Rotate and flip, flip the shape to the left through 90o. 17. Right Click/Convert Object Type/Reset Text/Path Object. 18. Flip the shape back through 90o to the right. This turns the shading through 90o - making it run from left to right instead of top to bottom.
19. To give a bit of added 'depth' to the inside of the Bowl you can use the Retouch Tools/Burn on the settings shown opposite. Convert the ellipse to an image (see Instruction 13 above) and then two or three passes with the cursor over the ellipse shape should be enough to give it a deeper colouring. 20. Similarly, the same tool can be used to give the other pieces of the bowl a deeper shading - however I would recommend that you change the Level setting to 60 before doing this. ...and there's your beautiful blue bowl just waiting for a posy of flowers! |
 |
|
|
Free Spirit Graphics If you would then like an invitation to join, please Email Me. We'd love to have you along! |
|
|
If you need any help - or want to make suggestions to improve this tutorial - or for new ones |
|
 - Easy Palette
This site © Rosie Hardman-Ixer 2001/2/3/4/5 |