
PAINTED WOODGRAIN PI VERSION: 6/7. LEVEL: Beginner MAIN TOOLS USED: Paint Tools/Paintbrush, Selections Tool, Effect/Whirlpool. NOTE: This tutorial tries to replicate the effect of 'limed' wood or the new 'Paint & Grain' effect (made by a leading paint manufacturer) achieved by first painting the wood and then using a special texturing tool whilst the paint is still wet. I should also add - I can't take ALL the credit for this tutorial. I saw a tutorial for Adobe PhotoShop in 'Computer Arts' magazine - using different tools and methods ( & creating ordinary brown woodgrain with just one knot) - and the idea for this tutorial evolved out of that. Although my tutorial produces a completely different effect I feel I ought to acknowledge the source of my inspiration! PSP USERS! You can now find a PSP Version of this tutorial at Doodles by LadyFox Enjoy! TERMS OF USE: Please Read - Thank You! |
|
INSTRUCTIONS |
|
|
|
PAINTING THE WOOD 1. Open a canvas 400W x 300H in the colour you wish to 'paint' the wood. I am using Hex Code - #C5FEE9. 2. Using the Paint Tools/Paintbrush - set the Shape size to 2: Colour - white: Trans - 0: Soft Edge - 20: Preset - None: Lines - Straight Lines: Mode - click to set in 'Paint as object' Mode 3. Draw a straight line across the top of your canvas.
TIP: Keep your finger on the Shift key when drawing the line - this constrains it to a straight line - making it easy! 4. Now change the Paintbrush size to 1 and the paint Colour to a darker shade of the same green as the background and paint a line immediately below the white line. 5. Now click on the Pick Tool and when the box comes up asking if you wish to leave the paint in object mode, click Yes. 6. Right Click/Duplicate the line (Ctrl + C then Ctrl + V). Move it below the first. NOTE: Don't try to space all the following lines evenly - it will look more realistic if you don't! 7. Now Right Click/Select All Objects. Right Click/Duplicate and move these below the first two lines. 8. Repeat instruction 7 until you have filled your rectangle with the lines. 9. Right Click/Align/Right - then make sure your lines are centred on the canvas and Right Click/Merge All. the hard work is DONE! :-) |
|
|
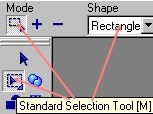
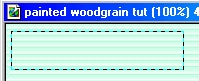
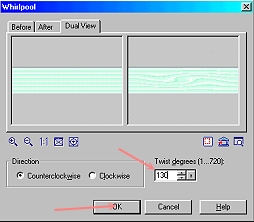
CREATING THE GRAIN NOTE: If you are going to use small sized pieces of wood in your finished picture you might like to try making a copy of your canvas now and resizing it BEFORE you do this part - the results will be quite different to doing the whole thing before resizing. Try both methods and see which result you prefer - each has its own merits! 10. Using the Standard Selection Tool: Shape-Rectangle, select an area of your canvas as shown. 11. Now click on Effect/All/Whirlpool and click on the Options button. 12. In the box that comes up, try changing the 'Twist degrees' number until you see a shape you like. Click OK. 13. Right Click Merge All. 14. Now repeat steps 10, 11 and 12, selecting different areas of the canvas (see note below), until you are satisfied with your finished woodgrain. NOTE: Choose different widths and depths of rectangles each time - also vary the Direction and Twist degrees number in stage 11 to get a realistic effect. Don't overdo the effect - just give a slight bend to some areas.Wasn't that easy? |
|
|
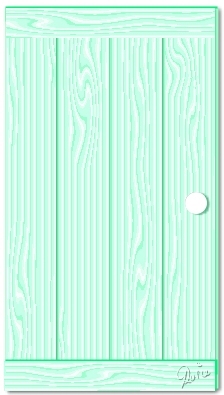
By making selections from this canvas and dragging them to a new one I made the cupboard door in the picture at the top of this page. |
|
|
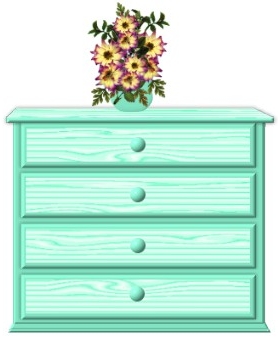
A super little chest using this method by Thanks for this Solen! |
 |
|
|
Free Spirit Graphics If you would then like an invitation to join, please Email Me. We'd love to have you along! |
|
|
If you need any help - or want to make suggestions to improve this tutorial - or for new ones |
|


This site © Rosie Hardman-Ixer 2001/2/3 |