
PIN IT UP! (Pushpins) PI VERSION: 6/7. LEVEL: Beginner MAIN TOOLS USED: TERMS OF USE: Please Read - Thank You! |
|
INSTRUCTIONS |
|
|
|
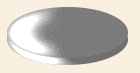
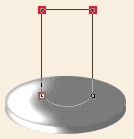
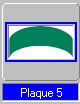
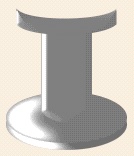
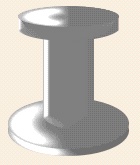
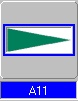
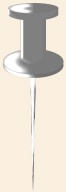
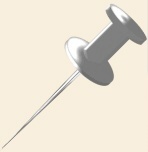
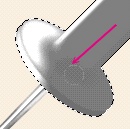
MAKING A PUSHPIN 1. Open a new canvas, 300W x 400H pixels with a coloured background. 2. Using the Path Drawing Tool, Shape - Ellipse: Color - grey: Mode - 3D: Border - 26: Depth - 30: draw an ellipse 120W x 50H pixels. 3. Click on the Material button/Shading tab - and change the shading to Metallic/Silver. 4. Right Click/Duplicate this piece and put in place on top of the first ellipse as shown. 5. In the Path Panel, use the lighting button to change the lighting to the positions illustrated. 6. Using the Path Drawing Tool, Shape - Rectangle: Color - grey: Mode - 3D: Border - 8: Depth - 30: draw a rectangle 50W x 85H pixels. 7. Click on the Path Edit Tool and select the bottom line of the rectangle. Click on Convert Line to convert the line to a curve. Click out of Path Edit Mode. 8. Using the Path Drawing Tool, Custom Shape - Plaque5: Color - grey: Mode - 3D: Border - 2: Depth - 6: draw a shape then use the Transform Tools/Rotate and flip - to flip the shape vertically. 9. Use the Transform Tools/Resize to resize this shape to 100W x 30H pixels as shown. 10. Using the Path Drawing Tool, Shape - Ellipse: Color - grey: Mode - 3D: Border - 11: Depth - 30: draw an ellipse 100W x 30H pixels. Put in place as illustrated. 11. Using the Path Drawing Tool, Custom Shape - A11 (PI6 - Arrow 3): Color - grey: Mode - 3D: Border - 11: Depth - 30: draw a shape 250 pixels wide then use the Transform Tools/Resize to squash this into a long narrow pin. 12. Use the Transform Tools/Rotate and flip - to rotate the shape 90 degrees to the right. 13. Fill this shape with a suitable shiny silver preset - I have used Silver 1 from the Material Attribute Gallery (PI6 - Material Gallery) in the EasyPalette. Right Click/Arrange/Send to Back. 14. Just to neaten everything up Right Click/Select All Objects - then Right Click/Align/Center Horizontally. 15. Shift/Click to select all the pieces of your pushpin head (not the pin itself) and then Right Click/Merge As Single Object. 16. Right Click/Select All Objects and then use the Transform Tools/Rotate by Degree to rotate the pushpin 45 degrees to the right. 17. Using the Retouch Tools/Blur, smooth the section shown - to blend the upright piece of the pushpin head into the base. Now is a good time to select both pieces of your pin and drag them to the EasyPalette for future use if you keep your ufos there. 18. If you wish to colour the head of your pin there is a nice, easy way. Select the head section of the pin and then click on the Format/Color Balance. Click around the colours until you find the colour and intensity you want. Easy! Alternatively you could use the Retouch Tools/Colorizer Pen to recolour the head. |
|
|
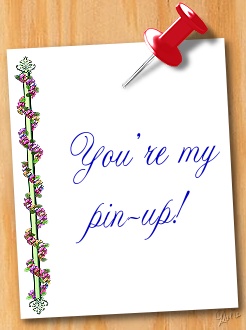
Now all you have to do is find a photo, message or other item you wish to pin up and resize your pin to the appropriate size. Don't forget to use the Object Paint Eraser to take the end off the pin where it goes into the picture! You can also add a shadow where this is appropriate. Maybe you could make the message swing to and fro in an animation? However you choose to use your pushpins - enjoy! |
 |
|
|
Free Spirit Graphics If you would then like an invitation to join, please Email Me. We'd love to have you along! |
|
|
If you need any help - or want to make suggestions to improve this tutorial - or for new ones |
|
This site © Rosie Hardman-Ixer 2001/2/3 |