
HALLOWEEN PUMPKIN PI VERSION: 6. LEVEL: Animation for Beginners MAIN TOOLS USED: Path/Path Edit Tools: Transform Tools: Airbrush: Gif Animator (Optional) TERMS OF USE: Please Read - Thank You! |
 |
INSTRUCTIONS |
|
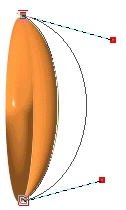
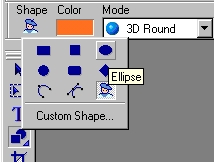 | DRAWING THE PUMPKIN 1. Open a new canvas, 250 x 250 pixels. 2. Using the Path Tool - Shape Ellipse: Color - Bright Orange: Mode 3D Round: Border 12: Depth 30 - draw an Ellipse as shown. |
|
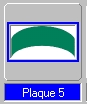
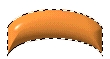
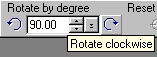
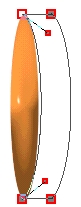
DRAWING THE PUMPKIN continued... 3. Again using the Path Tool - this time Custom Shape Plaque 5: Color - Bright Orange: Mode 3D Round: Border 12: Depth 30 - draw a shape as shown. Right Click and Duplicate this shape twice. Drag the two copies to a separate canvas until later. 4. Using the Transform Tool/Rotate - Rotate this shape 90 degrees clockwise. Using the Transform Tool/Resize - stretch the shape downwards until it is the height of your first piece. |
|
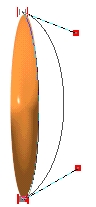
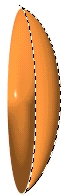
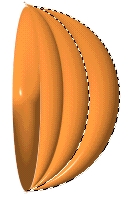
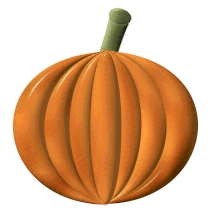
DRAWING THE PUMPKIN continued... 5. Click on the Path Edit Tool and then on either the top left or bottom left square box to produce the editing handles shown. Use these to shape the inner line so that it lies alongside the line of the ellipse. 6. Click on the top right square box and move it on top of the top left box. Click on the bottom right square box and move it on top of the bottom left box. 7. Click out of Edit Mode and check to see if your piece fits nicely against the ellipse. If you need to make adjustments you can do so by either going back into Path Edit mode or use the Transform Tool/Resize to help to make your piece fit better. 8. To get rid of the sharp 'spine' and give a more rounded look, click on the Materials button- Border/Depth tab and check the 'Smooth Spine' box. Click OK. 9. Drag one of the pieces you reserved earlier next to the right hand piece of the pumpkin and repeat stages 5 to 8 to produce a second side piece. You can produce a more rounded appearance by dragging the two editing handles for the right hand line outwards as shown. 10. Repeat with the last reserved piece. Your pumpkin should now look something like the one opposite. |
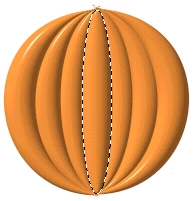 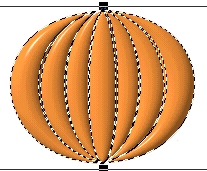 |
COMPLETING THE PUMPKIN 11. Hold down the Shift key and click on the last three right hand pieces of the pumpkin that you just made (not the ellipse) to select them. 12. Right Click and Duplicate these. 13. Using the Transform Tool/Rotate and Flip - flip the pieces horizontally. Put in place on the lefthand side of the pumpkin. 14. Click on the original ellipse section - Right Click/Arrange/Bring to Front. At this point my ellipse looked a little flat so I used the Transform Tool/Resize to expand it a little - I then used the Material button - Border/Depth to smooth the spine as per the other pieces. If you want your pumpkin to look slightly flatter - Right Click/Select All Objects and then use the transform tool to 'squash' (no pun intended!) your pumpkin a little flatter (opposite). |
|
THE STALK 15. Using the Path Tool - Custom Shape - Shape Edges : Color - any suitable green colour; Mode 3D: Border 5: Depth 30 - draw a shape as shown. 16. Using the Transform Tool - Resize reshape this until it looks like the picture opposite 17. Using the Path Tool, Shape Ellipse: in the same colour draw a small ellipse and put in place at the the top of the stalk as shown. 18. Select both pieces of the stalk and Right Click/Merge As Single Object. 19. Keeping stalk selected, Right Click and Send to Back and place behind the centre of the top of the pumpkin. 20. Using the Transform Tool/ Rotate Freely - rotate the stalk a little as shown opposite. (You can also use the Burn Tool to give a little more shading to your stalk and/or pumpkin as I have done here) Right Click/Select All Objects and Merge as Single Object. |
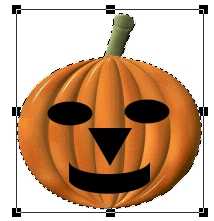  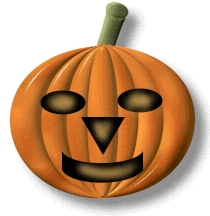 |
THE FACE 21. Using the Path Tool - Shape Ellipse: Mode 2D: Color Black - draw an ellipse. Right Click and Duplicate and put the eye sockets in place on the pumpkin. 22.Using the Custom Shape- Triangle draw the nose (you will have to use the Transform Tool/Rotate and Flip to flip this Vertically). 23. Using the Custom Shape - Plaque 5 draw the mouth (you will have to use the Transform Tool/Rotate and Flip to flip this Vertically). Place in position on the pumpkin. 24. Right Click/Select All Objects - the Right Click and Merge as Single Object. 25. Using the Paint Tool/Airbrush - on the settings shown opposite - paint a 'glow' inside the eyes, mouth and nose as shown. Add a shadow or put your pumpkin into a bigger picture and the still version is done! Those who want to animate - read on! |
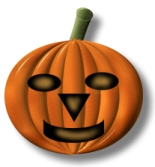 Frame 1  Frame 2 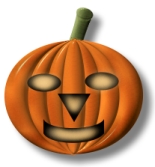 Frame 3 |
ANIMATED VERSION 26. First of all, drag your merged pumpkin shape to a new canvas to minimise the size of the canvas used (or, if you wish to put your pumpkin in a scene - this is the time to create a background for your graphic. Do not make the finished graphic too big or the file size of the finished animation will also be too large! Once your pic is ready to animate - Right Click and Merge All. 27. Click on Format/Dimensions and reduce the graphic to 75 percent (approximately 160 x 160 pixels). It should now be sized similar to the pic opposite. Save this as Frame 1. 28. Click on the Paint Tool/Airbrush - on the settings shown opposite - Color - a paler gold than before: Trans 0: Soft Edge 50. Paint over the light in the eyes to make it brighter and also a little on the glow in the mouth. Save this as Frame 2. 29. Paint the eyes and mouth again - nice and bright this time! - and add more glow in the nose too! Save this as Frame 3. |
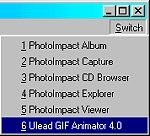 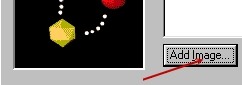 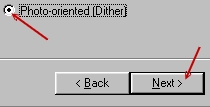 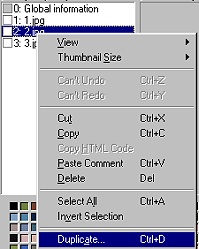 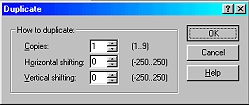 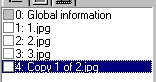 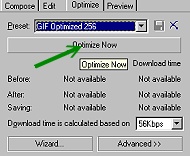 |
CREATING THE ANIMATION 29. Click on Switch/ULead Gif Animator 30. When Gif Animator opens, click on Animation Wizard. 31. Click on Add Image. Browse to your desktop - click on 1.jpg and Open. Repeat to add 2.jpg. Repeat to add 3.jpg. Click on Next. 32. Check the Photo-oriented (Dither) radio button and click on Next. 33. In the next box click on Next; then Finish in the final box. 34. Right Click on frame 2.jpg and then Duplicate. 35. In the Duplicate box make 1 copy and OK. 36. On your keyboard, hold down the ALT button and then use the Down Arrow Key to move the frame 2 jpg to the bottom of the list. 34. (If you want to see your pumpkin in action you can click on the Preview tab here!) 35. Click on the Optimise tab and then on Optimise Now. 36. Click on File/Save As - give a title to your file and Save! |
|
|
Your finished animation! |
 |
|
|
Free Spirit Graphics If you would then like an invitation to join, please Email Me. We'd love to have you along! |
|
|
If you need any help - or want to make suggestions to improve this tutorial - or for new ones |
|
This site © Rosie Hardman-Ixer 2001/2/3 |