
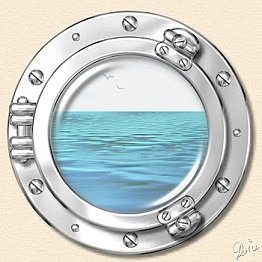
PORTHOLE FRAME PI VERSION: 7 (Can be done in PI6 but the preset is not available so another suitable silver/steel preset will have to substituted for the one used in the tutorial. Also the Copy Rotate tool is not available in PI6 - this is not a major problem though). LEVEL: Beginner MAIN TOOLS USED: Path Drawing Tool, Continue Draw, Path Edit Tool, EasyPalette, Paint Tools (Paintbrush), Line & Arrow Tool (Optional), Shadow. NOTE: Finished illustration shown at 75% of actual size. TERMS OF USE: Please Read - Thank You! |
|
INSTRUCTIONS |
|
|
|
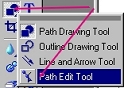
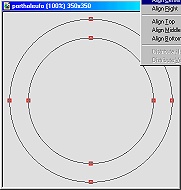
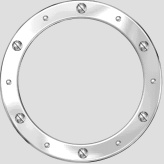
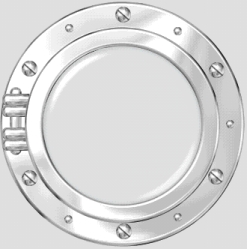
THE LARGE RING 1. Open a new canvas - 350W x 350H pixels with a light to medium-grey background. 2. Using the Path Drawing Tool, Shape - Circle: Colour - Grey: Mode - 3D Chisel: Border - 5: Depth - 30: draw a shape 325W x 325H pixels. 3. Change the Mode to Continue Draw and draw another circle inside it 250W x 250H pixels (don't worry if it's not right in the middle at this stage!). 4. Now let's get these two circles centralised, click on the Path Edit Tool and then Shift/Click to select both circles (Shift Click - Hold the Shift key down - then move your cursor over each circle outline until it becomes a little hand and then click).
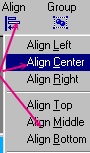
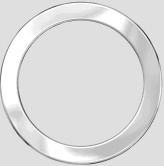
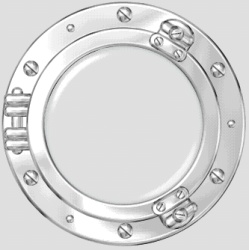
Now click on Align/ Align Center and then Align/Align Middle. 5. Click out of Path Edit Mode and back to 3D Chisel. 6. Open the EasyPalette/Material Gallery/Metallic and fill this circle shape with a silver preset - I have used M17 in PI7. 7. If you use the same preset you will need to open the Path Panel and restore the Border to 5 and the Depth to 30. Your pic should now look like the one opposite. |
|
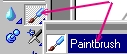
|
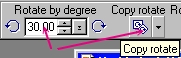
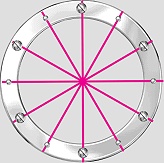
FIXINGS 8. Using the Path Drawing Tool, Shape - Circle: Mode - 3D Chisel: Border - 11: Depth - 30: draw a shape 20W x 20H pixels for a screw-head. Right Click/Convert Object Type/From Text/Path to Image. 9. Using the Paint Tools/Paintbrush - Size 4, Colour - Black: Lines/Straight Lines. 10. Draw a dark line across the screwhead. 11. Change the Paint colour to White and draw another line close to the first one as shown. 12. Now use the Path Drawing Tool, Shape to create a smaller circle 10W x 10H pixels. (I don't know why there are two different sizes of fixings on these portholes - but they mostly seem to have them - so, in the interests of accuracy, our porthole is having them too - LOL!!!) 13. Now you can place your fixings around the porthole by eye if you wish.... but, because I like to get things really accurate, I will show you how I placed them. If you want to place them by eye - ignore Instructions 14 - 20 and go straight to 21. 14. Using the Line and Arrow Tool, draw a line from top to bottom of your big circle (any colour). 15. Click on the Transform Tool - set the Rotate by Degree to 30 degrees and then, with your line selected, click on Copy-rotate 5 times. 16. Shift/Click to Select all the lines, then Right Click/Merge As Single Object. 17. Select your large screwhead and Right Click/Duplicate 5 times. 18. Select the smaller one and Right Click/Duplicate 5 times. 19. Now, using your lines as guides, put these in place on your ring as shown. 20. Once they are all nicely in place, select the lines again and hit Delete! 21. Click on the ring to select it - then Right Click/Select All Objects and Right Click/Merge As Single Object. That's the first part complete! Note: DO NOT Merge this section with any of the following sections! (Otherwise you won't be able to apply the shadows correctly at the end). |
|
|
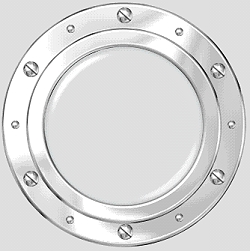
THE SECOND RING SECTION 22. Now, using the same methods as in Instructions 2 - 7 above, make an inner circle for your porthole but use 260W x 260H pixels for the first circle you draw and 210W x 210H pixels for the inner circle in Continue Draw. Make sure that you change the Border to 5 and the Depth to 30 after applying the preset! 23. Using the Path Drawing Tool, create another circle - Mode - 3D Round: Border - 21: Depth - 18: 210W x 210H pixels and fill this with a glass preset (EasyPalette/Material Attribute Gallery/G23). 24. Once the glass is in place - select the glass and the small ring, Right Click/Align/Center Both and Right Click/Merge As Single Object. |
|
|
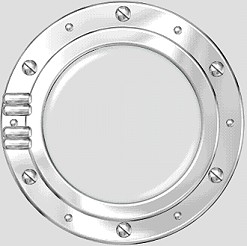
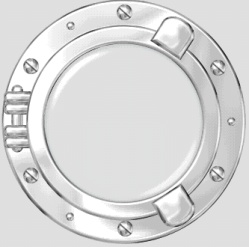
THE HINGE SECTION You don't have to - but it might help to open a second, new canvas for this next bit! 25. Using the Path Drawing Tool, Shape - Rounded Rectangle: Colour - Grey: Mode - 3D Round: Border - 7: Depth - 30: draw a shape 40W x 15H pixels. 26. Right Click/Duplicate this shape. Place one shape immediately below the other, then select both rounded rectangles and Right Click/Merge As Single Object. 27. Right Click and Duplicate the merged object. 28. Move these objects back to your original canvas if you are working on a second one. 29. Put in place as shown. 30. Using the Path Drawing Tool, Shape - Rounded Rectangle: Mode - 3D Round: Border - 11: Depth - 30: draw a shape 15W x 90H pixels as shown and use Right Click/Arrange (or use the ALT key and the down arrow) twice - to Send Backwards behind the two hinge shapes. 31. Use Shift/Click to select all three pieces of the hinge - Right Click/Merge As Single Object, then Right Click/Arrange/Send Backward to put this behind the inner ring. 32. Use Shift/Click to select the hinge and the inner ring - then Right Click/Merge As Single Object. |
|
|
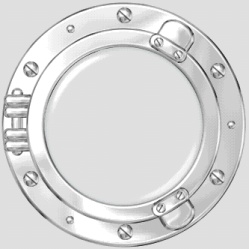
THE LATCHES 33. Using the Path Drawing Tool, Custom Shape - Arch 3: Mode - 3D Round: Border - 7: Depth - 30: draw a shape 50W x 70H pixels. 34. Use the Transform Tools/Resize to shorten it so that it fits within the inner ring.
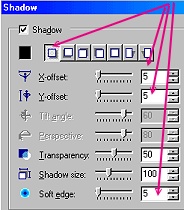
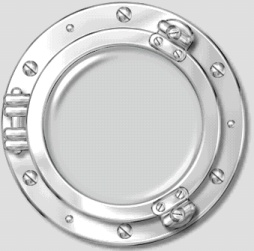
35. Use the Transform tools/Rotate Freely to rotate it to the angle shown. 36. Right Click and Duplicate this piece - then use the Transform Tools/Rotate and flip - to flip the piece Vertically. 37. Select the two pieces you just made then Right Click/Arrange/Send Backwards behind the hinge/inner ring piece. 37. Shift/Click to select the two pieces and the hinge/inner ring piece and then Right Click/Merge As Single Object. 38. Using the Path Drawing Tool, Shape - Rounded Rectangle: Mode - 3D Round: Border - 5: Depth -30: draw a shape 55W x 20H pixels. 39. Use the Transform tools/Rotate Freely to rotate it to the angle shown. 40. Using the Path Drawing Tool, Shape - Circle: Mode - 3D Round: Border - 5: Depth -30: draw a shape 12W x 12H pixels. 41. Right Click/Convert Object Type/From Text/Path to Image. Paint lines across the centre of this as in Instructions 10 and 11 above, using the brush on size 2 to make a small screwhead. 42. Right Click/Duplicate this screwhead and then put the two pieces in place on the rectangle as shown. 43. Shift/Click to select the rectangle and two screw heads and then Right Click/Merge As Single Object. 44. Right Click/Duplicate this piece and use the Transform Tools/Rotate and flip - to flip this piece Vertically. Put in place on the inner ring as shown then Shift Click to select the two pieces you just made + the inner ring/glass/hinge object and Right Click/Merge As Single Object. 45. Using the Path Drawing Tool, Shape - Rounded Rectangle: Mode - 3D Round: Border - 8: Depth -30: draw a shape 15W x 30H pixels. 46. Now using a Circle shape, draw a shape 20W x 20H pixels and put this centrally on the bar you just drew. 47. Draw a smaller circle - 12W x 12H pixels and lower the Border to 3. Keeping this piece selected, Right Click/Convert Object Type/From Text/Path to Image. Paint lines across the centre of this as in Instructions 10 and 11 above, using the brush on size 2. 48. Combine all the pieces of the turning latch you just drew by Shift/Clicking to select them all and then Right Click/Merge As Single Object. 49. Put this piece in place and then use the Transform Tools/Rotate Freely to get the angle shown. 50. Right Click/Duplicate this piece. Use the Transform Tools/Rotate and flip - to flip the piece Vertically - and put in place. 51. Shift/Click to select both the pieces you just made and then Right Click/Merge As Single Object. You should now have THREE objects - a) the back ring, complete with screwheads, b) the inner ring/glass/hinge/bolt plates and finally c) the two turning latches. 52. Selecting each one of these three objects in turn - apply shadows to them using the settings shown - X and Y Offsets + Soft Edge - all = 5. 53. Right Click/Select All Objects and then Right Click/Merge As Single Object. |
|
|
BON VOYAGE! |
 |
|
|
Free Spirit Graphics If you would then like an invitation to join, please Email Me. We'd love to have you along! |
|
|
If you need any help - or want to make suggestions to improve this tutorial - or for new ones |
|


This site © Rosie Hardman-Ixer 2001/2/3 |