
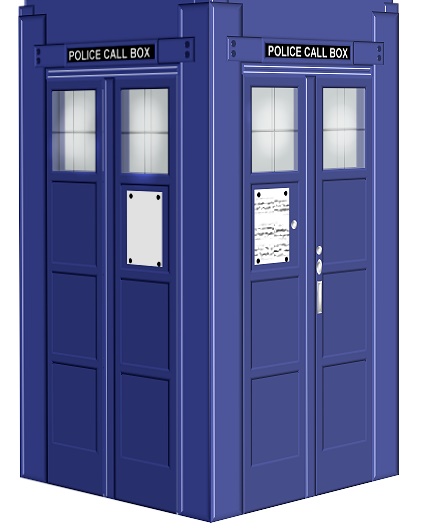
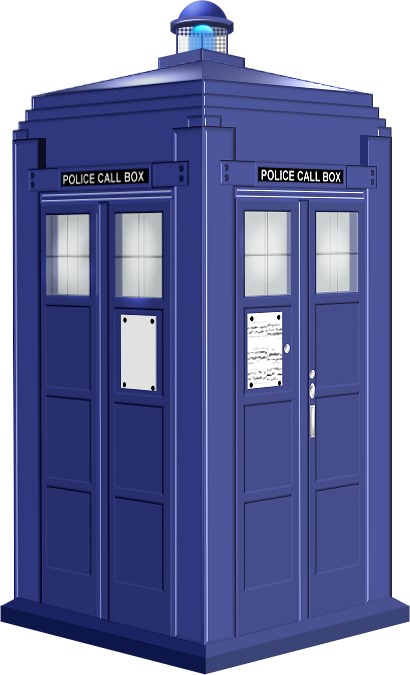
OLD FASHIONED, BRITISH POLICE CALL BOX PI VERSION: 12 (but also suitable for earlier versions). LEVEL: Intermediate MAIN TOOLS USED: Path Drawing Tool, Continue Draw, Path Edit, EasyPalette, Paintbrush Tool, Text Tool, Outline Drawing Tool, Transform Tools (Resize, Distort & Slant), Type Gallery/Hole, Line & Arrow Tool, Retouch Tools (Dodge & Burn). TERMS OF USE: Please Read - Thank You! |
|
|
|
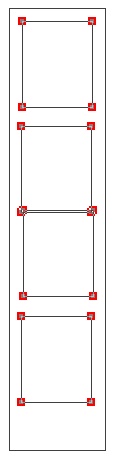
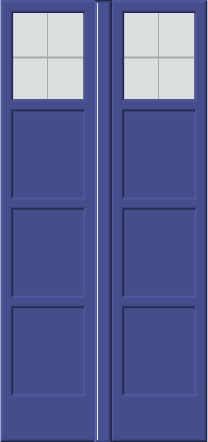
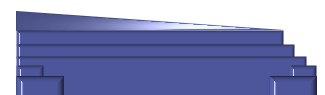
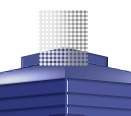
SIDE SECTION - STAGE ONE
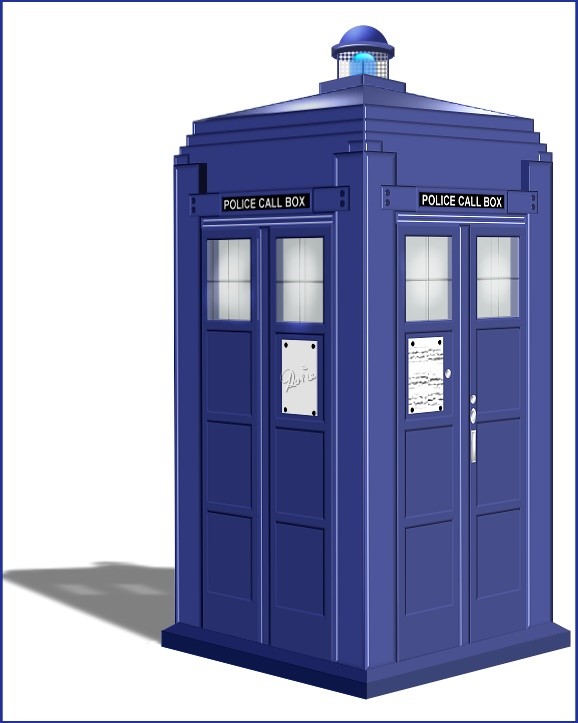
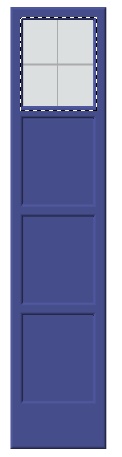
1. In PI, open a new, white canvas, 600W x 750H pixels. 2. Using the Path Drawing Tool, Shape - Rectangle: Color - Blue (Hex#272E72): Mode - 3D Round: Width - 3: Depth - 30: draw a shape 96W x 442H pixels. 3. Change the Mode to Continue Draw and draw another rectangle, approximately 70W x 85H pixels as shown far left. 4. Go into Path Edit and, with both paths selected, click on Align/Center Horizontally (you can either use Right Click or the button on the Attribue Toolbar to access this Command). 5. Now select ONLY the small Rectangle and click on Duplicate Path 3 times (see left).
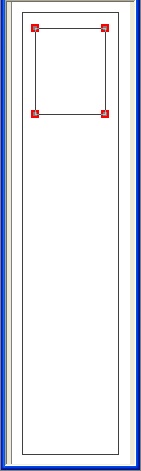
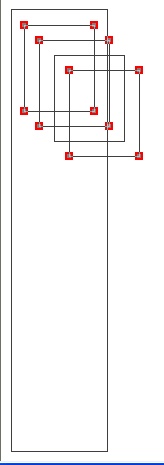
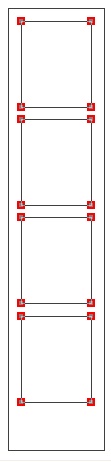
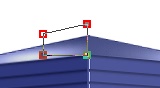
6. Now move the 3 duplicated rectangles to approximately the positions on the illustration far left (there should be a larger section at the bottom as shown) 7. Select ALL the 4 small rectangles and click on Align/Center Horizontally and then Align/Distribute Vertically - the result should be as shown left.
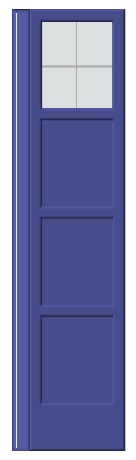
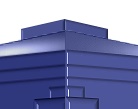
8. Exit Path Edit and return to 3D Round Mode (result, left). 9. Using the Path Drawing Tool, Shape - Rectangle: Color - Blue (Hex#272E72): Mode - 3D Round: Width - 3: Depth - 30: draw a shape 85W x 300H pixels.10. Right Click/Arrange/Send to Back, then put in place as shown, behind the lower three small rectangles.
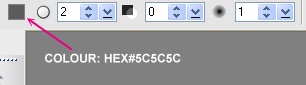
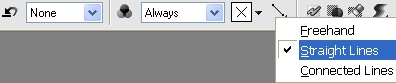
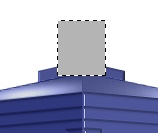
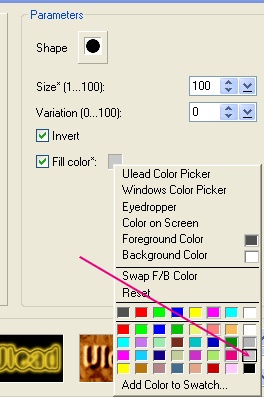
11. Using the Path Drawing Tool, Shape - Rectangle: Color - (any at this point): Mode - 3D Round: Width - 3: Depth - 30: draw a shape 79W x 93H pixels. 12. Open the EasyPalette/Text/Path Effects/Material Attribute/Glass and apply preset G24. 13. Right Click/Convert Object Type/From Text/Path to Image. 14. Using the Paint Tools/Paintbrush, on the settings shown in the 2 pictures opposite, draw two lines on the grey rectangle to represent panes in the window.
15. Right Click/Arrange/Send to Back, then put in place as shown, behind the top rectangle. 16. Right Click/Select All Objects - Right Click/Merge as Single Object. 17. Using the Path Drawing Tool, Shape - Rectangle: Color - Blue (Hex#272E72): Mode - 3D Round: Width - 5: Depth - 30: draw a shape 17W x 442H pixels. 18. Use the Light Bulb feature in the Path Panel to put a light down the left-hand edge of the shape. 19. Put in position to the left of the first object you created (see left).
20. Now Duplicate the first object (with the window), Right Click/Arrange/Send to Back and put this in position to the left of the tall, thin rectangle as shown.
21. Select the centre, tall, thin rectangle (this will ensure that we have the lighting correct on the next piece) and draw another rectangle: Mode 3D Round: Width - 5: Depth - 30: approximately 47W x 513H pixels. If at any time you find you have darker pieces than you should, just adjust the light slightly on the left hand side and you should be able to restore the correct colour of blue. 22. Right Click/Duplicate this rectangle and put the two shapes in place as illustrated left (be careful to Align all the bottom edges of these objects using Right Click/Align/Bottom if necessary.
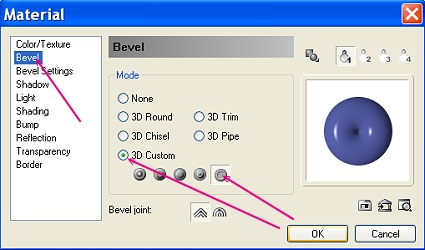
23. Now draw a blue rectangle, 210W x 12H pixels and change the Mode to 3D Custom: Width - 7: Depth - 30. Click on the button to 'Adjust Material Options' on the Attribute Toolbar (it looks like a little camera). 24. Under Bevel, select the option shown left.
25. Use the Light Bulb feature in the Path Panel to put a light across the bevels of the shape as shown. 26. Right Click/Arrange/Send to Back, then put in place as shown.
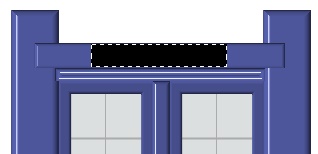
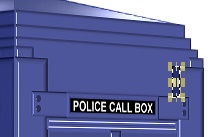
27. Using the Path Drawing Tool, Shape - Rectangle: Color - Blue (Hex#272E72): Mode - 3D Round: Width - 4: Depth - 30: draw a shape 250W x 25H pixels and put in place as shown.
28. Using the Path Drawing Tool, Shape - Rectangle: Color - Black: Mode - 2D: draw a shape 135W x 23H pixels and put in place as shown.
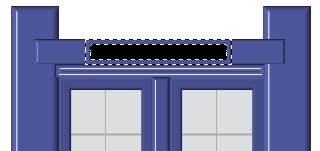
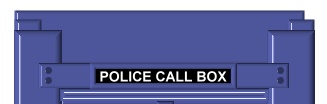
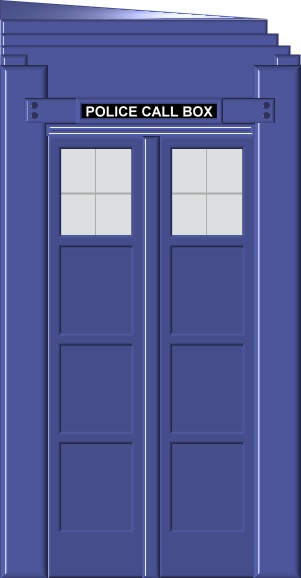
29. Using the Outline Drawing Tool, Shape - Rectangle: Color - Blue (Hex#272E72): Mode - 3D Round: Width - 3: Depth - 30: draw a shape 140W x 20H pixels and put in place as shown.
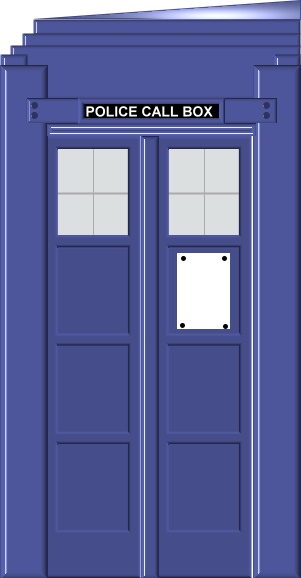
30. Using the Text Tool, Color - White: Font - Arial: Size- 14: BOLD: Mode - 2D: type the words POLICE CALL BOX and put in place as shown.
31.Using the Path Drawing Tool, Shape - Rectangle: Color - Blue (Hex#272E72): Mode - 3D Round: Width - 8: Depth - 30: draw a shape 27W x 16H pixels. Duplicate this and then Right Click/Arrange/Send to Back (for both pieces) and put in place at the sides as shown. 32. Using the Path Drawing Tool, Shape - Circle: Color - Darker Blue (Hex#111435): Mode - 3D Round: Width - 1: Depth - 30: draw four tiny little bolts and put in place as shown.
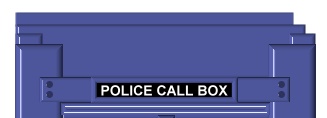
33. Using the Path Drawing Tool, Shape - Rectangle: Color - Blue (Hex#272E72): Mode - 3D Round: Width - 4: Depth - 30: draw a shape 290W x 53H pixels and put in place as shown. NOTE: This should be aligned with the LEFT-HAND side objects!
34. Using the Path Drawing Tool, Shape - Rectangle: Color - Blue (Hex#272E72): Mode - 3D Round: Width - 4: Depth - 30: draw a shape 278W x 14H pixels and put in place as shown (again, aligned LEFT).
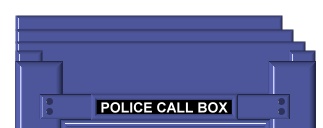
35. Using the Path Drawing Tool, Shape - Rectangle: Color - Blue (Hex#272E72): Mode - 3D Round: Width - 4: Depth - 30: draw a shape 267W x 14H pixels and put in place as shown.
36. Using the Path Drawing Tool, Shape - Triangle: Color - Blue (Hex#272E72): Mode - 3D Round: Width - 1: Depth - 30: draw a shape then go into Path Edit. 37. Create the triangular shape shown left being careful to keep the left edge vertical.
38. Go into the Material box/Light again and change the type of light to Spot instead of Direct - then use the Light Bulb feature in the Path Panel to create the lighting effect shown.
39. SAVE your work as side1.ufo. 40. Right Click/Select All Objects - then Duplicate. 41. Drag the Duplicate to a new canvas and save this as side2.ufo. |
|
|
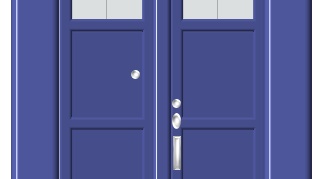
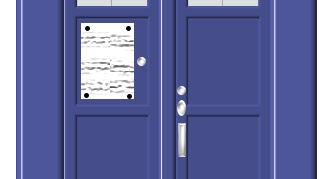
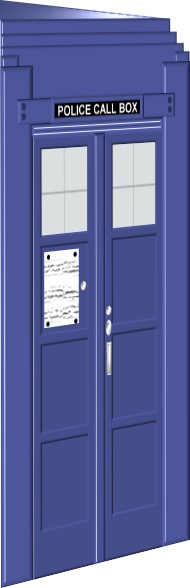
SIDE SECTION - STAGE 2 42. Using the Path Drawing Tool, with the circle, ellipse and rectangle shapes and the Silver 2 preset from the EasyPalette/Text/Path Effects/Material Attribute/Metallic - draw several small shapes as shown left and put in place. 43. Using the Path Drawing Tool, Shape - Rectangle: Color - White: Mode - 2D: draw a shape 52W x 75H pixels and put in place as shown.
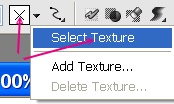
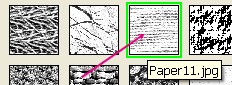
44. Right Click/Convert Object Type/From Text/Path to Image. Select the Paintbrush again, Color - Dark Grey (Hex#515151): and click on the Painting Texture Menu pull-down arrow to Select Texture (see opposite).
45. Select the Paper11 texture (shown opposite) and paint 2 or three line across the white shape to represent writing. 46. Add silver or black circles at the corner to represent pins for the white object (in order to 'pick up' the black or silver preset used previously, just click on a black or silver object). |
|
|
SIDE 2
47. Using the Side 2 ufo, Select ALL objects except for the white text. Use the Transform Tools to Flip all these objects Horizontally. 48. Create another white object with 4 black or silver pins and put in the position shown. |
|
|
CREATING PERSPECTIVE (using the Transform Tools)
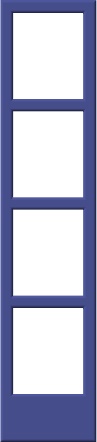
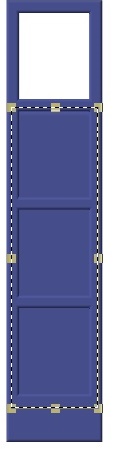
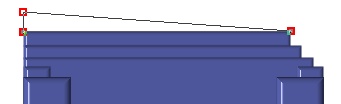
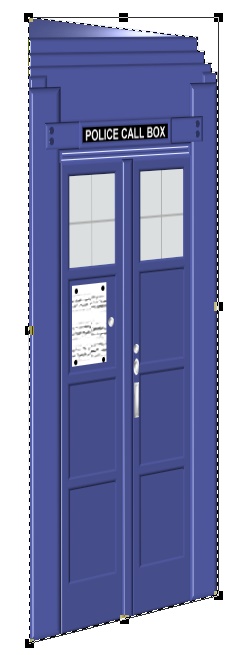
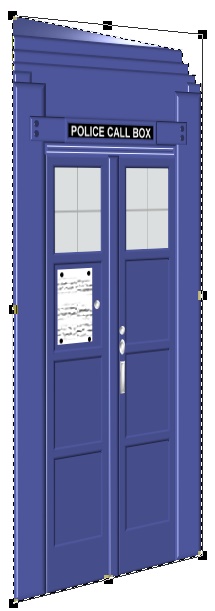
49. Using the Side 1 ufo - Right Click/Select All Objects and then Right Click/Merge as Single Object. 50. Using the Transform Tools/Resize, lessen the Width of the object to 190 pixels. 51. Now use the Transform Tools/Distort to pull the bottom left node down to the position shown. 52. Using the Transform Tools/Resize, reduce the Height of the object to 588 pixels.
53. Now use the Transform Tools/Distort to pull the top right node down to the position shown. 54. Because using these tools often blurs an object to a degree, you might like to click on Photo/Sharpen to sharpen up your object a little - but it will only need the lightest of the sharpern options to do this sufficiently.
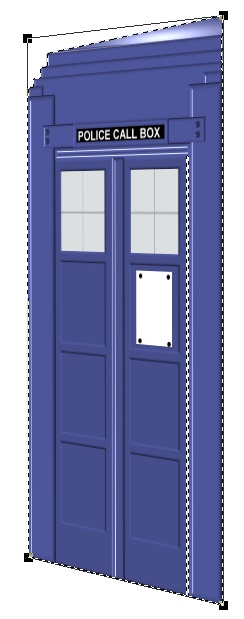
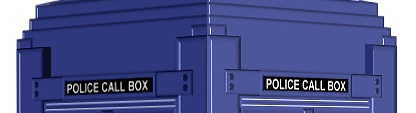
55. Select the Side 2 object. Using the same Transform Tools - first reduce the width (using Resize), pull the bottom RIGHT node down (using Distort), pull the bottom LEFT node up (using Distort) and pull down the top LEFT node (Distort) - to create the shape shown.
56. Sharpen this object and then click on Photo/Light/Brightness & Contrast and click on the bottom, centre square TWICE to darken this side of the box. 57. Right Click/Arrange/Send to Back and put in place as shown. |
|
|
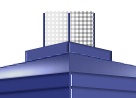
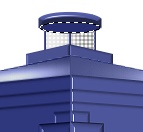
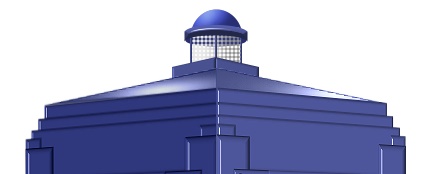
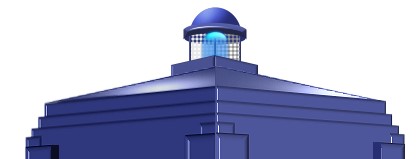
TOP LIGHT
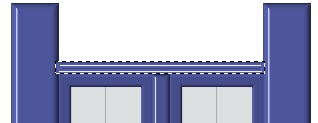
58. Using the Path Drawing Tool, Shape - Rectangle: Color - Blue (Hex#272E72): Mode - 3D Round: Width - 3: Depth - 30: draw a shape 44W x 30H pixels and put in place as shown.
59. Right Click/Arrange/Send to Back and then go into Path Edit. Edit the top line as shown by pulling down the top, left node.
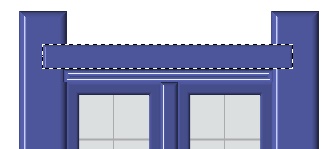
60. Exit Path Edit mode, Duplicate the shape and then, using the Transform Tools, flip the shape Horizontally. Right Click/Arrange/Send to Back & put in place as shown.
61. Using the Path Drawing Tool, Shape - Rectangle: Color - Grey (Hex#C8C8C8): Mode - 2D: draw a shape 50W x 56H pixels and put in place as shown.
62. In the EasyPalette click on Type/Path Effects/Type/Hole - Select Hole 2 and then Right Click/Modify Properties & Apply. Change the colour to the grey shown left and OK to make the mesh.
63. Using the Retouch Tool/Dodge lighten the left-hand side of the mesh and using the Retouch Tools/Burn darken the right-hand side. This should give the mesh a more rounded appearance. 64. Right Click/Arrange/Send to Back and put in place as shown. 65. Use the Line & Arrow Tool - Straight Lines: Colour - Blue (Hex#272E72): Mode - 3D Round: Line Size - 1: to draw three lines and use Right Click/Arrange/Send Backwards to place these between the box and the grey mesh (see left).
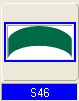
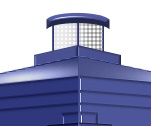
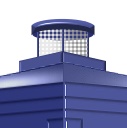
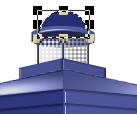
66. Using the Path Drawing Tool, Custom Shape - S46: Color - Blue (Hex#272E72): Mode - 3D Round: Width - 3: Depth - 30: draw a shape 63W x 19H pixels and put in place. Use the Light Blub feature in the Path Panel to create the light along the shape as illustrated.
67. Using the Path Drawing Tool, Shape - Ellipse: Color - Blue (Hex#272E72): Mode - 2D: draw a shape 61W x 12H pixels and put in place as shown and then Right Click/Arrange/Send to Back.
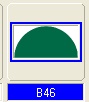
68. Using the Path Drawing Tool, Custom Shape - B46: Color - Blue (Hex#272E72): Mode - 2D: draw a shape 52W x 28H pixels and put in place (see left).
69. After Converting to Image, use the Retouch Tools/Dodge to shade the shape (see left) and the top section is finished.
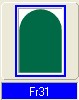
70. Now using the Custom Shape, Fr31 (left), Mode - 3D Round: Width - 13: Depth - 6: draw a shape 27W x 35H pixels. 71. Go into the EasyPalette/Text/Path Effects/Material/Glass and apply preset L20. Right Click/Shadow and UNcheck the shadow on the shape to remove it. 72. Put this in place as shown and the use Right Click/Arrange/Send Backwards to send it behind the two base pieces of the top - but NOT the mesh. |
|
|
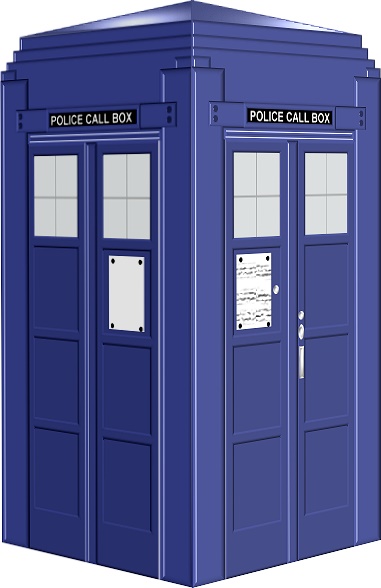
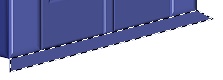
BASE & FINISHING TOUCHES
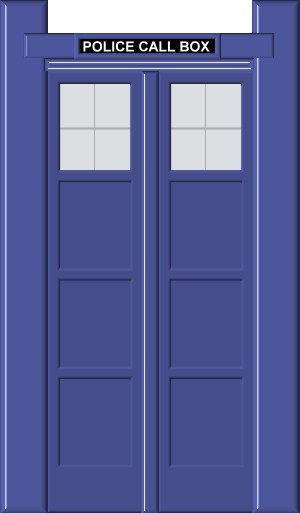
73. First of all select the two, large side pieces of the box and Right Click/Duplicate. 74. Right Click/Merge as Single Object. Now use the Transform Tools/Resize to make the object 355W x 588H pixels. 75. Right Click/Arrange/Send to Back and put in place to create the 'inside of the box' effect shown left. 76. Now select each of the 2 side pieces in turn and use the Retouch Tools/Dodge to create a 'shine' on each of the windows as illustrated.
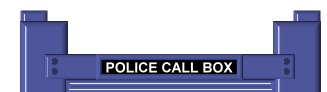
77. Using the Path Drawing Tool, Shape - Rectangle; Color - Blue (Hex#272E72): Mode - 2D: draw a shape 8W x 31H pixels and put in place on Side 1 (see left). 78. Duplicate this piece for Side 2 but make it a much darker shade of blue.
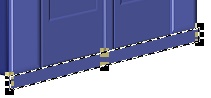
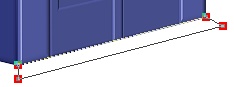
79. Using the Path Drawing Tool, Shape - Rectangle; Color - Blue (Hex#272E72): Mode - 2D: draw a shape 188W x 12H pixels and put in place. Align this with the centre of the police box. 80. Now use the Transform Tools/Slant on the centre node of the right-hand side of the shape to move it up into line with the bottom of the box. 81. Go into Path Edit and create the shape shown, being careful to keep the bottom line of the path, parallel to the bottom line of the box. Exit Path Edit. 82. Using the Path Drawing Tool, Shape - Rectangle; Color - Darker Blue (Hex#1D2254): Mode - 2D: draw a shape 205W x 16H pixels and put in place. Align this with the left-hand side of the previous piece. 83. Now use the Transform Tools/Slant on the centre node of the right-hand side to move the shape into line with the previous, edited shape. NOTE: You may need to adjust these pieces slightly to ensure that they all fit together perfectly. 84. Use the same method to create the base for Side 2. If you have made this side accurately, you should be able to Duplicate the base from Side 1 & flip it Horizontally using the Transform Tools - however it might need some minor adjustments in Path Edit. Slightly darken this base using Photo/Light/Brightness & Contrast again to match the side colouring.
|
 |
|
|
Free Spirit Graphics If you would then like an invitation to join - write to the email address on that page - we'd love to have you along! |
|
|
If you need any help - or want to make suggestions to improve this tutorial - or for new ones |
|


This site © Rosie Hardman-Ixer 2001/2/3/4/5/6/7 |