
CURTAINED PLAQUE (OR WINDOW) ANIMATION PI VERSION: 6. LEVEL: Animation for Beginners MAIN TOOLS USED: Path Tools: Object Paint Eraser: Transform Tools: Gif Animator NECESSARY DOWNLOADS: In order to make this plaque you will need to download and install this TERMS OF USE: Please Read - Thank You! |
 |
INSTRUCTIONS |
|
|
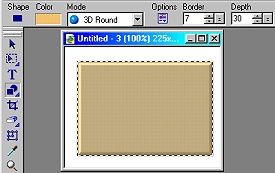
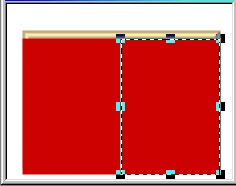
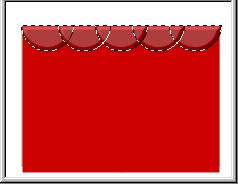
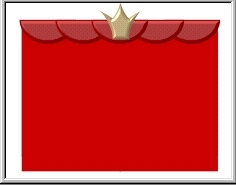
MAKING THE PIECES... 1. Open a new canvas 225W x 175H pixels. 2. Using the Path Tool, Shape Rectangle, Mode 3D, Color Gold, Border: 7, Depth 30 - draw a rectangle as shown. Keeping the shape selected, click on the Material button on the Attributes Bar/Shading and check the Metallic option. Click OK. Now put any text you wish onto the plaque in any colour or style - you could even add a photograph if you wish. 3. Using the Path Tool, this time Mode 2D, Color Dark Red - draw a curtain shape halfway across and just below the bottom of the plaque in the position shown. 4. Duplicate the red rectangle and place in position. 5. Using the Path Tool, Shape: Half Circle: Color Red: Mode 3D: Border 4: Depth 30: - draw a half circle. Using the Transform Tool/Flip and Rotate, flip the half circle vertically. 6. Duplicate the half circle 4 times and place them in position as shown. Select all five half-circles, Right click/Align Top. Then Right Click/Align/Space Evenly - Horizontally. Check Space/Even (fix objects on both ends). Click OK. 7. Using the Path Tool, Shape Crown 2 (or shape of your choice), Mode 3D, Color Gold, Border: 7, Depth: 30 - draw a decoration for the centre of your swags. You have now made all the pieces for your graphic! |
|
CREATING THE CURTAINS... 8. Select the left hand curtain. 9. Open your Easy Palette and apply the preset that you have downloaded and installed for this tutorial. 10. Repeat with the second curtain. 11. Keeping curtain selected click on Object/Convert Object Type/From Path to Image. 12. Using the Object Eraser - Shape 10, erase a small wavy line at the bottom of each curtain as shown to indicate the folds. Repeat 12 with the second curtain. It's now time to create the frames for your animation. |
 Frame 2.  Frame 3. |
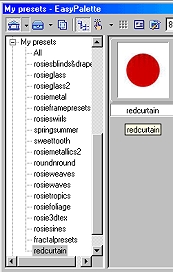
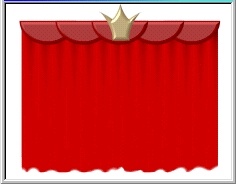
CREATING THE ANIMATION FRAMES 13. Save your pic with the closed curtains as Frame 1.
14. Using the Transform Tool/Resize - narrow the curtains to 'open them' as shown. Save this as Frame 2.
15. Using the Transform Tool/Resize - narrow the curtains again to 'open them' further as shown. Save this as Frame 3.
|
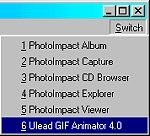 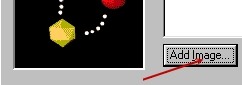 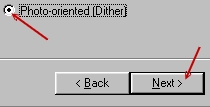 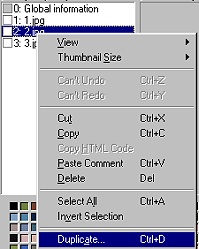 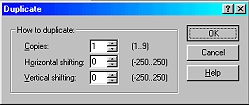 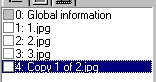 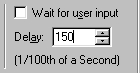 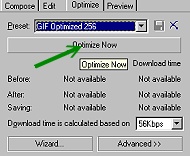 |
CREATING THE ANIMATION 24. Click on Switch/ULead Gif Animator 25. When Gif Animator opens, click on Animation Wizard. 26. Click on Add Image. Browse to your desktop - click on 1.jpg and Open. Repeat to add 2.jpg. Repeat to add 3.jpg. Click on Next. 27. Check the Photo-oriented (Dither) radio button and click on Next. 28. In the next box change the Delay Time to 100; click on Next; then Finish in the final box. 29. Right Click on frame 2.jpg and then Duplicate. 30. In the Duplicate box make 1 copy and OK. 31. On your keyboard, hold down the ALT button and then use the Down Arrow Key to move the frame 2 jpg to the bottom of the list. 32. Highlight frame 1.jpg in the list and change the delay to 200. 33. Highlight frame 3.jpg in the list and change the delay to 350. 34. (If you want to see your pic in action you can click on the Preview tab here!) 35. If you wish to optimise your graphic, click on the Optimise tab and then on Optimise Now (however I found that the file was not too big at about 40kbs and red does not optimise well). 36. Click on File/Save As - give a title to your file and Save! |
|
|
Your finished animation! |
|
Another version of the same tutorial - with a few changes! The instructions for making the window can be found on my Window Snapshot Tutorial |
 |
|
|
Free Spirit Graphics If you would then like an invitation to join, please Email Me. We'd love to have you along! |
|
|
If you need any help - or want to make suggestions to improve this tutorial - or for new ones |
|
This site © Rosie Hardman-Ixer 2001/2/3 |