
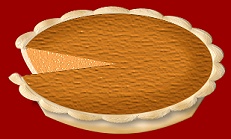
PUMPKIN PIE PI VERSION: 7. LEVEL: Beginner MAIN TOOLS USED:Path Drawing Tool, Path Edit, Transform tools, EasyPalette, Object Paint Eraser, Paintbrush. TERMS OF USE: Please Read - Thank You! |
|
INSTRUCTIONS |
|
|
|
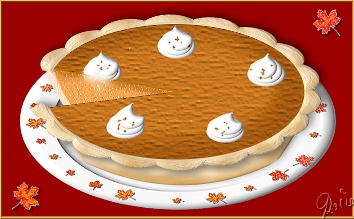
PIE TOP
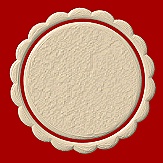
1. Open a new canvas - background colour of your choice - I am using Hex#9B0000 (a nice warm red as this suits the season well), 350W x 350H pixels. 2. Using the Path Drawing Tool, Custom Shape - Circular 3: Color - #F9CD9D: Mode - 3D Round: Border - 10: Depth - 20, draw a shape 300W x 300H pixels for the pie crust. 3. Open the EasyPalette/Material Attribute Gallery/Bump and click on Bump No. M13.
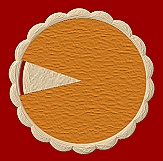
4. Using the Path Drawing Tool, Custom Shape - Pie01: Color - #D05B0D: Mode - 3D Round: Border - 2: Depth -30, draw a shape to fit the inside circle of the first shape (up to the inner edge of the crust - see illustration). 5. Open the EasyPalette/Material Attribute Gallery/Bump and click on Bump No. M33.
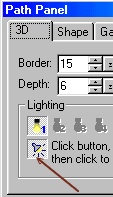
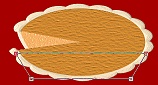
6. Now Shift/Click to select both pieces of the pie and click on Transform/Resize and use this to resize your pie pieces to 300W x 160H pixels. 7. Now select the pastry crust piece of your pie and, in the Path Panel, click on the light button.
Move the cross-hair cursor over the selected piece until you get an effect you like. (I found the best place was near the far left of the pie crust).
8. Once you are happy with the look of the crust, Right Click/Convert Object Type/From Text/Path to Image.
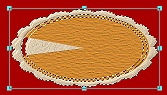
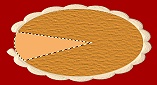
9. Now use the Object Paint Eraser to erase the excess part of the crust as shown (what a shame this isn't real..... no 'cook's perks' today!). |
|
|
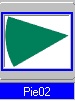
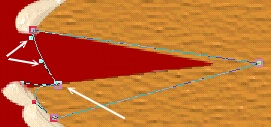
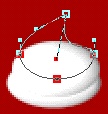
INSIDE THE PIE 10. Using the Path Drawing Tool, Custom Shape - Pie02: Color - #EC7C2B: Mode - 3D Round: Border - 1: Depth - 1, draw a shape and then use the Transform Tools to stretch this shape until it fits the gap in the pie as shown. 11. Open the EasyPalette/Material Attribute Gallery/Bump and click on Bump No. M29. 12. Keeping this piece selected - click on the Editing button and move the Edit point to the position shown. Use the adjustment handles to create the inner curve illustrated. 13. Right Click/Arrange/Send to Back. 14. Right Click/Duplicate this piece.
15. Click on Color and change this to Hex#F9CD9D - then Right Click/Arrange Send to Back and put into position as shown to represent the outer edge of the pastry base. |
|
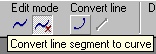
|
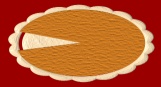
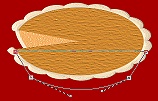
PIE BASE 16. Using the Path Drawing Tool, Shape - Rectangle: Color - #F9CD9D: Mode - 3D Round: Border - 5: Depth - 30, draw a shape 260W x 50H to stretch across the pie as shown. 17. Click on the Editing button and move the two bottom edit points to the points shown. 18. Now select the bottom line (make sure you have the left-hand button under the word 'Edit Point' on the Attribute bar... then move your cursor over the line until it turns into a little hand then click to select the line). Click on Convert to Curve. Use the adjusment handles to produce a curve parallel to the edge of the pie as illustrated. 19. Right Click/Arrange/Send to Back - and put in place. 20. Now select the crust of the pie again and Right Click/Shadow. Change the X and Y-Offsets to 3 and click OK.
21. Right Click/Split Shadow. Now select the shadow only (if necessary find this in the Layer Manager) and use the Object Paint Eraser to erase ALL the shadow except for the part under the front crust rim.
22. I have now used the Paintbrush (color - #B7770D) on a high Transparency (90%) to add brown, cooked highlights to the pastry and the Retouch Tools/Burn to add a little shading to the top. |
|
|
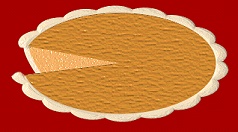
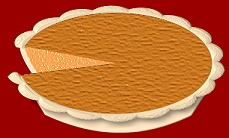
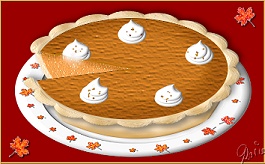
CREAM WHIRLS 23. Using the Path Drawing Tool, Shape - Ellipse: Colour - White: Mode - 3D Round: Border - 6: Depth - 30: Draw three shapes as shown. To give you some idea of size - the bottom shape is 45W x 25H pixels. 24. Keeping the top shape of these three selected, click on the Editing button, and use the Adjustment handles to produce the shape shown. 25. The quick way to add a number of these to your pie would be to select all the white shapes then Right Click/Merge As Single Object - and then Duplicate these to go around your pie.... however it will look better if you make slightly different shaped ones each time! 26. Put the final whirl over the 'cut' in the pie and (assuming you have merged the three white shapes), use the Object Paint Eraser to erase part of it as if it has been cut through. 27. Finally, I used the Paintbrush to paint in a few 'chopped nuts' and a little shading at the top of the pie filling. and your pie is ready to serve! |
 |
|
|
Free Spirit Graphics If you would then like an invitation to join, please Email Me. We'd love to have you along! |
|
|
If you need any help - or want to make suggestions to improve this tutorial - or for new ones |
|


This site © Rosie Hardman-Ixer 2001/2/3 |