
PAINTBOX & BRUSH PI VERSION: 8 (also suitable for 6 & 7). LEVEL: Advanced MAIN TOOLS USED: Path Drawing Tool, Continue Draw, Path Edit, Transform Tools. For PSP Users an excellent tutorial for producing this Paintbox in PSP can be found at Jan's Designs. TERMS OF USE: Please Read - Thank You! |
 |
INSTRUCTIONS |
|
|
|
THE BOX BASE AND LID - PART 1 1. Open a new canvas - 400W x 300H pixels.
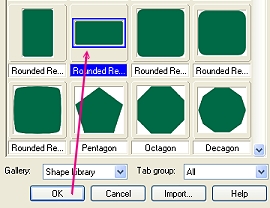
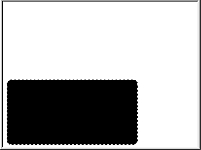
2. Using the Path Drawing Tool - Custom Shape/Rounded Rectangle2 (watch out! There are TWO Rounded Rectangle 2s in some versions of PI! be sure to use the one on the left.); Colour Black; Mode-2D - draw a shape 285W x 143H pixels.
3. Using the Transform Tool/Resize, stretch the shape as shown until it is 360 pixels wide.
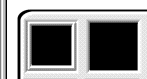
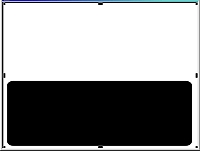
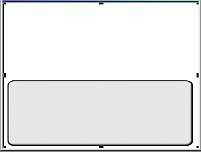
4. Copy and Paste the black shape. Change its colour to white; Mode 3D; Border 4: Depth 30. 5. Using the Transform Tool/Resize, reduce the size of the shape a little and put in place over the black shape as shown. 6. Copy and Paste these two shapes and drag the copy to a separate canvas. Minimise this window (which will be used to make the Lid) until later. |
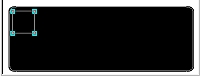 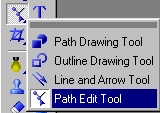    |
THE BOX BASE - PART 2. 7. Select the square shape on the Path Drawing Tool, then select the white shape and change the Mode to Continue Draw. Draw a small square approximately 47W x 47H pixels. 8. Click on the Path Edit Tool (left).
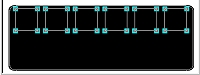
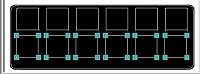
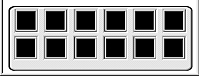
9. Click on the Duplicate button five times to produce a total of six squares. Arrange these in a row across your box as shown (they don't have to be perfectly in line at this stage). 10. Select all the small squares, Right Click/Distribute Horizontally; Right Click/Align Top. 11. Keeping all the small squares selected Right Click/Duplicate Path and move into position as shown. Leave room below the second row of squares for the 'brush holder'! 12. Change back to the Path Drawing Tool and change the Mode back to 3D Round. 13. Select the black and white shapes of the box base and Right Click/Merge as Single Object. Your box base should look as shown. |
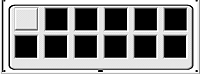     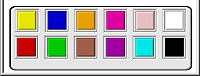 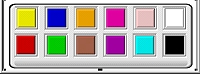 |
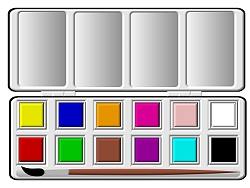
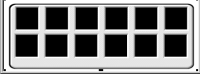
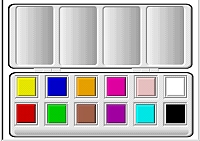
THE PAINTS 14. Using the Path Drawing Tool - Colour White; Shape Square; Mode 3D Round; Border 5; Depth 30 - draw a square to fill the first 'Paintpot holder' as shown. 15. Change Mode to Continue Draw and draw another square within it. 16. Change Mode Back to 3D Round - your pic should look as shown left. 17. Select the square shape you just made - Copy and Paste this 11 times and place into all the 'Paintpot holders' in the base as shown. Right Click/Select All Objects/Merge as Single Object. 18. Using the Path Drawing Tool - Colour White; Shape Square; Mode 3D Round; Border 4; Depth 30 - draw a square shape to make your first 'paint block' as shown. 19. Copy and Paste this 11 times and place in all the other vacant paint spaces. 20. Select each of these in turn and change the colours to any colours that you wish for your 'paints'. To get a really good white - select the square then click on the Lighting button in the Path Panel. Change the number of lights to 2 (both Direct). 21. Using the Path Drawing Tool - Shape Rounded Rectangle; Mode 2D draw a long shape to represent the 'groove' for a paintbrush. Fill this with a Gradient Fill - white to dark grey - direction top to bottom (see illustration left). 22. Right Click/Select All Objects/Merge as Single Object. Your base is complete! |
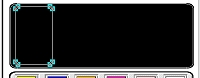  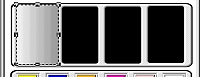 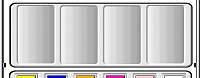  |
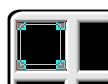
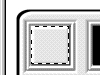
THE LID continued. 23. Drag the lid pieces from the second canvas onto your main canvas and close the second canvas. 24. Click on Path Drawing Tool - Custom Shape Rounded Rectangle. Select the white lid rectangle. Change the Mode to Continue Draw. Draw a Rounded Rectangle Shape as shown. 25. Change to Path Edit Mode as before - Select the rectangle and duplicate it three times. 26. Arrange these 4 rectangles in a line across the lid, Right Click/ Align-Top and then Right Click/Distribute Horizontally - see left. 27. Click out of Path Edit and back into 3D Round mode. 28. Using the Path Drawing Tool - Shape Rectangle; Mode 2D - draw a rectangle that covers the first black area in the lid but do not go beyond the edges of the white section. Fill this with a white to grey gradient (left to right) - see illustration. 29. Copy and paste this 3 times and position over the remaining three black areas in the lid. Select all four shaded rectangles and Right Click/Arrange/Send backwards so that they lie between the black and white parts of the lid as shown. Select all the elements of the lid - Right Click/Merge as Single Object. 30. Using the Path Drawing Tool - Shape Rectangle - draw a very small 3D shape, Copy and Paste twice and merge all three to form a hinge as shown. Copy and Paste the hinge and put both hinges in place between the lid and the base of the paintbox. Your paintbox is now complete! |
 |
THE BRUSH 31. Open a new canvas 400W x100H pixels. 32. Using the Path Drawing Tool - Custom Shape, Brush Tip 2 (NOT the one illustrated left!); Colour brown; Mode 3D - draw a brown shape. 33. Using the Transform Tool - Rotate this 90 degrees to the right. Use the Resize Tool to stretch this sideways and make narrower. (see illustration) 34. Convert the shape to an Image and keeping it selected use the Paintbrush Tool to paint a bristle-holder on the end of the paintbrush (any colour of your choice). 35. Using the Path Drawing Tool - Custom Shape, Brush Tip 1 (illustrated left); Colour black; Border 4; Depth 30 - draw a brush tip for your brush. 36. Using the Transform Tool - Rotate this 90 degrees to the right. Place on the end of your brush. Select all elements of your brush - Right Click/Merge as Single Object. 37. Drag your brush onto your paintbox. Your paintbox and brush are complete! |
 |
|
|
Free Spirit Graphics If you would then like an invitation to join, please Email Me. We'd love to have you along! |
|
|
If you need any help - or want to make suggestions to improve this tutorial - or for new ones |
|
This site © Rosie Hardman-Ixer 2001/2/3 |