
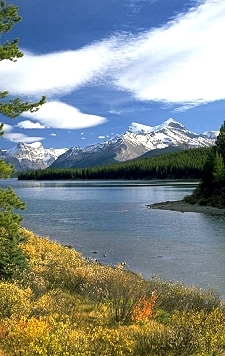
REFLET WATER ANIMATION PI VERSION: 8 (also suitable for 7). LEVEL: Intermediate MAIN TOOLS USED: Selection tools, Object Paint Eraser, Outline Drawing Tool (Optional - if you want to frame the picture), Reflet program, Gif Animator. NECESSARY DOWNLOADS: You will need to download and install a small French program called Reflet (click on the Telechargements (Downloads) link at the site) in order to use this tutorial. To download the picture I am using in the tutorial Click Here. TERMS OF USE: Please Read - Thank You! |
|
INSTRUCTIONS |
|
|
|
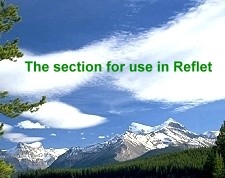
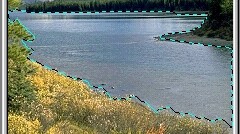
PREPARE THE IMAGE FOR REFLET 1. Open the picture supplied in PhotoImpact. 2. Using the Selection Tools/Rectangle select an area from the far shoreline of the water to the top of picture and across it's full width. To be sure to get the full width of the picture - if necessary click on the Transform Tools/Resize - click on the 'Selection' button on the Attribute Toolbar and stretch the selection manually to ensure this. 3. Right Click/Convert to object and drag this piece to a new canvas. 4. Right Click/Merge and save this to any folder of your choice as reflet.jpg. |
|
|
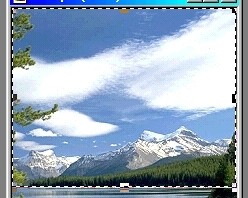
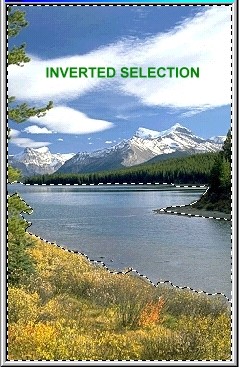
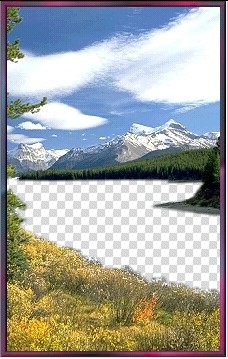
PREPARING THE OVERLAY 5. Back with the original picture again in PI, we now have to use the Selection Tools/Lasso Tool to make a selection to use as our overlay. First of all carefully using the Lasso Tool: Snap to Edges - Checked: Sensitivity - 1: Soft Edge - 1, to select all the water section of the picture. Don't be worried about getting a perfect edge around the trees and foliage but just be as careful as you can. 6. Right Click/Invert. 7. Right Click/Convert to Object. 8. Now open a new canvas - under Canvas check 'Transparent' and under Image Size check 'Active Image' - and OK. 9. Now drag your overlay to the Transparent Canvas and ensure that it fits perfectly on all sides. 10. Save this as overlay.ufo (Click on File/Save As - File Type UFO (Ulead File for Objects)). You can now close the original photograph. 11. Using the Object Paint Eraser you can now use this on a small size to tidy up and improve your overlay. For this particular picture I dropped the size right down to 1 or 2 pixels and chipped away at the edges of the trees and bushes and tidied up the shoreline. Also there is often a single, pixel line left at the sides of the picture in the water section when you Invert the selection - so you can remove this too as this stage. 12. (Optional) You may also now add a frame to your overlay using the Outline Drawing Tool. However, if you do this you should ensure that this fits your picture EXACTLY. If necessary click on Format/Image Size - check 'Selected object' and put in the precise sizes (for this picture they are 225W x 356H pixels). Make sure that this is centred perfectly on your canvas. 13. Fill this with any preset of your choice (make sure that the preset doesn't alter the size of the frame!) and then select the frame and the overlay and Right Click/Merge As Single Object. Keep the overlay.ufo open in PI whilst you do the next bit. |
|
|
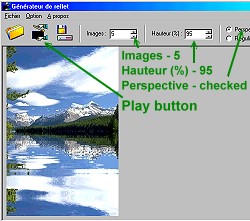
USING REFLET TO MAKE THE WATER ANIMATION FRAMES 14. Now open the Reflet Program. Click on the yellow folder button and browse to the folder where you saved your reflet.jpg earlier. Select it and click on Open. 15. Use the following settings: If you want to see how this looks click on the 'Play' button (the two hands holding the clapperboard). 16. Click on Fichier/Exporter. 17. In the box that comes up under Format d'Export choose S�quence JPG and OK. Save these frames somewhere you can locate them easily. 18. Close the Reflet Program. |
|
|
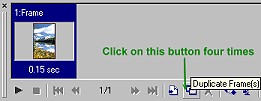
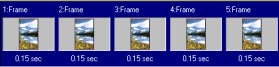
FINAL PREPARATION OF THE UFO & 19. In PI - now open all the frame jpgs that you just made in Reflet. You will see that these are titled reflet00.jpg, reflet01.jpg, reflet02.jpg, reflet03.jpg and reflet04.jpg. 20. Click on reflet00.jpg and Right Click/Copy (or Ctrl + C). 21. Back on the Overlay canvas - Right Click/Paste (or Ctrl + V). Right Click/Arrange/Send to Back. Close reflet00.jpg 22. Do the same thing using reflet01.jpg, reflet02.jpg, reflet03.jpg and reflet04.jpg in turn, making sure you Right Click/Arrange/Send to Back each time. 23. Save the overlay ufo again. 24. Close PI and open Gif Animator (or click on the Switch button in the top right of the screen in PI to open Gif Animator from there). 25. When the Startup Wizard appears click on 'Open an existing image file'. Browse to the overlay.ufo and Open. 26. Click on the Duplicate Frame (s) button four times. 27. Shift Click to select all five frames and Right Click/Properties. Set the delay to 15 and OK. 28. Select Frame 2 and, in the Object Manager Panel, click on the eye icon for the second object down in the list to hide this object (Ignore the top object - that is the overlay). 29. Select Frame 3 and this time click on the eye icon for the second and third objects in the list to hide them. 30. Select Frame 4 and click on the eye icon for the second, third and fourth objects to hide them this time. 31. Select Frame 5 and click on the eye icon for the second, third, fourth and fifth objects - this should leave only the top and bottom items in the list with the eye icon left open. 32. You can now click on either the Play arrow at the bottom left of your screen or the Preview tab to check your animation. 33. Click on the Optimise tab and under Preset choose Photo128 and then Save your animation! With this type of animation you can expect a picture of this size to produce an animation about 70 - 90kbs. If you wish to reduce the size of the animation you can do this by reducing the size of the picture or by choosing Photo64 or Photo32 as your preset but this may result in a considerable degradation of the picture. There's your finished animation - doesn't it look great? |
|
PLEASE NOTE: These are just general guidelines for making an overlay water animation. If you are trying this with your own pictures you might find that, after bringing the frames from Reflet into PI you have to cut off some of the bottom of the overlay to make it the same size as the Frames (especially if the bottom part of the picture is open water). You might also find that the water does not accurately reflect items in the foreground of the overlay. There are ways to correct this but they are beyond the scope of this tutorial as each picture presents its own, unique problems. I hope however, that this tutorial will encourage you to experiment with overlays..... Have fun!... Rosie |
|
 |
|
|
If you need any help - or want to make suggestions to improve this tutorial - or for new ones |
|

This site © Rosie Hardman-Ixer 2001/2/3 |