
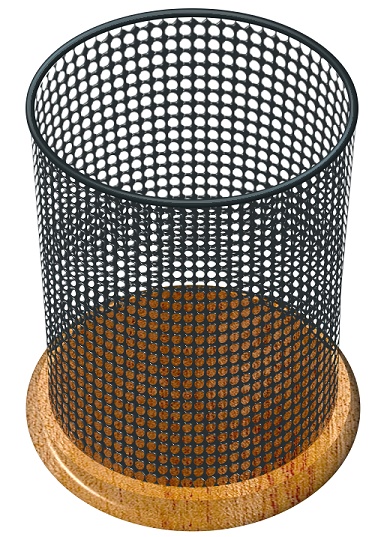
METAL MESH BIN TUTORIAL PI VERSION: 10 (also suitable for PI 8/8.5/XL,12). LEVEL: Advanced MAIN TOOLS USED: Path Drawing Tool, Type Gallery/Hole, Trace Command, Outline Drawing Tool, Transform Tools/Rotate & flip/Perspective, Retouch Tools/Burn & Dodge, Object Paint Eraser, Path Edit, Select on Object Command. TERMS OF USE: Please Read - Thank You! |
|
INSTRUCTIONS |
|
|
|
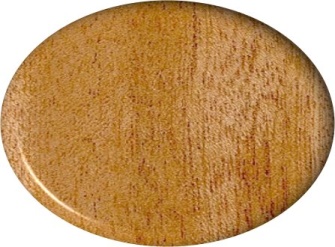
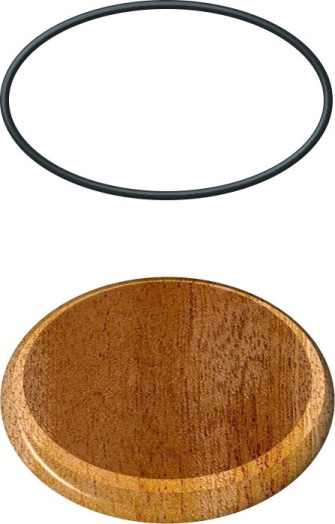
THE WOODEN BASE 1. In PI, open up a new, white canvas, 520 x 720 pixels. This is a large canvas and may not fit on your workspace at 100% Zoom - please be aware that working in less than 100% Zoom sometimes makes shapes look as if they have 'jaggies' around the edge. If this happens, just zoom in to 100% to check - you will usually find that they disappear! If they DON'T disappear then you need to check that Anti-aliasing is checked in the Path Panel/Options. 2. Using the Path Drawing Tool, Shape - Ellipse: Mode - 3D Round: draw a shape 446 x 329 pixels. Apply a suitable wood preset from your EasyPalette (I am using woodno6 from my own wood presets - available for download from my resources site at http://www.rosiehardman.com/pipresets.htm - Wood Selection 2). 3. In the Path Panel/3D tab use the settings: Width - 22: Depth - 30 and using the Light Bulb feature move the light to the position shown opposite. In the Material Box/Light the Ambient setting should be 30%.
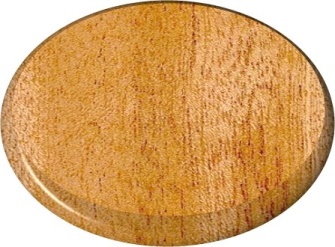
4. Now draw another ellipse using the same preset - 418 x 284 pixels. Change the Width setting in the Path Panel/3D tab to 1. In the Material Box/Light change the Ambient setting to 56%. 5. Put this ellipse in the position shown almost at the top of the first ellipse.
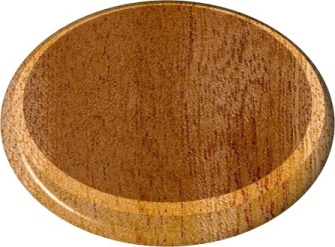
6. Draw a third ellipse 386 x 264 pixels, this time changing the Mode to 2D. 7. Put this in position as shown - almost at the top of the second ellipse. That completes your base shapes, though we will be back do put a bit of shading on them later. |
|
|
THE FRONT MESH
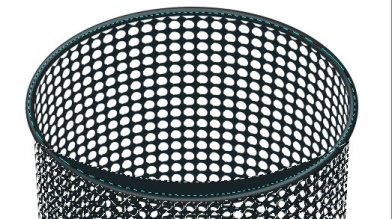
8. Using the Outline Drawing Tool, Shape - Ellipse: Color - Dark Blue-y-Grey Hex#182327: Mode - 3D: draw a shape 431 x 254 pixels. In the Path Panel/Outline set the Width to 6. 9. In the Material Box/Shading, change the setting to Metallic. 10. Put this in position above the base as shown.
11. Using the Path Drawing Tool, Shape - Rectangle: Color - Very Dark Grey Hex#1A2123: Mode - 2D: draw a shape 417 x 337 pixels and put in position accurately as shown.
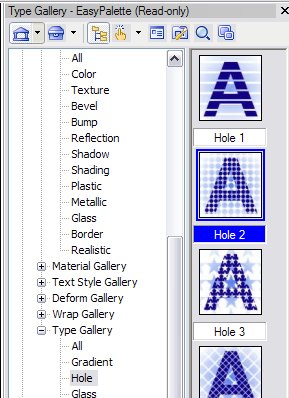
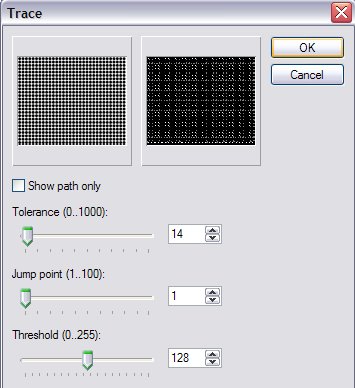
12. Open the EasyPalette/Text/Path Effects/Type Gallery/Hole and select Hole 2. Right Click/Modify Properties & Apply.
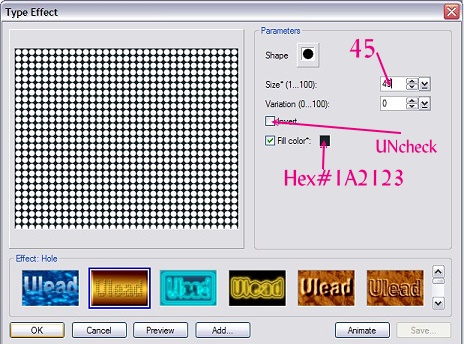
13. In the window that appears apply the settings shown opposite and OK. This should give you a mesh image shape.
14. Now, keeping the rectangle selected, click on Edit/Trace Edges/Selection Marquee; accept the default settings and OK. I would recommend that, if you are using PI 12 (which is memory intensive) you Save your work before doing this next part. Change the Mode of the result to 3D Round (this will take a few seconds to render).
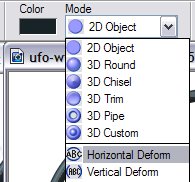
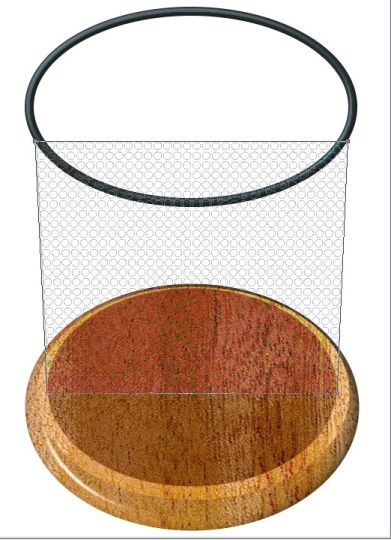
15. In the Layer Manager, delete the original mesh image. Now select your 3D mesh if it is not already selected and change the Mode to Horizontal Deform (see opposite). 16. Move the two lower nodes inwards so that they touch the edges of the darkest ellipse as shown.
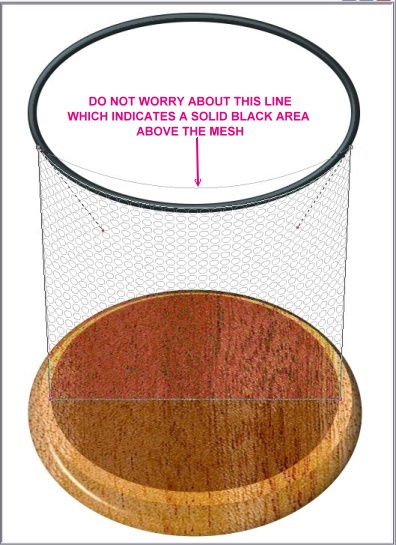
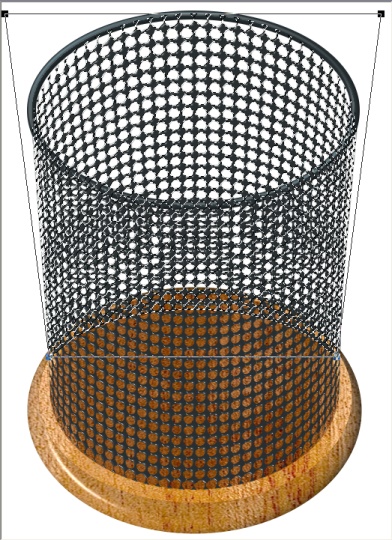
PLEASE NOTE: This next instruction sometimes produces a solid black area above the mesh, the top of which is indicated in the picture opposite by a solid line - DO NOT WORRY ABOUT THIS AS WE ARE GOING TO ERASE THIS PART. However this does not ALWAYS occur - so don't worry if it doesn't in your case... I have yet to work out WHY this is an intermittent effect! 17. Now select one of the two top nodes to produce the control handles and create a curve that runs around the middle of the bottom edge of the outline ellipse. Try to ensure that the two control handles are symmetrical i.e. pulled to the same angle on both sides as shown - otherwise your mesh will appear twisted!
18. Now select one of the bottom two nodes to produce the control handles and create a curve that runs around the bottom edge of the dark ellipse. If you find it hard to locate the control point for the control handle, I recommend that you ZOOM in to about 300% or temporarily make the base ellipses invisible, just while you drag the control points to a more visible position. NOTE: Once again, try to get your control handles symmetrical as shown - otherwise you will get a twisted mesh!
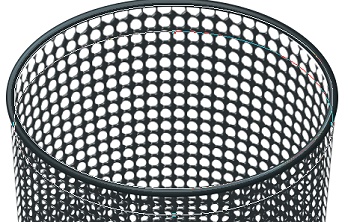
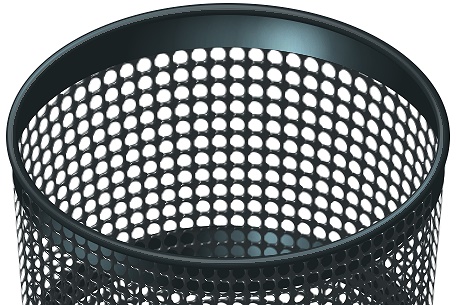
19. Change your mode back to 3D Round once more. Your result should look like the picture opposite.
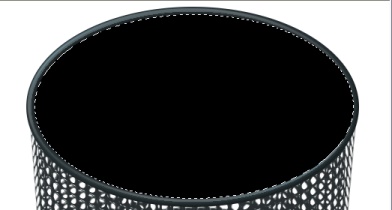
20. Keep the mesh selected and in the Path Panel change the Width to 14 and then use the Light Bulb feature to apply a light to the mesh as shown. If you didn't get the solid black area at the top of your mesh, you can now go straight to the next section - the Back Mesh 21. Keeping the mesh selected - Right Click/Convert Object Type/From Text/Path to Image.
22. Using the Selection Tool - select the ellipse shape and then click on the 'Select on Object' button. 23. Now draw an ellipse with the tool using the dark Outline ellipse as a guide (see opposite) then hit the Delete button on your keyboard to cut off that dark area at the top of the Mesh. (If you are not good at using this tool, you can also opt to use the Object Paint Eraser to get rid of the solid black area). Hit Shift + G or click on Selection/None to get rid of the selection line.
OK - looking good, now onto the back mesh! |
|
|
THE BACK MESH
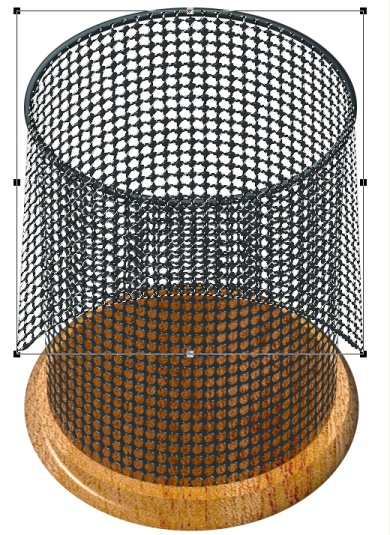
24. Duplicate the front mesh piece and then use the Transform Tools/Rotate & flip to flip the shape Vertically. 25. Put in place at the top of the Outline ellipse as shown.
26. Now use the Transform Tools/Resize to widen the object as shown left.
27. Now use the Transform Tools/Perspective to narrow the bottom line until the shape fits the bin as shown - lining up the sides of the two mesh objects.
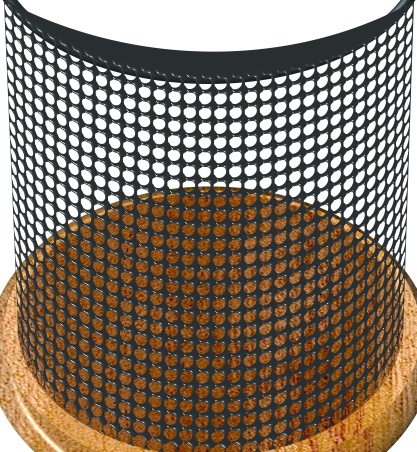
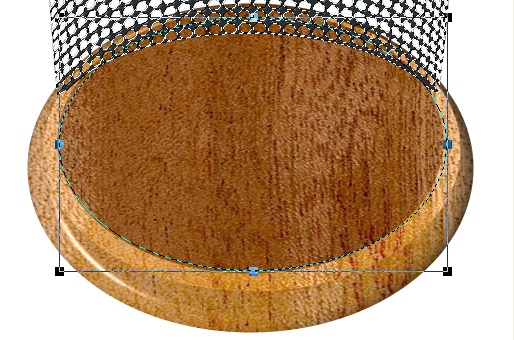
28. It helps to make the front mesh invisible in the Layer Manager for this next bit! Using the Selection Tools/Ellipse and Select on Object once more - draw a selection on the back mesh to cover the area of the dark wooden ellipse on the base and then hit the Delete key on your keyboard to get rid of this. An easier way to do this is to put the measurements of the dark base ellipse (386 x 264 pixels) into the boxes in the Attribute Toolbar of the Selection Tools - then you have exactly the dimensions of the ellipse you wish to cut out automatically! Alternatively, you can use the Object Paint Eraser if you prefer. Hit Shift + G or click on Selection/None to get rid of the selection line.
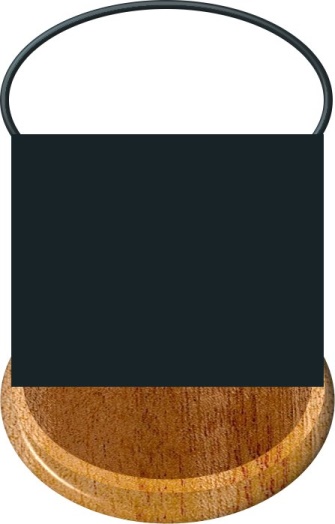
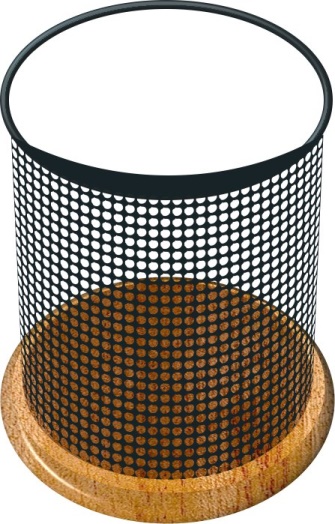
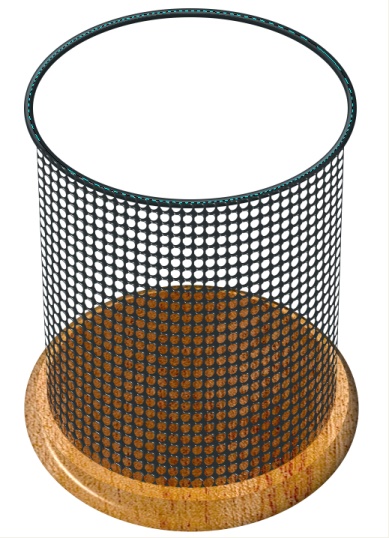
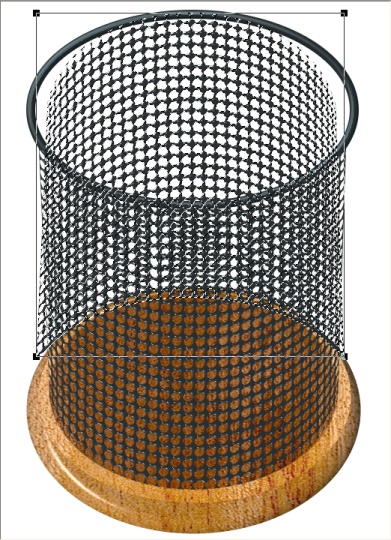
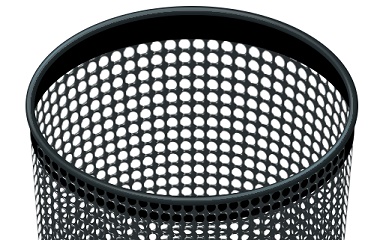
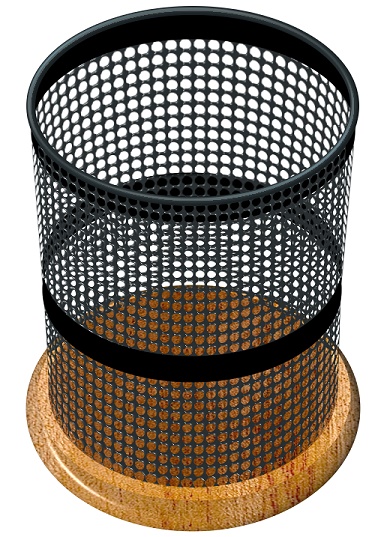
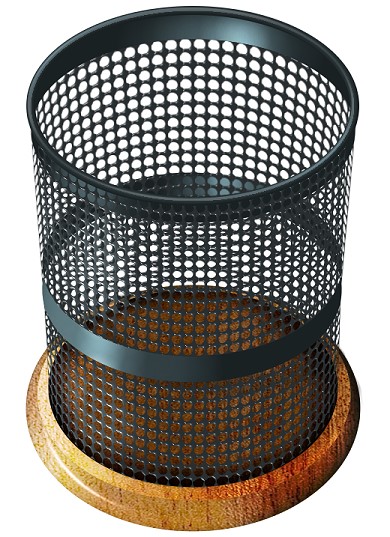
29. Make your front mesh visible again if you need to. Select the Outline ellipse at the top of the bin and Right Click/Arrange/Bring to Front. Your bin should now look like the one opposite. |
|
|
SOLID BANDS/FINISHING TOUCHES
30. The first of the solid bands that go around the bin that we're going to make is the top one and I'm going to show you a really quick way to make this! First of all using the Path Drawing Tool, Shape - Ellipse: Color - Very Dark Grey Hex#1A2123: Mode - 2D: draw a shape very slightly smaller than the top ellipse of your bin. 31. Go into Path Edit and Duplicate the ellipse path. 32. Move the Duplicate path down to the point shown and then exit Path Edit and return to 2D Mode.
33. Use the Transform Tools/Resize to adjust the width of the shape if necessary - so that it fits the sides of the mesh and then Right Click/Arrange/Send Backwards to send the shape behind the front mesh.
Now we'll make the band for the middle of the bin using the one we've just made to simplify things! 34. Duplicate the dark band shape and move it down to the middle of the bin - then use the Transform Tools to Resize the shape so that it fits as shown.
36. Right Click/Convert Object Type/From Text/Path to Image and then use the Object Paint Eraser to remove the UPPER crescent from the shape as shown.
37. Duplicate this erased shape and use the Transform Tools/Rotate and flip to flip the shape Vertically. 38. Right Click/Arrange/Send to Back and put in place as shown. All that remains now are a few important finishing touches!
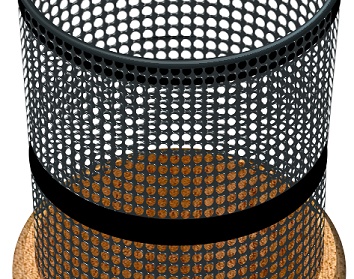
39. First of all, select the band going around the front of the bin. Use the Retouch Tools/Dodge (put Shape, Level and Soft Edge ALL at 100!) to create the shading shown left. 40. Select the back band and put a small highlight on this with the same tool (also see left).
41. Now select the top band, convert this to an Image object and then use the Dodge Tool once again to add highlights as shown. Make sure that these fit with the highlights you put on the lower band!
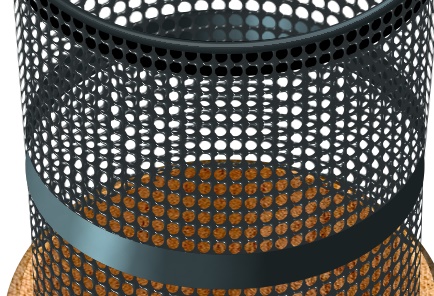
42. Now select the front mesh and use the Dodge Tool to add highlights to the left-hand side as shown.
43. Now select the dark ellipse of the wooden base. Convert this shape to an Image object and use the Retouch Tools/Burn (same settings as the Dodge Tool) to shade the edge of this shape. Use the Burn and Dodge Tools to Highlight and Shade the remaining two wooden pieces as illustrated.
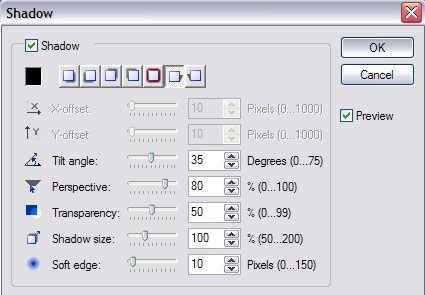
OPTIONAL SHADOWS STAGE ONE:
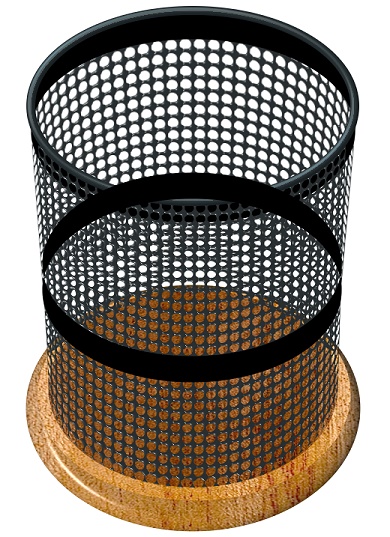
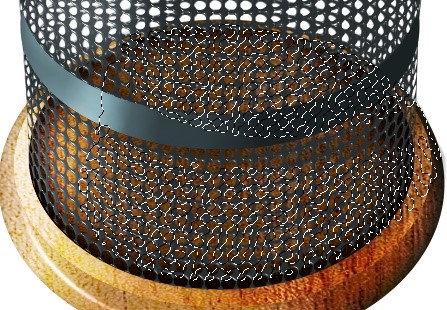
...and there's your completed mesh bin! |
 |
|
|
Free Spirit Graphics If you would then like an invitation to join, please email one of the Admin Team mentioned on that page - I know they've love to have you along! |
|
|
If you need any help - or want to make suggestions to improve this tutorial - or for new ones |
|


This site © Rosie Hardman-Ixer 2001-2007 |