
MAYPOLE PI VERSION: 8 (but should be suitable for 6 & 7 also). LEVEL: Beginnner MAIN TOOLS USED: TERMS OF USE: Please Read - Thank You!NOTE: The ceremony of the maypole and maypole dancing, is symbolic of renewed life. In folklore, the common practice was to bring a new pole into the village every year representing that year's incarnation of the spirit of all growing plants - hopefully encouraging a good harvest. The tradition of dancing around the maypole is widespread through the UK, North America and Europe. Each dancer holds a ribbon and by dancing around the pole and weaving in and out of one another, the dancers gradually wind the ribbons in an intricate pattern down the pole. |
|
INSTRUCTIONS |
|
|

|
THE POLE 1. Open a new, white canvas 300W x 400H pixels. 2. Using the Path Drawing Tool, Shape - Rectangle: Color - any at this point: Mode - 3D Round: Border - 15: Depth - 30: draw a shape 10W x 360H pixels. 3. Fill this with any preset of your choice. This can be wood, white (traditional for maypoles in some parts of the world) or even silver or gold... 4. Now using the Path Drawing Tool again, Shape - Rounded Rectangle: draw a small shape at the top of the pole. Fill this with a preset of your choice - silver or gold would probably look best. 5. Change to Custom Shape - Raindrop and draw a top piece for the pole as shown.
6. Click on the Stamp Tool and select the flower1.ufo stamp.
7. Using the Settings shown stamp a garland at the top of the pole as illustrated.
8. Using the Path Drawing Tool: Custom Shape - Diagonal Bars: Color - your choice: Mode - 3D Round: Border - 2: Depth - 2: draw a small shape.
9. Using the Transform Tools/Rotate & flip - rotate the shape 90 degrees to the right.
10. Place this shape in position on the pole and, using the Transform Tools/Resize, stretch the shape until it is 10W x 235H.
11. Fill with a preset of your choice.
12. Using the Outline Drawing Tool: Shape - Ellipse: Color - Grey: Mode - 3D Round: Border - 2: Depth - 30, draw a shape 50W x 10H pixels in the position illustrated. 13. Open the EasyPalette/Material Attribute Gallery/Metallic and fill this with the Silver 4 preset. 14. Right Click/Convert Object Type/From Text/Path to Image. 15. Using the Object Paint Eraser, erase the section of the lower line of the ring shown (Shape size 10 is about perfect for doing this).
16. Using the Line & Arrow Tool, Shape - Straight Line: Color - same Silver Preset: Mode - 3D Round: Width - 2: Depth - 30: draw two lines as shown.
17. For each of these lines, Right Click/Arrange/Send to Back.
There's the pole finished - now for the ribbons! |
|
|
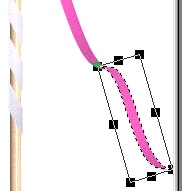
THE RIBBONS 18. Using the Path Drawing Tool, Custom Shape - Wave 1: Color - of your choice: Mode - 3D Round: Border - : Depth - : draw a shape 60W x 45H pixels.
19. Use the Transform Tools/ Resize to stretch this shape until it is 190 pixels wide.
20. Use the Transform Tools/Rotate freely to rotate the shape into the position shown (make sure it looks as if it is attached to the silver ring).
21. Right Click/Duplicate the shape and then use the Transform Tools/Resize to reduce the height of the shape.
22. Put this second piece into place as shown.
23. Select both pieces of your ribbon and Right Click/Duplicate.
24. Change the colour of the second ribbon and use the Transform Tools/Rotate & flip to flip the pieces horizontally.
25. Now use the Transform Tools/Rotate Freely - to rotate the second ribbon to a different angle. 26. Duplicate the ribbon pieces again and reduce the size of both pieces and Right Click/Arrange/Send to Back. Again use the Transform Tools/Rotate Freely - to rotate the third ribbon to a different angle. Your picture should now look something like the one opposite.
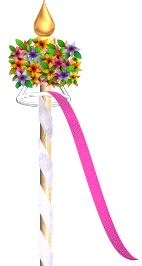
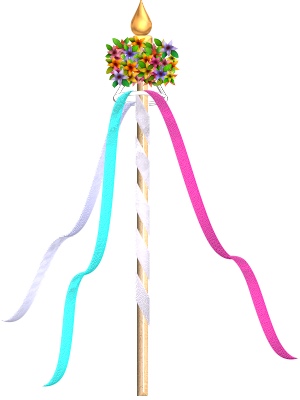
27. Using the same method, add as many ribbons as you wish to your maypole. Try shortening and lengthening the various parts of the ribbon to give variety to the way the ribbons are bending and flowing (see finished picture). 28. (Optional) For some extra depth to the shading on the ribbons you could Right Click/Convert Object Type/From Text/Path to Image on each of the ribbons pieces and use the Retouch Tools/Burn to shade various parts of the ribbons. 29. Once you are happy with your maypole, Right Click/Select ALl Objects - then Right Click/Merge As Single Object. |
|
|
BRING ON THE DANCERS - |
 |
|
|
Free Spirit Graphics If you would then like an invitation to join, please Email Me. We'd love to have you along! |
|
|
If you need any help - or want to make suggestions to improve this tutorial - or for new ones |
|


If you came to this page directly cannot see my navigation bar on the left hand side of this page This site © Rosie Hardman-Ixer, 2002 |