
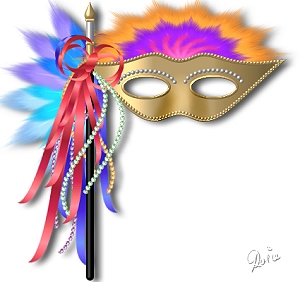
MARDI GRAS MASK PI VERSION: 7/8/XL. LEVEL: Intermediate MAIN TOOLS USED: Path Drawing Tool, Continue Draw, Path Edit, Wrap/Fit Together Command, Transform Tools, Copy Rotate Command, Format/Color Balance, Object Paint Eraser, Retouch Tools (Burn & Dodge), Paint on Edges, Stamp Tool. NECESSARY DOWNLOADS: TERMS OF USE: Please Read - Thank You! |
|
INSTRUCTIONS |
|
|
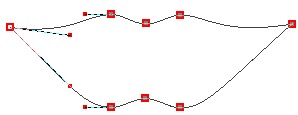
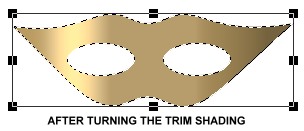
PLEASE READ! - TURNING THE SHADING IN 3D TRIM In the first section we are going to make a number of pieces in 3D Trim mode. As you make each one I am going to ask you to 'Turn the 3D Trim shading through 90o'. To do this you will need to use the following steps on each of the pieces: To turn 3D Trim shading through 90o:a. Create the shape to the dimensions stated and do any path edit work where appropriate. b. Click on the Transform Tools/Rotate & flip and flip the shape 90o to the left. c. Right Click/Convert Object Type/Reset Text/Path Object. d. Flip the shape back 90o to the right. NOTE: Border settings will change after turning the shading. Leave them at the new setting! You will find that the 3D Trim shading now goes from left to right. |
|
|
|
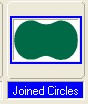
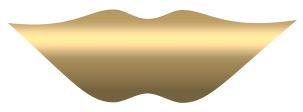
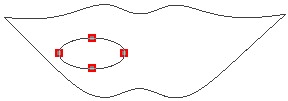
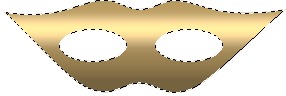
MASK 1. Open a new, white canvas, 425W x 400H pixels (if you wish to make a longer handle, you may increase the Height dimension). 2. Using the Path Drawing Tool, Shape - Circle: Color - Gold (Hex#F7BC5B): Mode - 3D Round: Border - 3: Depth - 30: draw a small, gold bead approximately 5W x 5H pixels. 3. Click on the Material button/Shading tab - check the Metallic box and OK. 4. Using the Path Drawing Tool, Shape - Joined Circles: Color - same: Mode - 3D Trim: Border - 50: Depth - 30: draw a shape 150W x 95H pixels. 5. Click on the Editing button on the Attribute Toolbar to go into Path Edit mode. 6. Pull the two side nodes out to the angles shown and then click on the Editing button once again to return to 3D Trim mode. 7. Right Click/Duplicate this piece and move the duplicate to one side for the moment. 8. Select the original mask piece and change the Mode to Continue Draw. 9. Using the Ellipse shape, draw an ellipse 65W x 30H as shown.
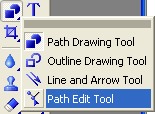
10. Click on the Path Edit Tool in the Tool Panel to go into Path Edit.
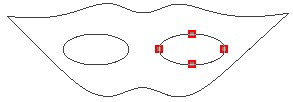
11. Click on Duplicate on the Attribute Toolbar to duplicate the ellipse.
12. Click anywhere in the white background to deselect the paths and then move the two ellipses into the correct places for the eye-holes before clicking on the Editing button to return to 3D Trim mode.
13. Now, using the instructions in red at the top of the Instructions, turn the shading in 3D Trim.
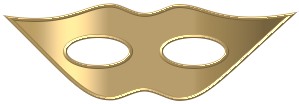
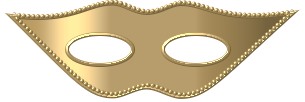
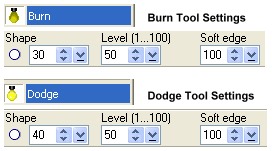
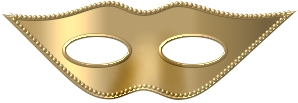
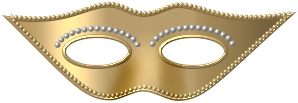
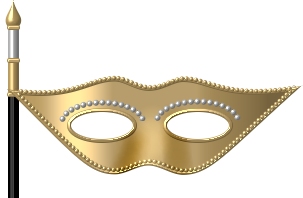
14. Right Click/Duplicate this piece and change the Mode to 3D Pipe. Don't Panic! 15. In the Path Panel change the Border setting to 2. Phew - that's better! Put in place over the first mask piece. 16. Now using the Pick Tool, select the small gold bead that you made at the beginning and, holding your finger on the Ctrl key, also select the duplicated solid mask piece (without the eye-holes). 17. Right Click/Wrap/Fit Together. This should give you the beads to outline the mask with. Put these in place as shown. 18. Select all pieces of the Mask and Right Click/Merge As Single Object. 19. Using the Retouch Tools/Burn on the settings shown opposite, shade the sides of the nose-piece. 20. Now use the Retouch Tools/Dodge on the settings shown to shade the bridge of the nose-piece. 21. Reselect the Path Drawing Tool. Change the Color to pale grey (Hex#E2E2E2) and using the Circle shape draw another small bead 5W x 5H pixels. 22. Using the Ellipse shape, draw a shape 80W x 40H pixels. 23. Select the Pick Tool and then, holding down the Ctrl key select the small bead and the ellipse. 24. Right Click/Wrap/Fit Together. 25. Right Click/Convert Object Type/From Text/Path to Image. 26. Use the Object Paint Eraser to remove the lower part of the ellipse. 27. Right Click/Duplicate this piece and put the two pieces in place on the mask. 28. Right Click/Select All Objects - then Right Click/Merge As Single Object. Your mask should now look like the one opposite. |
|
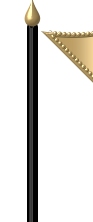
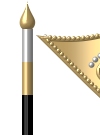
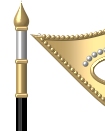
HANDLE 29. Using the Path Drawing Tool, Custom Shape - Raindrop: Color - Gold (as above): Mode - 3D Round: Border - 6: Depth - 30: draw a shape 16W x 30H pixels. 30. Click on the Material button/Border /Depth tab and check the 'Smooth Spine' button and OK. 31. Using the Path Drawing Tool, Shape - Rounded Rectangle: Color - Black: Mode - 3D Round: Border - 6: Depth - 30: draw a shape 10W x 360H pixels (see left - increase the Height dimension if you want a longer handle). 32. Right Click/Arrange/Send to back and put the two pieces together as shown. 33. Using the gold colour (Hex#F7BC5B) and 3D Trim mode draw a shape 10W x 30H pixels. Using the instructions at the top of the tutorial - turn the shading. 34. Right Click/Duplicate this piece and change the colour to pale grey (Hex#E2E2E2). 35. Put the two pieces in place as shown. 36. Using the gold colour again and the Rounded Rectangle shape, Mode - 3D Round: draw a tiny shape 13W x 6H pixels. 37. Right Click/Duplicate this shape twice and put in place on the handle as shown. 38. Shift/Click to select all parts of the handle and Right Click/Merge As Single Object.
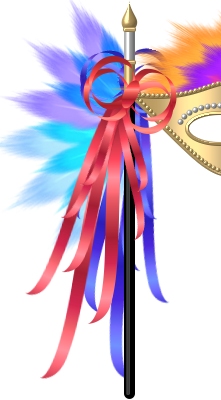
39. Select the Mask and Right Click/Arrange/Bring to Front and put in place on the handle. OK - that's the mask and handle - now for the feathers! |
|
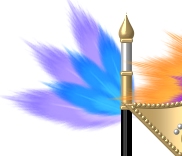
FEATHERS 40. If you wish to use your own feathers to decorate the mask with that's fine - but if you want to use the feather ufo supplied with the tutorial, open this in PI now. 41. First of all, Right Click/Duplicate (or Shift + D) the grey feather at least three times (you may need more depending on how many colours you decide to use). 42. Selecting one copy of the feather click on Format/Color Balance. 43. Decide what colour you want to produce - I'm going for yellow and gold to start with - so I'm clicking on the top, right-hand square until I get the colour I want - then OK. This gives me the feather opposite. 44. Now click on the Transform Tool/Rotate & flip and flip the feather to the left. 45. Set the Rotate by Degree to 25 degrees. 46. Under Rotate Method click on the 'Rotate freely' button and move the rotation point (a circle with cross-hairs through it) to the right-hand point shown. 47. Now click on Copy Rotate (Clockwise!) 7 times to give the fan shape shown opposite. 48. Select all the feathers and Right Click/Merge As Single Object. 49. Using the Transform Tool/Resize to make the feather fan the correct size to fit behind the mask. 50. Right Click/Arrange/Send Backward and put in place on the top of the mask.
51. This time we are going to make a multi-coloured feather. Select one of the feather copies and once again use Format/Colour Balance to colour the feather. This time I am going to use the bottom centre and right squares to click on - giving the feather a purple colour. 52. Selecting another copy of the feather make this one a red colour and then reduce the size of this and put it on top of the purple feather - giving the result opposite. 53. Select both parts of the feather and Right Click/Merge As Single Object.
54. Using the same method as above (see Instructions 44 - 48) create a fan with this feather.
55. Use the Transform Tools/Resize to make this feather fan smaller than the first and put in place as shown.
56. Now take another copy of the feather and colour it again using the same method. 57. This time use the Transform Tools/Resize to make it 45W x 150H pixels. 58. Move the rotation point to the bottom of the feather this time and then click on Copy Rotate twice.
59. Select the three feathers and Right Click/Merge As Single Object. 60. Use the Transform Tools/Rotate method/Rotate freely to rotate the feathers to the required angle and put in place as shown.
61. Right Click/Duplicate this set of feathers and use Format/Colour balance to create a different coloured set of three feathers. This can then be resized and put in place. You can even combine the two sets of three feathers, Merge them and recolour again for another set (as I have done in the final picture). It is up to you how many feathers and what colours you use but this is Carnival - so go wild! |
|
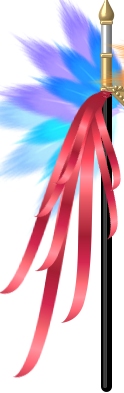
RIBBONS 62. Using the Path Drawing Tool, Custom Shape - Wave 1: Color - any: Mode - 2D: draw a shape approximately 70W x 54H. 63. Use the Transform Tools/Rotate & flip to flip the shape 90 degrees to the left and then Horizontally. 64. Use the Transform Tools/Resize to make it 53W x 235H pixels. 65. Click on Edit/Fill/Multiple colours, click on the colour swatch to open the Palette Ramp Editor and then fill this with a colour of your choice. I chose the one shown but this was not quite crimson enough - so afterwards I used Format/Color Balance again to redden it.
66. The rest of the red ribbons are merely copies of this original, resized and turned to different angles!
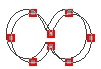
67. To make the bow - once again use the Joined Circles shape: Color - same as ribbons: Mode - 2D: and draw a shape approximately 80W x 50H pixels. 68. Now click on the Editing button to go into Path Edit. 69. Move the two centre nodes to the point shown then click on the Duplicate button. 70. Move the Duplicate shape to the position shown. 71. Click on the Editing button again to leave Path Edit and return to 2D mode. This should leave you with the shape shown opposite. 72. Right Click/Duplicate this shape and then use the Transform Tools/Rotate method/Rotate freely to rotate the duplicate shape a little to the right. 73. Using the Ellipse shape, draw a small ellipse to cover the centre of the bow and rotate this into place as shown. 74. Once you have all the three pieces of your bow, select them all and Right Click/Merge As Single Object. Put this in place on your mask (once again I have recoloured mine to match the ribbons). 75. In the Layer Manager, select all the ribbons and the bow and Right Click/Merge As Single Object. 76. Right Click/Duplicate this object and use Format/Color Balance to produce a second, differently coloured bow and ribbons! These can be flipped and sent backward between the handle and the feathers for a nice effect. Only the beads to go and you'll be glad to know - these are easy LOL!!! |
|
BEADS 77. Using the Path Drawing Tool, Custom Shape - Wave 1 again: Color - any: Mode - 2D: draw a shape approximately 190W x 143H pixels. 78. Using the Stamp Tool, select the silver ball ufo and change the settings to those shown opposite. Make sure that under Object it is set to 'Single Object'. 79. Click on Effect/Creative/Paint on Edges. 80. Now delete the ribbon shape.
81. Use the Transform Tools/Rotate method/Rotate freely to rotate the beads shape into the position shown.
82. Now use the Object Paint Eraser to take off the bottom few beads.
83. You can click on Effect/Sharpen to make the beads 'glisten' a little more and you can also use Format/Color Balance to colour them if you wish... and of course they can be resized and rotated as many times as you wish to decorate your mask.
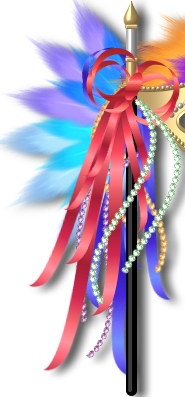
I'm sure you can find lots of other jewels and goodies to add to your mask to make them as original as they are in the real carnivals so I look forward to seeing all your creations! |
|
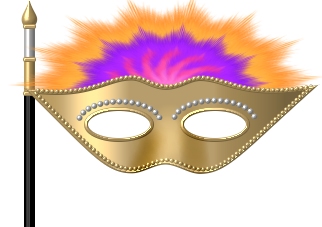
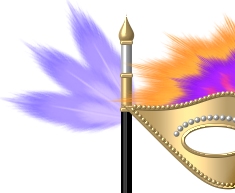
All ready for the Carnival! |
 |
|
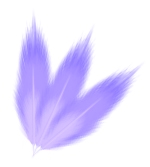
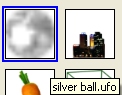
|
Free Spirit Graphics If you would then like an invitation to join, please Email Me. We'd love to have you along! |
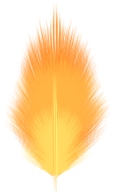
|
|
If you need any help - or want to make suggestions to improve this tutorial - or for new ones |
|

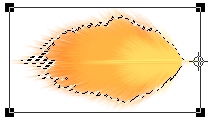


This site © Rosie Hardman-Ixer 2001/2/3/4 |