
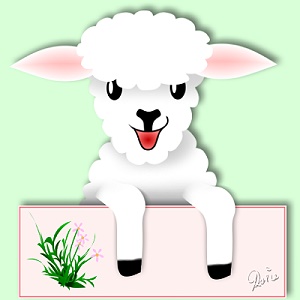
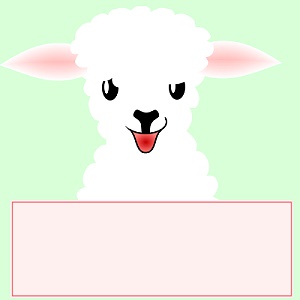
SPRING LAMB TAG PI VERSION: 7/8/XL. LEVEL: Beginner MAIN TOOLS USED: Path Drawing Tool, Path Edit, Transform Tools (Resize/Rotate & flip/Rotate by degree), Outline Drawing Tool, Object Paint Eraser, Paint Tools (Paintbrush). TERMS OF USE: Please Read - Thank You! |
|
INSTRUCTIONS |
|
|
TOOL ICONS FOR BEGINNERS
|
|
|
|
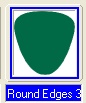
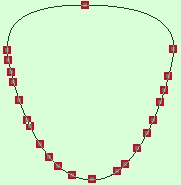
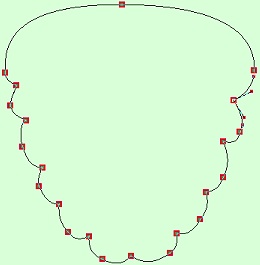
HEAD 1. Open a new canvas, 400W x 400H pixels with a pastel coloured background (I am using Hex #D9FFD9). 2. Using the Path Drawing Tool, Shape - Custom Shape/Round Edges 3: Color - White: Mode - 2D: draw a shape approximately 170W x 175H pixels. 3. Click on the Editing button on the Attribute Toolbar, to go into Path Edit mode. 4. Click on the + (Plus) sign under 'Edit Point' and add an even number of extra nodes around the two lower path edges as shown (DON'T space these too regularly!).
TIP! It helps to Zoom in to 200-300% for this bit!
5. Click back on the Pick Point under 'Edit Point' and drag every alternate node inwards as shown.
TIP! Click on each node before attempting to move them, this gets the control handles out of the way!
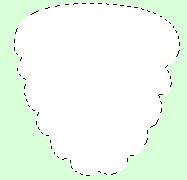
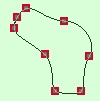
6. Click on the Editing button again to exit Path Edit mode.
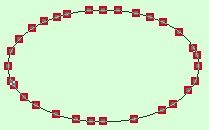
This should leave you with a shape like the one opposite.
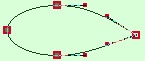
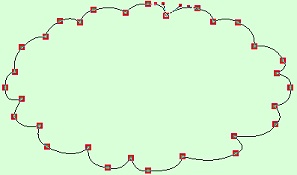
7. Now using the Ellipse shape draw a shape, 100W x 50H pixels. 8. Click on the Editing button on the Attribute Toolbar, to go into Path Edit mode. 9. Drag the right hand node out to the point shown to create an ear shape. Click on the Editing button to exit Path Edit. 10. Click on Color/Gradient - select 2 colors and use a circular fill with colours white to pink (Hex#FF7F7C) as illustrated left. 11. This leaves the ear TOO pink - but we cannot alter this in the Path Panel at the moment. So click on the Material button on the Attribute Toolbar and click on the Border/Depth tab. 12. Change the 'Maximum border width' to 50 pixels and OK. 13. Right Click/Duplicate the ear shape and then use the Transform Tools/Rotate & flip to flip the duplicated shape Horizontally to make the second ear. Put in place as shown.
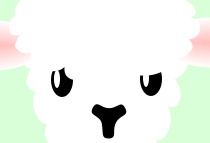
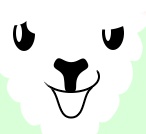
14. Now draw another Ellipse shape, Color - White: 190W x 110H pixels. 15. Click on the Editing button on the Attribute Toolbar, to go into Path Edit mode. 16. Click on the + (Plus) sign under 'Edit Point' and add an even number of extra nodes around the path as shown (again don't space these too regularly). 17. Using the same method as you used in Instruction 5 create a scallop-style edge as shown. 18. Click on the Editing button to exit Path Edit mode and put the piece in place for the topknot for the lamb's head. 19. Now draw another Ellipse Shape, this time in black, 20W x 30H pixels and a smaller one in white 5W x 17H pixels. 20. Put these together to form an eye and then Shift/Click to select both pieces and Right Click/Merge As Single Object.
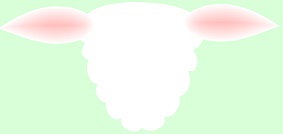
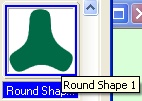
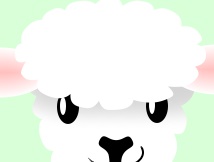
21. Right Click/Duplicate the eye and put the two eyes in place. 22. Select the white, curly topknot shape and Right Click/Arrange/Bring to Front. 23. Now using the Custom Shape - Round Shape 1, Color - Black: draw a shape 35W x 35H pixels and put in place for the lamb's nose then use the Transform Tools/Rotate & flip to flip the shape Vertically.
Your lamb should now look like the one opposite.
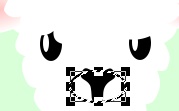
24. Using the Outline Drawing Tool, Shape - Ellipse: Color - Black: Mode - 2D: Border - 1: draw a shape 55W x 30H pixels.
25. Put in place as shown - then Right Click/Convert Object Type/From Text/Path to Image. 26. Now use the Object Paint Eraser to remove the part of the ellipse shown.
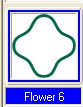
27. Using the Outline Custom Shape - Flower 6: Color - Black: Border - 1: draw a shape 60W x 62H pixels - then use the Transform Tools/Resize to make it 70W x 105H pixels.
28. Put in place as shown - then Right Click/Convert Object Type/From Text/Path to Image. 29. Now use the Object Paint Eraser to remove the part of the shape shown to form the mouth (see illustration). Make sure there are NO gaps between the upper and lower mouth lines. 30. Select the two line objects you have just made (probably best done in the Layer Manager) and Right Click/Merge As Single Object. 31. Right Click/Duplicate this object and drag the duplicate to a new canvas and Right Click/Merge. 32. Using the Selection Tools/Magic Wand, select the inside of the mouth area and Right Click/Expand/Shrink. 33. In the box that pops up, Expand the selection by 1 pixel and OK.
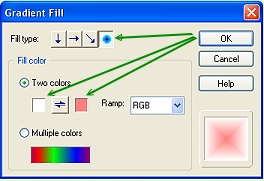
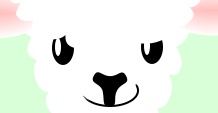
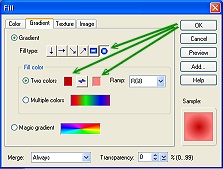
34. Click on Edit/Fill/Gradient - check Two colors and use a circular, red (Hex#C40000) - pink (Hex#FF7F7C) fill as shown and OK.
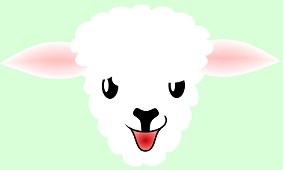
35. Right Click/Convert to Object. 36. Drag this object to the original canvas and put in place for the lamb's mouth - then Right Click/Arrange/Send Backwards. Your lamb's head should now look like the one opposite. |
|
|
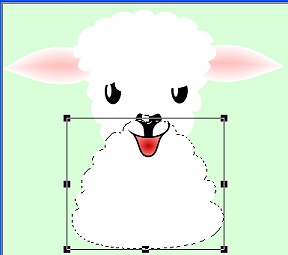
TAG, BODY & LEGS 37. Now select the lamb's face shape (the first one you made) and Right Click/Duplicate. 38. Use the Transform Tools/Rotate & flip to flip the shape Vertically. 39. Now use the Transform Tools/Resize to make the shape 210 pixels wide. 40. Right Click/Arrange/Send to Back then put in place for the body of the lamb.
41. Now use the Path Drawing Tool, Shape - Rectangle: Color - any you like: Mode - 2D: to draw a tag-board that will hold your wording and put in place. Mine measures 337W x 130H pixels but feel free to make this any size you wish/need. You may need to extend your canvas downwards to do this. I am making a plain board with a simple border but you can decorate this any way you wish
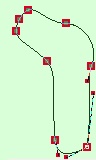
42. Now using Custom Shape - Round Shape 1 again (the same one you used for the nose): Color - white: Mode - 2D: draw a shape approximately 85W x 95H pixels. 43. Use the Transform Tools/Rotate by Degree to rotate the shape 60o to the left. 44. Click back on the Path Drawing Tool and then on the Editing button to go into Path Edit. 45. Select the - (Minus) sign under 'Edit point' and then remove the three right hand top nodes plus the centre bottom one as shown opposite by clicking on each one. 46. Reselect the Pick Tool under 'Edit Point' and then use drag the two lower nodes downwards. Use the control handles to create the shape shown. TIP! Ensure that you have 'Free Edit Mode' selected under 'Edit mode' on the Attribute Toolbar - this makes editing nodes so much easier!
47. Once you have the leg shape correct, click on the Editing button again to return to 2D Mode.
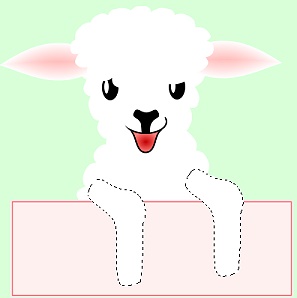
48. Right Click/Duplicate this shape and put the two legs in place as shown.
49. Now set the Paint Tools/Paintbrush to the following settings: Size - 80: Colour - light grey (Hex#C8C8C8): Trans - 0: Soft edge - 100. 50. Select the face shape and Right Click/Convert Object Type/From Text/Path to Image. 51. Use the Paintbrush to shade the shape under the topknot as shown.
52. Use the same method to shade the body under the lamb's chin and where the body goes behind the tag-board.
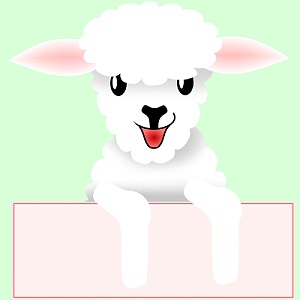
53. Select each leg in turn and Right Click/Convert Object Type/From Text/Path to Image. 54. Using the Paint Tools/Paintbrush - Size - 40: Color - Black: Trans - 0: Soft Edge - 5: Paint over the lower part of the legs for the black feet. 55. Use the Object Paint Eraser on the following settings: Shape - Size 60: Trans - 60: Soft edge - 100: to blend the tops of the legs into the body as shown. 56. Add some shadows if required.... and a message for your tag - and there's your little spring lamb! |
 |
|
|
Free Spirit Graphics If you would then like an invitation to join, please Email Me. We'd love to have you along! |
|
|
If you need any help - or want to make suggestions to improve this tutorial - or for new ones |
|


This site © Rosie Hardman-Ixer 2001/2/3/4 |