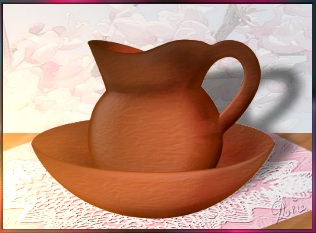
OLD FASHIONED WATER JUG & BOWL PI VERSION: 7. (Can be achieved in 6 but the presets in the EP will be different). LEVEL: Beginner/Intermediate - some knowledge of the Path, Path Edit and Transform tools is assumed MAIN TOOLS USED: Path Tools, Transform Tools, Trace, EasyPalette NOTE: For anyone wanting a more challenging pitcher and bowl, Pat Hinds has a super tutorial HERE - it gives stunning results! TERMS OF USE: Please Read - Thank You! |
|
INSTRUCTIONS |
|
|
|
MAKING THE JUG SHAPE
1. Open a new canvas 350W x 300H pixels.
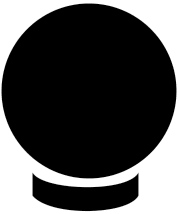
2. Using the Path Tool - Shape-Circle: Colour-Black: Mode 2D - draw a circle approximately 175 x 175 pixels.
3. Using the Path Tools - Shape-Plaque 5: - draw a shape and then use the Transform Tools/Resize and Rotate and Flip to stretch this shape and flip it vertically - so it looks like the picture opposite.
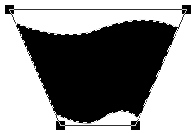
4. Using the Path Tools - Shape-Wave 1: - draw a shape approximately 140W x 115H pixels and then use the Transform Tools/Perspective to widen the top of this shape and narrow the bottom - so it looks like the picture opposite.
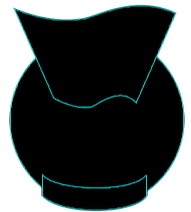
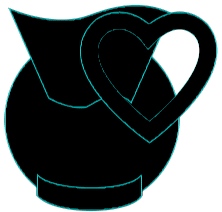
5. Fit the three pieces together as shown (I have outlined these in blue so you can see them more clearly but you should leave them black).
6. Using the Outline Drawing Tool - Shape-Heart: - draw a shape as shown.
If you need to, click on the Materials box and change the Border to around 11.
Put in place to form the handle of the jug.
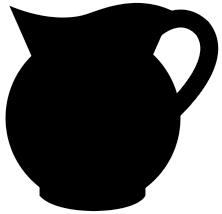
7. Once all the pieces are in place, Right Click/Select All Objects. Right Click/Merge All. 8. Now click on Edit/Trace/Image - accept the default settings and click OK. 9. Change the Mode to 3D. The Path Shape for your jug is now finished. |
|
|
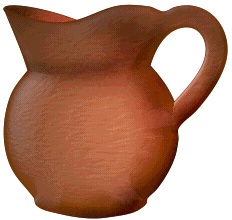
FINISHING THE JUG
10. Choose a preset from the EasyPalette for your jug (I have used Material Gallery/Plastic/P10 for the tutorial) and apply this to the jug shape. I changed the Border to 45 in my example.
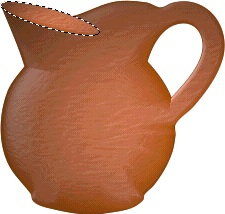
11. Whilst you have this preset selected, use the Path Tools - Shape-Ellipse to draw a small oval and then use the Transform Tools/Rotate Freely to rotate the oval into the position shown. Right Click/Arrange/Send to Back.
12. Right Click/Convert Object Type/From Text/Path to Image. Do the same with the front piece of the jug.
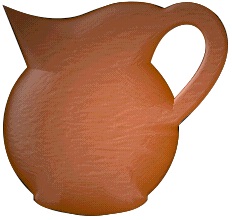
13. Using the Retouch Tools/Burn - shade the pieces of the jug until you have given it some depth. This makes it look much more realistic.
Your jug is finished! Drag it to a new canvas but keep this open because it helps to make sure that you make the next piece the right size. |
|
|
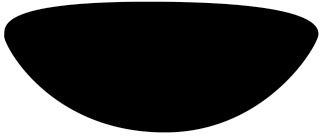
MAKING THE BOWL 14. Open a new canvas - same size as before. 15. Using the Path Tools - Shape-Round Edges 3: Mode-3D: Border-8: draw a shape then use the Transform Tools/Resize to stretch this until it is approximately 325w x 130H pixels as shown.
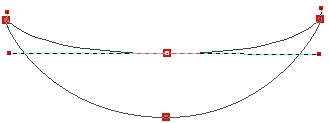
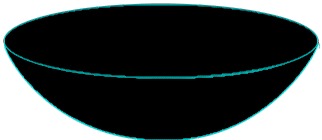
I have drawn this in black but you will probably have the same preset as the jug selected - this is fine. 16. Click on the Path Edit Tool. Now pull down on the top middle square until the shape is as shown opposite. Click out of Path Edit mode. Fill this with your preset - have the Border set to 8. 17. Using the Path Tools - Shape-Ellipse: Mode 3D: Border 1: - draw a shape and then use the Transform Tools/Resize Tools stretch the shape until it forms an oval that will fit the top of your bowl accurately. (Again - I have outlined the edges to show how these fit together). Fill this with your preset if it is not already selected - but make sure the Border stays at 1 - if it has changed with the preset - change it back again to 1. You need to have this difference between the font and back pieces of the bowl so that the top rim of the front of the bowl looks good. 18. Keeping the top piece of the bowl selected - Right Click/Convert Object Type/From Text/Path to Image. 19. Using the Retouch Tools/Burn - shade the inside of the bowl as shown until you have given it some depth. Now do the same to shade the front bowl piece. 20. Now bring your jug into this canvas and Right Click/Arrange/Send Backward once to put the jug between the bowl pieces. Close the empty canvas. All you need to do now is make a nice setting for your Water Jug and Bowl and wait for the praise! |
 |
|
|
Free Spirit Graphics If you would then like an invitation to join, please Email Me. We'd love to have you along! |
|
|
If you need any help - or want to make suggestions to improve this tutorial - or for new ones |
|
This site © Rosie Hardman-Ixer 2001/2/3 |