
iPOD PLAYER & SPEAKERS PI VERSION: 12 (also suitable for earlier versions but some of the tools may be in a different place in the program). LEVEL: Intermediate MAIN TOOLS USED: Path Drawing Tool, Path Edit, Continue Draw, EasyPalette, Text Tool, Paintbrush Tool, Type Gallery, Retouch Tools/Blur, Transform Tools. TERMS OF USE: Please Read - Thank You! |
|
INSTRUCTIONS |
|
|
|
DRAWING THE iPOD
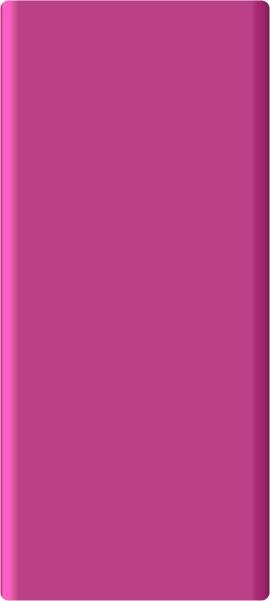
1. In PhotoImpact, open a new, canvas with a pastel coloured background (any colour will do as long as white will show up against it for section 2), 975 x 693 pixels. If you are using a lower resolution computer monitor, you might like to start with a white canvas 625 x 625 while you make the iPod section and then transfer to the larger, pastel canvas when we make the speakers. NOTE: In the next instruction, DO NOT use the Transform Tools to Resize - if you have to adjust sizing, do it after Instruction 3. 2. Using the Path Drawing Tool, Shape - Rounded Rectangle: Color - I am using the iPod official pink (Hex#FF1C8D) - but black, silver, green (Hex#88CE16) and blue (Hex#35C1E4) are also standard iPod colours: Mode - 3D Trim: draw a shape 600 x 267 pixels. After drawing, adjust Width/Depth settings to Width - 18: Depth - 12. 3. In the Tool Settings - Path Panel/Rounded Rectangle make 'Adjust Roundness' = 6. 4. In the same Panel, under Lighting, click on the 'More...' button and in the Material Window that pops up/Shading - change the type of Shading to Metallic and OK. 5. Now use the Transform Tools/Rotate & Flip to flip the shape through 90o to the left. This creates the main body of your iPod.
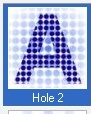
6. Using the Path Drawing Tool, Shape - Circle: Color - very dark fuchsia (Hex#571A3C): Mode - 2D: draw a shape 203 x 203 pixels. 7. Duplicate the circle, change the colour to white and put the two pieces in place directly on top of one another (you can use Right Click/Align/Center Both to ensure this). 8. In the Layer Manager, select the dark circle and with the Arrow keys on your keyboard, move it 1 pixel UP & 1 pixel to the LEFT of the white one. This creates a slightly 3D effect but is sharper edged than using 3D Round for something as flat as these multi-use buttons. 9. In the Layer Manager, select the dark circle again - in order to pick up that colour again. Now draw a small, 2D dark pink circle 93 x 93 pixels. 10. Duplicate the circle, change the colour to fuchsia (Hex#FF1C8D) and the mode to 3D Round). In the Tool Settings - Path panel, change both the Width and Depth settings of this pink circle to 1. 11. Put the 2 small circles directly on top of one another (you can use Right Click/Align/Center Both to ensure this again if you wish, after selecting them in the Layer Manager). 12. Once again, in the Layer Manager, select the dark circle and with the Arrow keys on your keyboard, move it 1 pixel UP & 1 pixel to the LEFT of the white one. 13. Your iPod should now look like the one on the left.
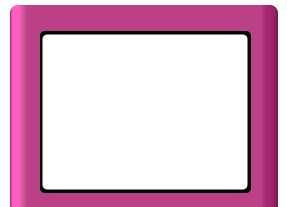
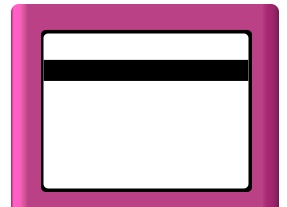
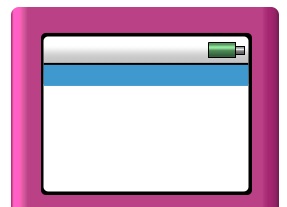
14. Using the Path Drawing Tool, Shape - Rounded Rectangle: Color - Black: Mode - 2D: draw a shape 211 x 161 pixels. 15. In the Tool Settings - Path Panel/Rounded Rectangle make 'Adjust Roundness' = 6. 16. Right Click/Duplcate this object and change the Color to white. 17. Using the Transform Tools/Resize, change the size of the duplicate to 205 x 155 pixels. 18. Put in place as shown.
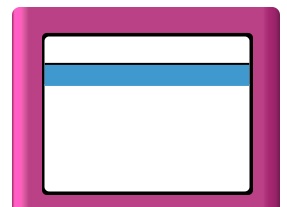
19. Using the Path Drawing Tool, Shape - Rectangle: Color - Black: Mode - 2D: draw a shape 205 x 21 pixels and put in place as shown. 20. Right Click/Duplcate this object and change the Color to blue (Hex#3F99CE). 21. Put this blue rectangle in place just 2 pixels below the black one underneath it (see left).
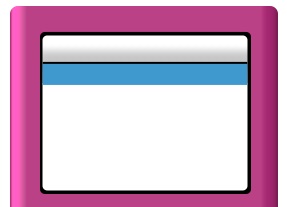
22. Now select the white rectangle and Right Click/Convert Object Type/From Text/Path to Image. 23. Using the Paint Tools/Paintbrush, on the settings shown (Color is grey Hex#B4B4B4) - Paint across the shape to create a grey shading to the top section (as a rough guide, the 'line' that you see as you paint should fall just above the black rectangle).
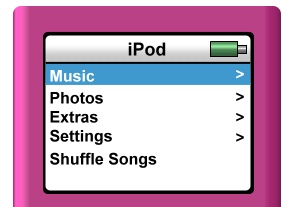
24. Now we have to make the battery indicator - a bit fiddly but apart from that - easy peasy. You need to make 2 little tiny rectangles with the following dimensions and modes:
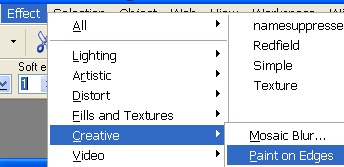
2. A green (Hex#49B654), 3D Trim rectangle, Border - Black Size - 1: 25 x 14 pixels - also Metallic. 25. (Early versions of PI which do not have the facility to add the black Border ONLY) Select the Paintbrush Tool again - this time on the settings shown opposite and then click on the Paint on Edges Effect shown opposite to edge your shapes.
26. Select both pieces and Right Click/Merge As Single Object. Put in place on your iPod as shown. 27. Using the Text Tool on the settings shown - Mode 2D - type the word Music and put in place. 28. Change the Color of the Font to Black & type the rest of the required words. The Shuffle Songs line IS supposed to be slightly lower than the other lines which are evenly spaced. 29. Change the Size of the Font to 18 and type the word iPod and put in place at the top of the player. 30. Type white and black > signs to go on the right-hand side of the player in the correct colours. 31. Put all these objects in place and, for neatness use Right Click/Align/Align Left on the wording and Align Right on the arrows.
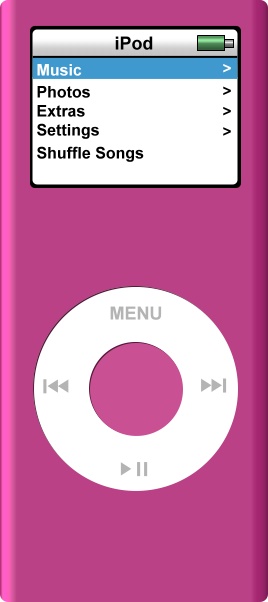
32. Change the Color of the font to grey (Hex#B4B4B4) and type the word MENU in capitals - and put in place on the circular button. 33. Now use the Path Drawing Tool - Rectangle and Equilaterial Triangle shapes (which will have to be turned using the Transform Tools/Rotate & Flip) to make the Rewind/Fast Forward/Play-Pause signs for the iPod. These are all 2D and use the same grey (Hex#B4B4B4). ...There is the iPod section of your picture completed! |
|
|
CREATING THE SPEAKERS & STAND
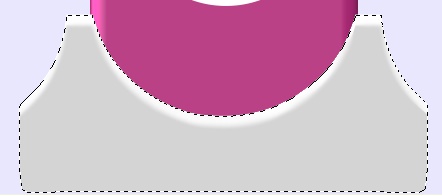
35. Select all your objects and Right Click/Merge As Single Object. If you worked on a smaller canvas before, you will now have to open the one that is 975 x 693 pixels and put your iPod in the centre. 36. Now open another, white canvas, 854 x 336 pixels. NOTE: In the next instruction, DO NOT use the Transform Tools to Resize - if you have to adjust sizing, do it after Instruction 38. 37. On this canvas, using the Path Drawing Tool, Shape - Rounded Rectangle: Color - Black: Mode - 2D: draw a shape 408 x 167 pixels. 38. In the Tool Settings - Path Panel/Rounded Rectangle make 'Adjust Roundness' = 12. 39. Resize now if you need to then put this shape at the bottom of your canvas, right in the center. 40. Now draw a white, 2D Circle, 269 x 269 pixels and put at the very top of your canvas - also in the Centre. 41. Right Click/Duplicate this white circle and put the two copies at each side of the canvas in the positions shown in the illustration left. Be sure to select the two outer circles and Right Click/Align/Align Top to make sure they are evenly placed. 42. Right Click/Merge ALL. 43. Now click on Edit/Trace Edges/Image - accept the defaults and OK. 44. Change the mode to 2D and the Color to white. 45. Right Click/Duplicate the white shape and change the colour to grey (Hex#D4D4D4). 46. Put the two pieces in place as shown on the iPod canvas as shown.
47. Select them both and Right Click/Merge As Single Object. You can now close the black and white canvas without saving it - unless you wish to keep it 'just in case' LOL!
48. Now use the Retouch Tools/Blur to blend the edges where the white and grey shapes meet (see left).
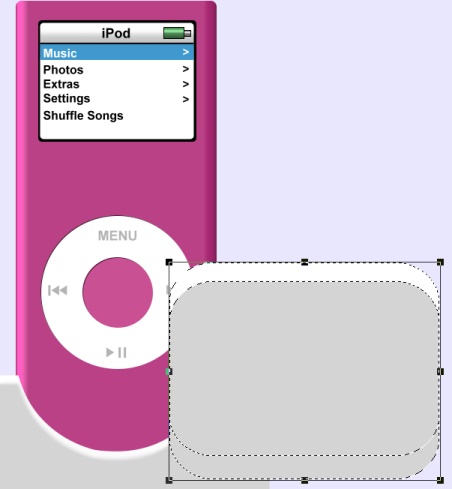
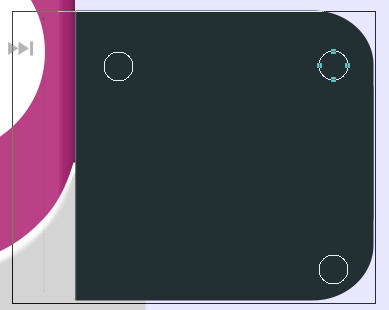
49. Using the Path Drawing Tool, Shape - Rounded Rectangle: Color - White: Mode - 2D: draw a shape 361 x 265 pixels. 50. Right Click/Duplicate the white shape and change the colour to grey (Hex#D4D4D4). 51. Put the two pieces in place as shown on the iPod canvas as shown. 52. Select them both and Right Click/Merge As Single Object.
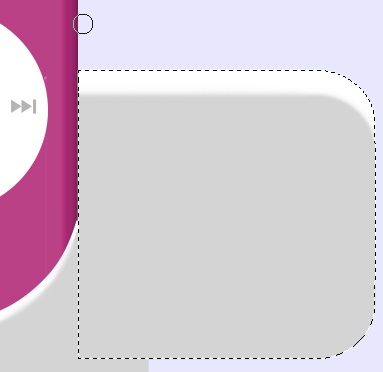
53. Now use the Retouch Tools/Blur to blend the edges where the white and grey shapes meet (see left).
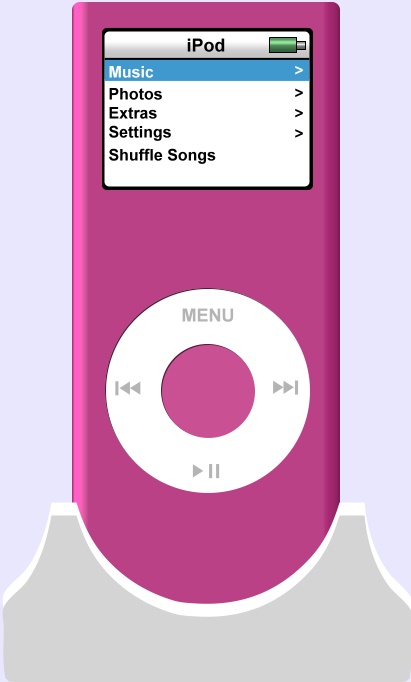
54. Use the Object Paint Eraser to erase all of the object that is in front of the iPod as shown.
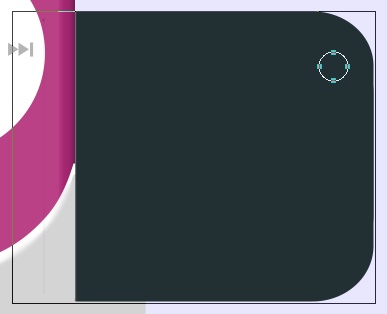
55. Right Click/Duplicate this object and fill the result with a plain dark blue colour - Hex#223033. Right Click/Arrange/Send to Back. 56. Select the front, grey, speaker object again, Right Click/Convert Object Type/From Text/Image to Path. Now change the Mode to Continue Draw. 57. Draw a small circle, 28 x 28 pixels as shown - then change the Mode back to 3D Round. 58. In the Tool Settings - Path panel, change the numbers to Width - 4: Depth - 30.
59. Now go into Path Edit and select the small circle path - and Duplicate it twice. 60. Put the 2 Duplicates in place as shown and then Exit Path Edit.
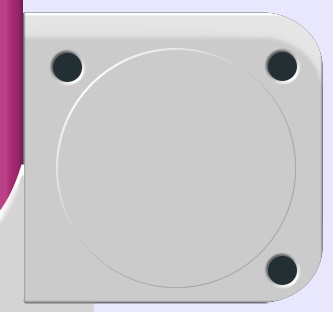
61. Using the Path Drawing Tool, Shape - Circle: Color - grey (Hex#D4D4D4): Mode - 3D Round: draw a shape 239 x 239 pixels. Change the settings to Width - 3: Depth - 30. Put in place on the speaker.
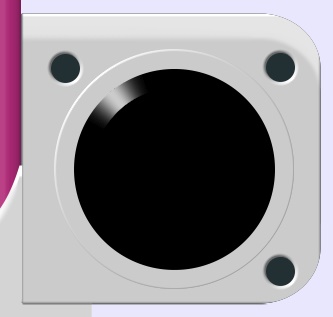
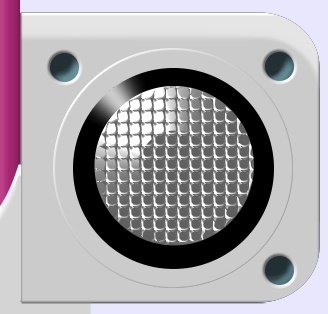
62. Using the Path Drawing Tool, Shape - Circle: Color - Black: Mode - 3D Chisel: draw a shape 200 x 200 pixels. Change the settings to Width - 20: Depth - 30. In the Material box/Shading it should be Phong. Use the Light-bulb feature in the Tool Settings - Path panel to adjust the lighting as shown. Put in place on the speaker.
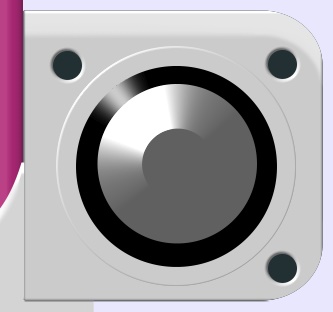
63. Now change the Color to Grey (Hex#B4B4B4) and draw another 3D Chisel shape, 160 x 160 pixels. Change the Width setting to 43 (Depth remains at 30). In the Material box/Shading change it to Metallic this time. Put in place on the speaker.
64. Now Duplicate the silver 3D Chisel circle and change the Mode to 3D Round. 65. Open the EasyPalette/Type/Path Effects/Type/Hole. Select Hole 2 then Right Click/Modify Properties & Apply. 66. Use the settings shown opposite (note Invert has been UNchecked) and OK.
67. Now click on Edit/Trace Edges/Selection Marquee - accept the defaults and OK. 68. Return to 3D Round Mode. 69. Now use the Light-bulb feature in the Tool Settings - Path panel to create the lighting shown.
If you look in the Layer Manager, you will find that the original, 2D shape you created when using the Type Gallery/Hole still exists behind the 3D version - you can delete this 2D shape.
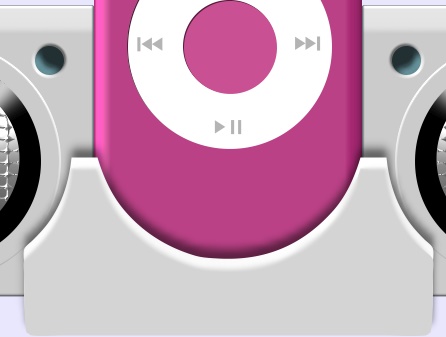
70. Select the very dark shape at the back of the speaker and using the Retouch Tools/Dodge on the Default settings, create a little shading inside the 3 'holes' on the speaker as shown. 71. Now select all parts of the speaker and Right Click/Merge As Single Object. 72. Right Click/Arrange/Send to Back. 73. Right Click/Duplicate the speaker and use the Transform Tools/Rotate and Flip to flip the Duplicate Horizontally. 74. Put in place on the left of the iPod and then Right Click/Arrange/Send to Back.
...there are your speakers completed!
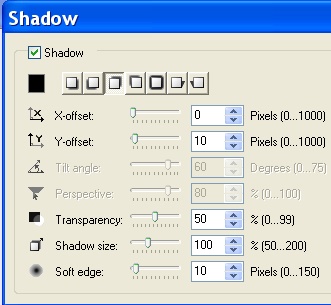
75. All that remains is the addition of some shadows. So first of all select the front support and add a raised shadow with the settings illustrated left.
76. Now select right-hand speaker and, using the Paintbrush Tool on the settings shown opposite (Color = grey - Hex#959595: Straight Lines), paint a shadow down the left-hand side. The side of the speaker should be in central in the ring cursor that appears when you use this tool; that will give you the correct shadow width. TIP! Remember that holding down the Shift key when using the Paintbrush Tool for drawing these lines will constrain the line to a perfectly straight line for you. 77. Do the same on the left-hand speaker.
78. Now select both speakers and the iPod and Merge all 3 pieces. 79. Add the same shadow that you added to the front support in Instruction 75.
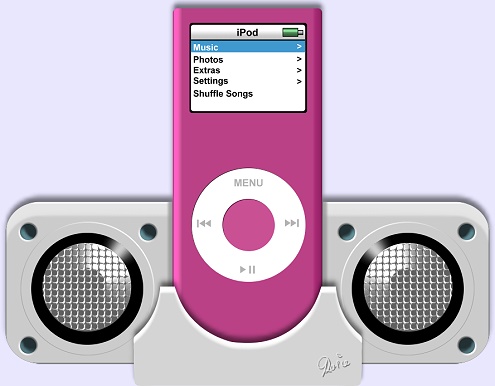
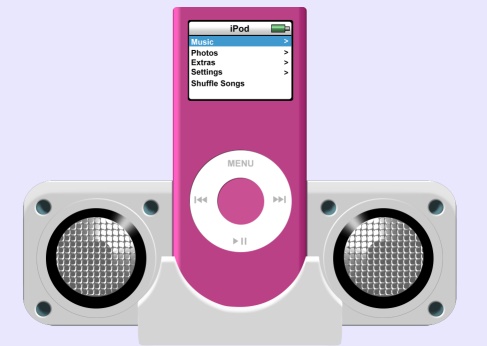
... and your iPod and speakers are finished & ready for some music! |
 |
|
|
Free Spirit Graphics We'd love to have you along! |
|
|
If you need any help - or want to make suggestions to improve this tutorial - or for new ones |
|


This site © Rosie Hardman-Ixer 2001-2007 |