
SUMMER HANGING BASKET PI VERSION: 6. LEVEL: Beginners - Intermediate MAIN TOOLS USED: TERMS OF USE: Please Read - Thank You! |
 |
INSTRUCTIONS |
|
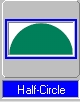 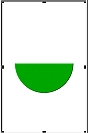 |
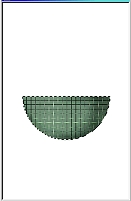
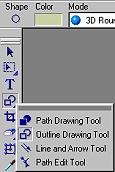
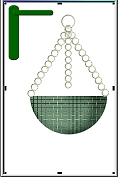
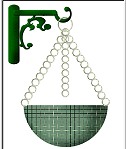
THE BASKET 1. Open a new canvas, 225 x 350 pixels. 2. Using the Path Tool, Custom Shape-Half Circle, Mode 3D, (Colour, Border and Depth do not matter) - draw a shape about halfway up your canvas. 3. Click on the Transform Tool and use Rotate and Flip to flip the shape vertically to produce the shape shown. |
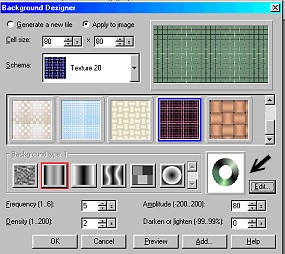 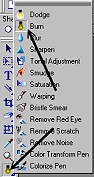  |
COLOURING THE BASKET 4. Keeping the shape selected - on the Menu Bar Click on Web/Background Designer. 5. Click on Texture 20 and select the weave pattern edged in blue shown opposite. 6. Click on Edit next to the Palette Ramp Editor (the little coloured circle - arrowed) and click on Colour 23. Click OK. 7. Alter the settings to those shown: Cell Size 80 x 80 Frequency: 5 Density: 2 Amplitude: 80 Darken/Lighten: 0 Make sure that 'Apply to Image' is checked Click OK. 8.Keeping the main body of the basket selected and using the Burn Tool (shown opposite) on the default settings (Shape 20, Level 100, Soft Edge 50), add shading to the basket. |
|
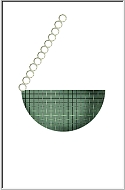
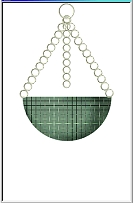
THE HANGING CHAIN 4. Using the Outline Tool, Shape-Circle, Mode 3D, Border 1, Depth 30, in the colour shown left, draw a ring. 5. Copy and paste enough of these to make a hanging chain as shown. 6. Holding down the Ctrl button select all the rings, Right Click and 'Merge as Single Object' (or you can select these in the Layer Manager in the Easy Palette and do the same thing). 7. Copy and Paste the whole chain. Use the Transform Tool/Rotate and Flip to flip the chain horizontally and place on the other side of the basket. 8. Using the same method as above draw a vertical line of rings, slightly smaller size (these do NOT have to reach the basket as they will be partially covered with flowers). Place these in the position shown - then Right Click/Send to the Back. 9. Draw a larger hanging ring at the top. Your basket should now look as shown. (Alteratively - anyone who has done my Suncatcher tutorial could use the chain stamp included to make the chain for the basket, following the instructions on that tutorial!). 10. Select all the pieces of the basket and chains, Right Click and Merge as a Single Object. |
 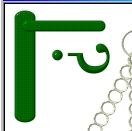 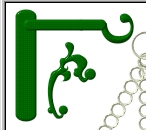 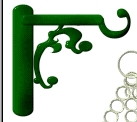 |
THE BRACKET (Optional -depending on the type of graphic you are going to use the basket for). 11. Using the Path Tool/Rounded Rectangle - Mode -3D - draw 2 shapes as shown in a very dark green. 12. To make the 'hook' - use the Text Tool and type a question mark in a suitable font (same colour). I used Georgia. Font Size 80. Mode - 3D. Border 6. Depth 30. 13. Using the Transform tool Rotate this 90 degrees to the right as shown. 14. Place this behind the top bar of the bracket (Right Click/Arrange/ Send to Back). 15. Using the Path Tool/Decoration 6 - Mode 3D - draw the shape shown. 16. Using the Transform Tool/Resize, stretch this (sideways) into the shape shown, Right Click/Arrange//Send to the Back and place in position on the bracket. 17. Select all pieces of the bracket. Right Click/Merge as Single Object. Using the Burn Tool shade the bracket as shown. Your bracket is finished. Now to hang the basket from it! |
|
HANGING THE BASKET 18. Right Click on the basket/Arrange/Bring to Front. 19. Place the ring of the basket over the hook of the bracket (see Close Up). 20. Click on Mask button. Using the Paintbrush Tool - Colour Black, Shape 3 - carefully paint out the right hand part of the ring where it goes behind the hook (it helps to zoom in to 200% here!). 21. Click out of Mask Mode. Your basket is hung from the bracket! |
Many of you will have collections of plants and leaves with which to fill your basket but, as I am trying to keep this tutorial to those items available in PhotoImpact 6, I am going to use the Path Tool and one of the stamps to complete the picture.
 
 |
PLANTING THE BASKET 22. Using the Path Tool - Custom Shape Plant1 - 3D - draw the leaves. 23. Use the Transform Tool/Rotate & Flip to flip the leaves vertically. 24. Copy and paste the leaves. Join the two sets of leaves together to make the trailing leaves shown. 25. Make several sets of trailing leaves - of different lengths using this method. 26. Put in position around the basket. (Put some of the trailing leaves behind the basket by using Right Click/Arrange/Send to back). Your basket should now look like the illustration on the left. 27. Using the Stamp Tool - select flower1.ufo. - on the settings shown left (Scale 40) and fill your basket with flowers. (Try to Right Click/Arrange/Send to back some of the flowers behind the chains and leave a little of the chain showing in front but be sure to cover the end of the central chain). 28. Add one or two smaller flowers (Scale 20) for contrast (see finished illustration). 29. Right Click/Select All Objects/Merge as Single Object. |
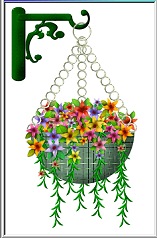 |
Your basket is done! |
 |
|
|
Free Spirit Graphics If you would then like an invitation to join, please Email Me. We'd love to have you along! |
|
|
If you need any help - or want to make suggestions to improve this tutorial - or for new ones |
|
This site © Rosie Hardman-Ixer 2001/2/3 |