
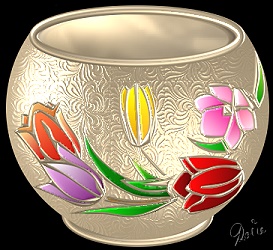
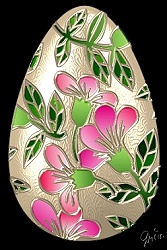
GOLD & ENAMEL DECORATED BOWL PI VERSION: 8. LEVEL: Intermediate (some knowledge of the tools used is assumed). MAIN TOOLS USED: Path Drawing Tool, Path Edit Tool, Outline Drawing Tool, Web Button Designer, Trace, Object Paint Eraser, EasyPalette, Retouch Tools/Blur (Optional). If you make your own patterns you may also need to use the Text Tool and the Line & Arrow Tool (or the Paint Tools/Paintbrush). NECESSARY DOWNLOADS: If you wish to use the same gold presets I use in the tutorial you will need to download them Here. If you wish to use the same floral decoration click here for the pattern (use Right Click/Save Picture As to save to your hard drive). TERMS OF USE: Please Read - Thank You! |
|
INSTRUCTIONS |
|
|
|
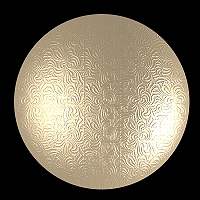
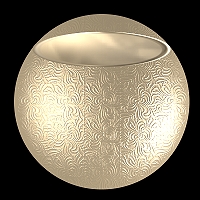
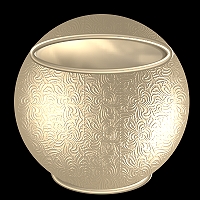
1. THE GOLD BOWL PIECES If you are going to use the same presets that I have used for the tutorial, please download these from the link above and install them in your EasyPalette before continuing. Please note that if you are using these presets they will automatically set the Border, Depth and initial light settings for you. 1. Open a new canvas, 400W x 400H pixels (I am using a black background but this is optional). 2. Using the Path Drawing Tool, Shape - Circle: Mode - 3D Round: draw a shape 350W x 350H pixels. 3. Open the EasyPalette and apply the 'mainbowl' preset from the set supplied or one of your own presets - a simple metallic preset with a clear patterned bump is best for this tutorial (once you have applied the preset you should find that the settings will be Border - 175: Depth - 30). 4. Now using the Path Drawing Tools again, Shape - Ellipse: Mode - 3D Round: Border - 5: Depth - 30: draw a shape 275W x 70H pixels. 5. From the EasyPalette, fill this with 'bowlpreset2' from those supplied or a preset of your choice. 6. Using the Outline Drawing Tool, Shape - Ellipse: Mode - 3D Round: Border - 6 (change this under the Outline tab if necessary): Depth - 30: draw a shape 275W x 70H pixels. 7. Fill this with 'bowlpreset3' preset from those supplied. 8. Using the same tool and shape, draw another ellipse 190W x 70H pixels and put in place at the bottom of the bowl - then Right Click/Arrange/Send to Back. These are the only basic pieces needed for our bowl. We aren't going to erase the excess from the top of the circle yet because to do so we'd have to convert to an image - and I want to leave this piece as a Path Shape so I can adjust the lighting on it again later if necessary. |
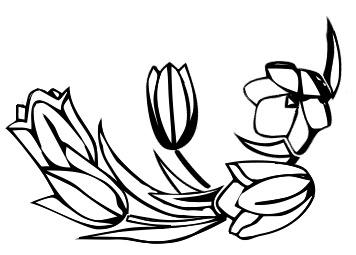
2. THE FLOWER DECORATION NOTE: At this point you will need to decide to use the pattern supplied in the download at the top of the tutorial (in which case go straight to Instruction 10 now) or to make & use your own pattern. 9. MAKING YOUR OWN PATTERN What you will need for this is a black & white line drawing without too many small shapes.
The lines should be well drawn and without any gaps. Solid blocks of black are not suitable. Fonts are a good source of line drawings but you will need to use these on a large size (up to 350 point depending on the font). Always use 2D & black for the font whilst you are trying the various designs out on top of the bowl shape. Sometimes you will need to rotate the font to get a pattern that fits well on your bowl. You may also have to convert the final shape to an Image and erase parts of it. You can also manipulate a pattern by making several copies, erasing various parts of the copies and fitting them together on the bowl. The pattern I have made for the bowl was made from a font, cut into three pieces and reassembled into a different design. Once you have a pattern that fits well you need to drag the black pattern to a new, white canvas and Right Click/Merge. Then click on Edit/Trace, accept the defaults & OK. Change the Mode to 3D Round and see if you have a good outline. If you have any parts of the pattern missing you will have to go back to the black and white drawing and use the Line & Arrow Tool/Spline or the Paint Tools/Paintbrush to overdraw any of the weak lines. You also need to use the Selection Tools/Magic Wand to check for any areas of your pattern that can't be selected on their own because of gaps in the lines. Once again, use the Line & Arrow Tools or the Paintbrush to seal these gaps. Once you can get a good Trace from your pattern you are ready to proceed with the rest of the tutorial. It is worth taking your time about this part of the bowl - it took me over 2 hours to find the basic design and turn it into a working pattern for this tutorial but the result is well worth it. |
|
|
|
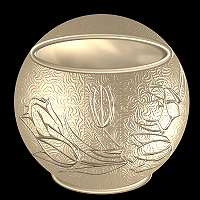
THE FLOWER DECORATION continued 10. Using either the pattern supplied or your own, Click on Edit/Trace and OK. 11. Change the mode to 3D Round and fill the result with the 'outlinepreset4' preset supplied. 12. Drag this to your bowl canvas and put in place on the bowl. You may need to use the Light Bulb under Lighting in the Path Panel at this point - to change the lighting on your outline so that it shows up strongly against the gold of the bowl. |
|
|
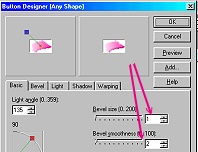
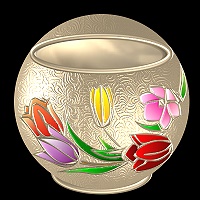
3. 'ENAMELLING' THE FLORAL DECORATION 13. Now, using your black and white pattern, select an area to colour using the Selection Tools/Magic Wand. 14. Right Click/Expand/Shrink - and Expand by 1 pixel & OK. 15. Click on Edit/Fill and fill this with a Two Color Gradient (I am using Hex #FFE7E6 and Hex #E90080 on this occasion for a petal on one of the flowers with a side to side fill). NOTE: Do watch which fills you use to shade the various parts of your design. Think about the shading on petals, making them darker towards the base.... Make your mind up which side you are imagining the light coming from and shade your petals accordingly. DON'T be tempted to select multiple areas and fill them all at once... yes, it's quicker... but if you cut corners it will usually SHOW ;-) 16. Right Click/Convert to Object. 17. Click on Web/Button Designer/Any Shape, change the Bevel Size to 1 and Bevel Smoothness to 2 and OK. 18. Drag this piece to your bowl and put in place. Use Right Click/Arrange/Send Backward to put behind the gold outline ( or do what I tend to do - put a number of pieces in place then click on the outline itself and Right Click/Arrange/Bring to Front!). Adjust the enamel piece(s) show that no rough edges show. TIP! Sometimes these buttonised pieces can have an edge which is a little too rough - even when they are behind the outline - if this is the case just use the Retouch Tools/Blur to soften the edge a little - but don't go overboard or you will lose the bevel effect altogether! 19. Repeat Instructions 13 to 18 filling all sections of your design. 20. Once you have all the pieces in place, make the final adjustments to the lighting (using the Lighting/Light Bulb feature in the Path Panel), both on the gold outline for your design and on the main part of the bowl itself until the lighting is the way you want it. 21. Having got the lighting correct, select the main circular part of the bowl and Right Click/Convert Object Type/From Text/Path to image. 22. Now use the Object Paint Eraser to remove the excess part of the bowl at the top. 23. Right Click/Select All Objects - then Right Click/Merge As Single Object. There's your beautiful bowl! |
|
| |
 |
|
|
Free Spirit Graphics If you would then like an invitation to join, please Email Me. We'd love to have you along! |
|
|
If you need any help - or want to make suggestions to improve this tutorial - or for new ones |
|


This site © Rosie Hardman-Ixer 2001/2/3 |